Datasette


![]()
An open source multi-tool for exploring and publishing data
Datasette is a tool for exploring and publishing data. It helps people take data of any shape or size and publish that as an interactive, explorable website and accompanying API.
Datasette is aimed at data journalists, museum curators, archivists, local governments and anyone else who has data that they wish to share with the world. It is part of a wider ecosystem of tools and plugins dedicated to making working with structured data as productive as possible.
Explore a demo, watch a presentation about the project or Try Datasette without installing anything using Glitch.
More examples: https://github.com/simonw/datasette/wiki/Datasettes
Support questions, feedback? Join our GitHub Discussions forum.
Contents
Getting started
Play with a live demo
The best way to experience Datasette for the first time is with a demo:
- fivethirtyeight.datasettes.com shows Datasette running against over 400 datasets imported from the FiveThirtyEight GitHub repository.
- sf-trees.datasettes.com demonstrates the datasette-cluster-map plugin running against 190,000 trees imported from data.sfgov.org.
Try Datasette without installing anything using Glitch
Glitch is a free online tool for building web apps directly from your web browser. You can use Glitch to try out Datasette without needing to install any software on your own computer.
Here's a demo project on Glitch which you can use as the basis for your own experiments:
Glitch allows you to "remix" any project to create your own copy and start editing it in your browser. You can remix the datasette-csvs project by clicking this button:

Find a CSV file and drag it onto the Glitch file explorer panel - datasette-csvs will automatically convert it to a SQLite database (using sqlite-utils) and allow you to start exploring it using Datasette.
If your CSV file has a latitude and longitude column you can visualize it on a map by uncommenting the datasette-cluster-map line in the requirements.txt file using the Glitch file editor.
Need some data? Try this Public Art Data for the city of Seattle - hit "Export" and select "CSV" to download it as a CSV file.
For more on how this works, see Running Datasette on Glitch.
Using Datasette on your own computer
First, follow the Installation instructions. Now you can run Datasette against a SQLite file on your computer using the following command:
datasette path/to/database.db
This will start a web server on port 8001 - visit http://localhost:8001/ to access the web interface.
Use Chrome on OS X? You can run datasette against your browser history like so:
datasette ~/Library/Application\ Support/Google/Chrome/Default/History
Now visiting http://localhost:8001/History/downloads will show you a web interface to browse your downloads data:
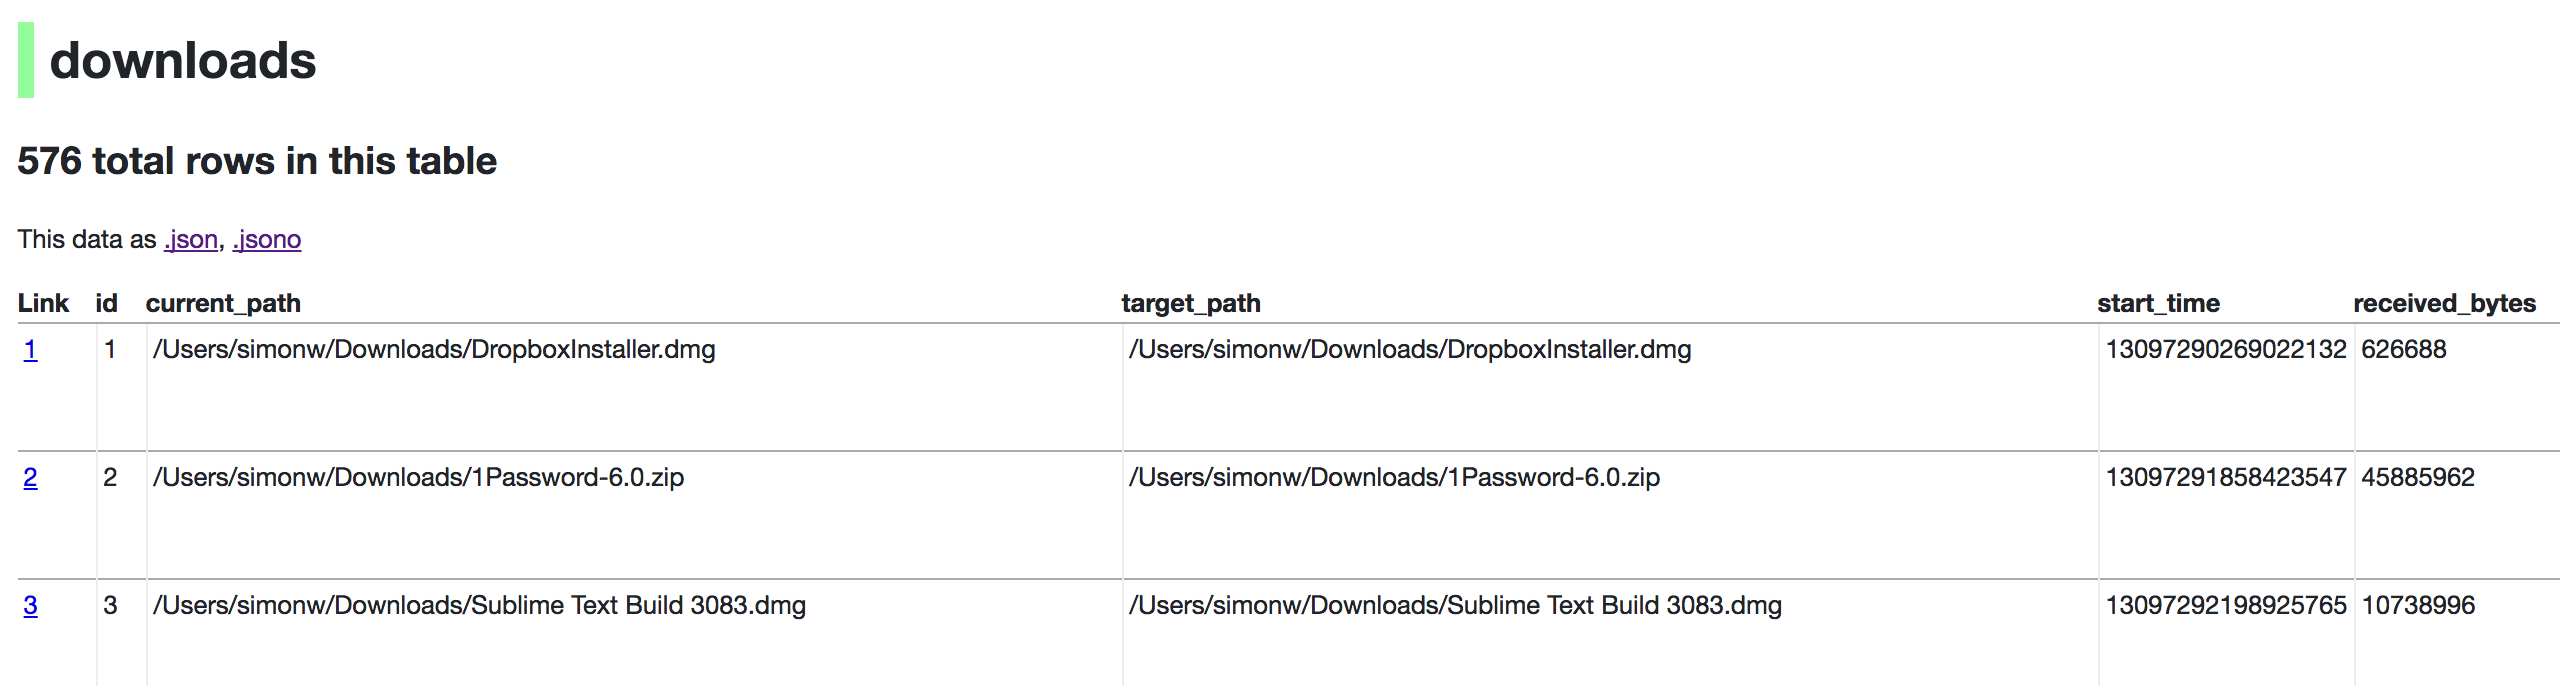
http://localhost:8001/History/downloads.json will return that data as JSON:
{
"database": "History",
"columns": [
"id",
"current_path",
"target_path",
"start_time",
"received_bytes",
"total_bytes",
...
],
"rows": [
[
1,
"/Users/simonw/Downloads/DropboxInstaller.dmg",
"/Users/simonw/Downloads/DropboxInstaller.dmg",
13097290269022132,
626688,
0,
...
]
]
}
http://localhost:8001/History/downloads.json?_shape=objects will return that data as JSON in a more convenient format:
{
...
"rows": [
{
"start_time": 13097290269022132,
"interrupt_reason": 0,
"hash": "",
"id": 1,
"site_url": "",
"referrer": "https://www.dropbox.com/downloading?src=index",
...
}
]
}
datasette --get
The --get option can specify the path to a page within Datasette and cause Datasette to output the content from that path without starting the web server. This means that all of Datasette's functionality can be accessed directly from the command-line. For example:
$ datasette --get '/-/versions.json' | jq .
{
"python": {
"version": "3.8.5",
"full": "3.8.5 (default, Jul 21 2020, 10:48:26) \n[Clang 11.0.3 (clang-1103.0.32.62)]"
},
"datasette": {
"version": "0.46+15.g222a84a.dirty"
},
"asgi": "3.0",
"uvicorn": "0.11.8",
"sqlite": {
"version": "3.32.3",
"fts_versions": [
"FTS5",
"FTS4",
"FTS3"
],
"extensions": {
"json1": null
},
"compile_options": [
"COMPILER=clang-11.0.3",
"ENABLE_COLUMN_METADATA",
"ENABLE_FTS3",
"ENABLE_FTS3_PARENTHESIS",
"ENABLE_FTS4",
"ENABLE_FTS5",
"ENABLE_GEOPOLY",
"ENABLE_JSON1",
"ENABLE_PREUPDATE_HOOK",
"ENABLE_RTREE",
"ENABLE_SESSION",
"MAX_VARIABLE_NUMBER=250000",
"THREADSAFE=1"
]
}
}
datasette serve --help
Running datasette downloads.db executes the default serve sub-command, and is equivalent to running datasette serve downloads.db. The full list of options to that command is shown below.
$ datasette serve --help
Usage: datasette serve [OPTIONS] [FILES]...
Serve up specified SQLite database files with a web UI
Options:
-i, --immutable PATH Database files to open in immutable mode
-h, --host TEXT Host for server. Defaults to 127.0.0.1 which means only
connections from the local machine will be allowed. Use
0.0.0.0 to listen to all IPs and allow access from other
machines.
-p, --port INTEGER Port for server, defaults to 8001. Use -p 0 to automatically
assign an available port.
--debug Enable debug mode - useful for development
--reload Automatically reload if database or code change detected -
useful for development
--cors Enable CORS by serving Access-Control-Allow-Origin: *
--load-extension PATH Path to a SQLite extension to load
--inspect-file TEXT Path to JSON file created using "datasette inspect"
-m, --metadata FILENAME Path to JSON/YAML file containing license/source metadata
--template-dir DIRECTORY Path to directory containing custom templates
--plugins-dir DIRECTORY Path to directory containing custom plugins
--static MOUNT:DIRECTORY Serve static files from this directory at /MOUNT/...
--memory Make :memory: database available
--config CONFIG Set config option using configname:value
docs.datasette.io/en/stable/config.html
--secret TEXT Secret used for signing secure values, such as signed
cookies
--root Output URL that sets a cookie authenticating the root user
--get TEXT Run an HTTP GET request against this path, print results and
exit
--version-note TEXT Additional note to show on /-/versions
--help-config Show available config options
--help Show this message and exit.
Installation
Note
If you just want to try Datasette out you don't need to install anything: see Try Datasette without installing anything using Glitch
There are two main options for installing Datasette. You can install it directly on to your machine, or you can install it using Docker.
If you want to start making contributions to the Datasette project by installing a copy that lets you directly modify the code, take a look at our guide to Setting up a development environment.
Basic installation
Using Homebrew
If you have a Mac and use Homebrew, you can install Datasette by running this command in your terminal:
brew install simonw/datasette/datasette
Once you have installed Datasette you can install plugins using the following:
datasette install datasette-vega
Using pip
Datasette requires Python 3.6 or higher. Visit InstallPython3.com for step-by-step installation guides for your operating system.
You can install Datasette and its dependencies using pip:
pip install datasette
You can now run Datasette like so:
datasette
Advanced installation options
Using pipx
pipx is a tool for installing Python software with all of its dependencies in an isolated environment, to ensure that they will not conflict with any other installed Python software.
If you use Homebrew on macOS you can install pipx like this:
brew install pipx
pipx ensurepath
Without Homebrew you can install it like so:
python3 -m pip install --user pipx
python3 -m pipx ensurepath
The pipx ensurepath command configures your shell to ensure it can find commands that have been installed by pipx - generally by making sure ~/.local/bin has been added to your PATH.
Once pipx is installed you can use it to install Datasette like this:
pipx install datasette
Then run datasette --version to confirm that it has been successfully installed.
Upgrading packages using pipx
You can upgrade your pipx installation to the latest release of Datasette using pipx upgrade datasette:
$ pipx upgrade datasette
upgraded package datasette from 0.39 to 0.40 (location: /Users/simon/.local/pipx/venvs/datasette)
To upgrade a plugin within the pipx environment use pipx runpip datasette install -U name-of-plugin - like this:
% datasette plugins
[
{
"name": "datasette-vega",
"static": true,
"templates": false,
"version": "0.6"
}
]
$ pipx runpip datasette install -U datasette-vega
Collecting datasette-vega
Downloading datasette_vega-0.6.2-py3-none-any.whl (1.8 MB)
|████████████████████████████████| 1.8 MB 2.0 MB/s
...
Installing collected packages: datasette-vega
Attempting uninstall: datasette-vega
Found existing installation: datasette-vega 0.6
Uninstalling datasette-vega-0.6:
Successfully uninstalled datasette-vega-0.6
Successfully installed datasette-vega-0.6.2
$ datasette plugins
[
{
"name": "datasette-vega",
"static": true,
"templates": false,
"version": "0.6.2"
}
]
Using Docker
A Docker image containing the latest release of Datasette is published to Docker Hub here: https://hub.docker.com/r/datasetteproject/datasette/
If you have Docker installed (for example with Docker for Mac on OS X) you can download and run this image like so:
docker run -p 8001:8001 -v `pwd`:/mnt \
datasetteproject/datasette \
datasette -p 8001 -h 0.0.0.0 /mnt/fixtures.db
This will start an instance of Datasette running on your machine's port 8001,
serving the fixtures.db file in your current directory.
Now visit http://127.0.0.1:8001/ to access Datasette.
(You can download a copy of fixtures.db from
https://latest.datasette.io/fixtures.db )
To upgrade to the most recent release of Datasette, run the following:
docker pull datasetteproject/datasette
Loading SpatiaLite
The datasetteproject/datasette image includes a recent version of the
SpatiaLite extension for SQLite. To load and enable that
module, use the following command:
docker run -p 8001:8001 -v `pwd`:/mnt \
datasetteproject/datasette \
datasette -p 8001 -h 0.0.0.0 /mnt/fixtures.db \
--load-extension=/usr/local/lib/mod_spatialite.so
You can confirm that SpatiaLite is successfully loaded by visiting http://127.0.0.1:8001/-/versions
Installing plugins
If you want to install plugins into your local Datasette Docker image you can do
so using the following recipe. This will install the plugins and then save a
brand new local image called datasette-with-plugins:
docker run datasetteproject/datasette \
pip install datasette-vega
docker commit $(docker ps -lq) datasette-with-plugins
You can now run the new custom image like so:
docker run -p 8001:8001 -v `pwd`:/mnt \
datasette-with-plugins \
datasette -p 8001 -h 0.0.0.0 /mnt/fixtures.db
You can confirm that the plugins are installed by visiting http://127.0.0.1:8001/-/plugins
The Datasette Ecosystem
Datasette sits at the center of a growing ecosystem of open source tools aimed at making it as easy as possible to gather, analyze and publish interesting data.
These tools are divided into two main groups: tools for building SQLite databases (for use with Datasette) and plugins that extend Datasette's functionality.
Tools for creating SQLite databases
csvs-to-sqlite
csvs-to-sqlite lets you take one or more CSV files and load them into a SQLite database. It can also extract repeated columns out into a separate table and configure SQLite full-text search against the contents of specific columns.
sqlite-utils
sqlite-utils is a Python library and CLI tool that provides shortcuts for loading data into SQLite. It can be used programmatically (e.g. in a Jupyter notebook) to load data, and will automatically create SQLite tables with the necessary schema.
The CLI tool can consume JSON streams directly and use them to create tables. It can also be used to query SQLite databases and output the results as CSV or JSON.
See sqlite-utils: a Python library and CLI tool for building SQLite databases for more.
db-to-sqlite
db-to-sqlite is a CLI tool that builds on top of SQLAlchemy and allows you to connect to any database supported by that library (including MySQL, oracle and PostgreSQL), run a SQL query and save the results to a new table in a SQLite database.
You can mirror an entire database (including copying foreign key relationships) with the --all option:
$ db-to-sqlite --all "postgresql://simonw@localhost/myblog" blog.db
dbf-to-sqlite
dbf-to-sqlite works with dBase files such as those produced by Visual FoxPro. It is a command-line tool that can convert one or more .dbf file to tables in a SQLite database.
markdown-to-sqlite
markdown-to-sqlite reads Markdown files with embedded YAML metadata (e.g. for Jekyll Front Matter) and creates a SQLite table with a schema matching the metadata. This is useful if you want to keep structured data in text form in a GitHub repository and use that to build a SQLite database.
geojson-to-sqlite
geojson-to-sqlite converts GeoJSON files to SQLite, optionally using SpatiaLite to create geospatial indexes for fast geometric queries.
shapefile-to-sqlite
shapefile-to-sqlite converts ESRI shapefiles to SQLite, optionally using SpatiaLite .
socrata2sql
socrata2sql is a tool by Andrew Chavez at the Dallas Morning News. It works with Socrata, a widely used platform for local and national government open data portals. It uses the Socrata API to pull down government datasets and store them in a local SQLite database (it can also export data to PostgreSQL, MySQL and other SQLAlchemy-supported databases).
For example, to create a SQLite database of the City of Dallas Payment Register you would run the following command:
$ socrata2sql insert www.dallasopendata.com 64pp-jeba
Datasette Plugins
Datasette's plugin system makes it easy to enhance Datasette with additional functionality.
datasette-graphql
datasette-graphql provides a GraphQL interface for querying the data contained in your Datasette instance.
datasette-cluster-map
datasette-cluster-map is the original Datasette plugin, described in Datasette plugins, and building a clustered map visualization.
The plugin works against any table with latitude and longitude columns. It can load over 100,000 points onto a map to visualize the geographical distribution of the underlying data.
datasette-vega
datasette-vega exposes the powerful Vega charting library, allowing you to construct line, bar and scatter charts against your data and share links to your visualizations.
datasette-auth-github
datasette-auth-github adds an authentication layer to Datasette. Users will have to sign in using their GitHub account before they can view data or interact with Datasette. You can also use it to restrict access to specific GitHub users, or to members of specified GitHub organizations or teams.
datasette-auth-tokens
datasette-auth-tokens provides a mechanism for creating secret API tokens that can then be used with Datasette's Authentication and permissions system. These tokens can be hard-coded into the plugin configuration or the plugin can be configured to access tokens stored in a SQLite database table.
datasette-permissions-sql
datasette-permissions-sql lets you configure Datasette permissions checks to use custom SQL queries, which means you can make permisison decisions based on data contained within your databases.
datasette-upload-csvs
datasette-upload-csvs allows users to upload CSV files directly into a Datasette instance through their web browser.
datasette-json-html
datasette-json-html renders HTML in Datasette's table view driven by JSON returned from your SQL queries. This provides a way to embed images, links and lists of links directly in Datasette's main interface, defined using custom SQL statements.
datasette-init
datasette-init allows you to define tables and views in your metadata file that should be created on startup if they do not already exist.
datasette-write
datasette-write provides an interface at /-/write allowing users to execute SQL write queries against a selected database.
datasette-media
datasette-media adds the ability to serve media files such as images directly, configured through a SQL query that maps a URL parameter to a path to a file on disk. It can also serve resized image thumbnails.
datasette-jellyfish
datasette-jellyfish exposes custom SQL functions for a range of common fuzzy string matching functions, including soundex, porter stemming and levenshtein distance. It builds on top of the Jellyfish Python library.
datasette-doublemetaphone
datasette-doublemetaphone by Matthew Somerville adds custom SQL functions for applying the Double Metaphone fuzzy "sounds like" algorithm.
datasette-jq
datasette-jq adds a custom SQL function for filtering and transforming values from JSON columns using the jq expression language.
datasette-rure
datasette-rure adds SQL support for matching values against regular expressions, built on top of a Python binding for the safe Rust regular expression library.
datasette-render-images
datasette-render-images works with SQLite tables that contain binary image data in BLOB columns. It converts any images it finds into data-uri image elements, allowing you to view them directly in the Datasette interface.
datasette-render-binary
datasette-render-binary renders binary data in a slightly more readable fashion: it shows ASCII characters as they are, and shows all other data as monospace octets. Useful as a tool for exploring new unfamiliar databases as it makes it easier to spot if a binary column may contain a decipherable binary format.
datasette-render-markdown
datasette-render-markdown adds tools for rendering Datasette rows that are formatted using Markdown.
datasette-render-html
datasette-render-html lets you configure columns that contain HTML from trusted sources such that the HTML is rendered correctly within the Datasette interface.
datasette-leaflet-geojson
datasette-leaflet-geojson looks out for columns containing GeoJSON formatted geographical information and displays them on a Leaflet-powered map.
datasette-pretty-json
datasette-pretty-json seeks out JSON values in Datasette's table browsing interface and pretty-prints them, making them easier to read.
datasette-saved-queries
datasette-saved-queries lets users interactively save queries to a saved_queries table. They are then made available as additional canned queries.
datasette-haversine
datasette-haversine provides a SQL haversine() function which can calculate the haversine distance between two geographical points. You can then sort by this distance to find records closest to a specified location.
select haversine(lat1, lon1, lat2, lon2, 'mi');
datasette-sqlite-fts4
datasette-sqlite-fts4 provides search relevance ranking algorithms that can be used with SQLite's FTS4 search module. You can read more about it in Exploring search relevance algorithms with SQLite.
datasette-bplist
datasette-bplist provides tools for working with Apple's binary plist format embedded in SQLite database tables. If you use OS X you already have dozens of SQLite databases hidden away in your ~/Library folder that include data in this format - this plugin allows you to view the decoded data and run SQL queries against embedded values using a bplist_to_json(value) custom SQL function.
datasette-cors
datasette-cors allows you to configure CORS headers for your Datasette instance. You can use this to enable JavaScript running on a whitelisted set of domains to make fetch() calls to the JSON API provided by your Datasette instance.
datasette-template-sql
datasette-template-sql adds a custom template function that can be used to execute and loop through the results of SQL queries in your templates. See this blog post for background on the plugin.
datasette-mask-columns
datasette-mask-columns allows you to use metadata.json to configure specific table columns that should be masked - that should return null no matter what value is contained within the column. This is useful for things like hiding password columns from public display.
datasette-auth-existing-cookies
datasette-auth-existing-cookies allows you to configure Datasette to authenticate users based on existing cookies they may have for the current domain - useful for running Datasette on a subdomain of your main site, for example. See this blog post for background on the plugin.
datasette-sentry
datasette-sentry lets you configure Datasette to send any error reports to Sentry.
datasette-publish-fly
datasette-publish-fly lets you publish Datasette instances using the Fly hosting platform. See also Publishing to Fly.
Pages and API endpoints
The Datasette web application offers a number of different pages that can be accessed to explore the data in question, each of which is accompanied by an equivalent JSON API.
Top-level index
The root page of any Datasette installation is an index page that lists all of the currently attached databases. Some examples:
- fivethirtyeight.datasettes.com
- global-power-plants.datasettes.com
- register-of-members-interests.datasettes.com
Add /.json to the end of the URL for the JSON version of the underlying data:
Database
Each database has a page listing the tables, views and canned queries available for that database. If the execute-sql permission is enabled (it's on by default) there will also be an interface for executing arbitrary SQL select queries against the data.
Examples:
- fivethirtyeight.datasettes.com/fivethirtyeight
- global-power-plants.datasettes.com/global-power-plants
The JSON version of this page provides programmatic access to the underlying data:
Table
The table page is the heart of Datasette: it allows users to interactively explore the contents of a database table, including sorting, filtering, Full-text search and applying Facets.
The HTML interface is worth spending some time exploring. As with other pages, you can return the JSON data by appending .json to the URL path, before any ? querystring arguments.
The querystring arguments are described in more detail here: Table arguments
You can also use the table page to interactively construct a SQL query - by applying different filters and a sort order for example - and then click the "View and edit SQL" link to see the SQL query that was used for the page and edit and re-submit it.
Some examples:
- ../items lists all of the line-items registered by UK MPs as potential conflicts of interest. It demonstrates Datasette's support for Full-text search.
- ../antiquities-act%2Factions_under_antiquities_act is an interface for exploring the "actions under the antiquities act" data table published by FiveThirtyEight.
- ../global-power-plants?country_long=United+Kingdom&primary_fuel=Gas is a filtered table page showing every Gas power plant in the United Kingdom. It includes some default facets (configured using its metadata.json) and uses the datasette-cluster-map plugin to show a map of the results.
Row
Every row in every Datasette table has its own URL. This means individual records can be linked to directly.
Table cells with extremely long text contents are truncated on the table view according to the truncate_cells_html setting. If a cell has been truncated the full length version of that cell will be available on the row page.
Rows which are the targets of foreign key references from other tables will show a link to a filtered search for all records that reference that row. Here's an example from the Registers of Members Interests database:
../people/uk.org.publicwhip%2Fperson%2F10001
Note that this URL includes the encoded primary key of the record.
Here's that same page as JSON:
Publishing data
Datasette includes tools for publishing and deploying your data to the internet. The datasette publish command will deploy a new Datasette instance containing your databases directly to a Heroku or Google Cloud hosting account. You can also use datasette package to create a Docker image that bundles your databases together with the datasette application that is used to serve them.
datasette publish
Once you have created a SQLite database (e.g. using csvs-to-sqlite) you can deploy it to a hosting account using a single command.
You will need a hosting account with Heroku or Google Cloud. Once you have created your account you will need to install and configure the heroku or gcloud command-line tools.
Publishing to Google Cloud Run
Google Cloud Run launched as a GA in in November 2019. It allows you to publish data in a scale-to-zero environment, so your application will start running when the first request is received and will shut down again when traffic ceases. This means you only pay for time spent serving traffic.
You will first need to install and configure the Google Cloud CLI tools by following these instructions.
You can then publish a database to Google Cloud Run using the following command:
datasette publish cloudrun mydatabase.db --service=my-database
A Cloud Run service is a single hosted application. The service name you specify will be used as part of the Cloud Run URL. If you deploy to a service name that you have used in the past your new deployment will replace the previous one.
If you omit the --service option you will be asked to pick a service name interactively during the deploy.
You may need to interact with prompts from the tool. Once it has finished it will output a URL like this one:
Service [my-service] revision [my-service-00001] has been deployed
and is serving traffic at https://my-service-j7hipcg4aq-uc.a.run.app
Cloud Run provides a URL on the .run.app domain, but you can also point your own domain or subdomain at your Cloud Run service - see mapping custom domains in the Cloud Run documentation for details.
$ datasette publish cloudrun --help
Usage: datasette publish cloudrun [OPTIONS] [FILES]...
Options:
-m, --metadata FILENAME Path to JSON/YAML file containing metadata to publish
--extra-options TEXT Extra options to pass to datasette serve
--branch TEXT Install datasette from a GitHub branch e.g. master
--template-dir DIRECTORY Path to directory containing custom templates
--plugins-dir DIRECTORY Path to directory containing custom plugins
--static MOUNT:DIRECTORY Serve static files from this directory at /MOUNT/...
--install TEXT Additional packages (e.g. plugins) to install
--plugin-secret <TEXT TEXT TEXT>...
Secrets to pass to plugins, e.g. --plugin-secret
datasette-auth-github client_id xxx
--version-note TEXT Additional note to show on /-/versions
--secret TEXT Secret used for signing secure values, such as signed
cookies
--title TEXT Title for metadata
--license TEXT License label for metadata
--license_url TEXT License URL for metadata
--source TEXT Source label for metadata
--source_url TEXT Source URL for metadata
--about TEXT About label for metadata
--about_url TEXT About URL for metadata
-n, --name TEXT Application name to use when building
--service TEXT Cloud Run service to deploy (or over-write)
--spatialite Enable SpatialLite extension
--show-files Output the generated Dockerfile and metadata.json
--memory TEXT Memory to allocate in Cloud Run, e.g. 1Gi
--help Show this message and exit.
Publishing to Heroku
To publish your data using [Heroku](https://heroku.com/), first create an account there and install and configure the Heroku CLI tool.
You can publish a database to Heroku using the following command:
datasette publish heroku mydatabase.db
This will output some details about the new deployment, including a URL like this one:
https://limitless-reef-88278.herokuapp.com/ deployed to Heroku
You can specify a custom app name by passing -n my-app-name to the publish command. This will also allow you to overwrite an existing app.
$ datasette publish heroku --help
Usage: datasette publish heroku [OPTIONS] [FILES]...
Options:
-m, --metadata FILENAME Path to JSON/YAML file containing metadata to publish
--extra-options TEXT Extra options to pass to datasette serve
--branch TEXT Install datasette from a GitHub branch e.g. master
--template-dir DIRECTORY Path to directory containing custom templates
--plugins-dir DIRECTORY Path to directory containing custom plugins
--static MOUNT:DIRECTORY Serve static files from this directory at /MOUNT/...
--install TEXT Additional packages (e.g. plugins) to install
--plugin-secret <TEXT TEXT TEXT>...
Secrets to pass to plugins, e.g. --plugin-secret
datasette-auth-github client_id xxx
--version-note TEXT Additional note to show on /-/versions
--secret TEXT Secret used for signing secure values, such as signed
cookies
--title TEXT Title for metadata
--license TEXT License label for metadata
--license_url TEXT License URL for metadata
--source TEXT Source label for metadata
--source_url TEXT Source URL for metadata
--about TEXT About label for metadata
--about_url TEXT About URL for metadata
-n, --name TEXT Application name to use when deploying
--help Show this message and exit.
Publishing to Vercel
Vercel - previously known as Zeit Now - provides a layer over AWS Lambda to allow for easy, scale-to-zero deployment. You can deploy Datasette instances to Vercel using the datasette-publish-vercel plugin.
pip install datasette-publish-vercel
datasette publish vercel mydatabase.db --project my-database-project
Not every feature is supported: consult the datasette-publish-vercel README for more details.
Publishing to Fly
Fly is a competitively priced Docker-compatible hosting platform that makes it easy to run applications in globally distributed data centers close to your end users. You can deploy Datasette instances to Fly using the datasette-publish-fly plugin.
pip install datasette-publish-fly
datasette publish fly mydatabase.db
Consult the datasette-publish-fly README for more details.
Custom metadata and plugins
datasette publish accepts a number of additional options which can be used to further customize your Datasette instance.
You can define your own Metadata and deploy that with your instance like so:
datasette publish cloudrun --service=my-service mydatabase.db -m metadata.json
If you just want to set the title, license or source information you can do that directly using extra options to datasette publish:
datasette publish cloudrun mydatabase.db --service=my-service \
--title="Title of my database" \
--source="Where the data originated" \
--source_url="http://www.example.com/"
You can also specify plugins you would like to install. For example, if you want to include the datasette-vega visualization plugin you can use the following:
datasette publish cloudrun mydatabase.db --service=my-service --install=datasette-vega
If a plugin has any Secret configuration values you can use the --plugin-secret option to set those secrets at publish time. For example, using Heroku with datasette-auth-github you might run the following command:
$ datasette publish heroku my_database.db \
--name my-heroku-app-demo \
--install=datasette-auth-github \
--plugin-secret datasette-auth-github client_id your_client_id \
--plugin-secret datasette-auth-github client_secret your_client_secret
datasette package
If you have docker installed (e.g. using Docker for Mac) you can use the datasette package command to create a new Docker image in your local repository containing the datasette app bundled together with your selected SQLite databases:
datasette package mydatabase.db
Here's example output for the package command:
$ datasette package parlgov.db --extra-options="--config sql_time_limit_ms:2500"
Sending build context to Docker daemon 4.459MB
Step 1/7 : FROM python:3
---> 79e1dc9af1c1
Step 2/7 : COPY . /app
---> Using cache
---> cd4ec67de656
Step 3/7 : WORKDIR /app
---> Using cache
---> 139699e91621
Step 4/7 : RUN pip install datasette
---> Using cache
---> 340efa82bfd7
Step 5/7 : RUN datasette inspect parlgov.db --inspect-file inspect-data.json
---> Using cache
---> 5fddbe990314
Step 6/7 : EXPOSE 8001
---> Using cache
---> 8e83844b0fed
Step 7/7 : CMD datasette serve parlgov.db --port 8001 --inspect-file inspect-data.json --config sql_time_limit_ms:2500
---> Using cache
---> 1bd380ea8af3
Successfully built 1bd380ea8af3
You can now run the resulting container like so:
docker run -p 8081:8001 1bd380ea8af3
This exposes port 8001 inside the container as port 8081 on your host machine, so you can access the application at http://localhost:8081/
You can customize the port that is exposed by the countainer using the --port option:
datasette package mydatabase.db --port 8080
A full list of options can be seen by running datasette package --help:
$ datasette package --help
Usage: datasette package [OPTIONS] FILES...
Package specified SQLite files into a new datasette Docker container
Options:
-t, --tag TEXT Name for the resulting Docker container, can optionally use
name:tag format
-m, --metadata FILENAME Path to JSON/YAML file containing metadata to publish
--extra-options TEXT Extra options to pass to datasette serve
--branch TEXT Install datasette from a GitHub branch e.g. master
--template-dir DIRECTORY Path to directory containing custom templates
--plugins-dir DIRECTORY Path to directory containing custom plugins
--static MOUNT:DIRECTORY Serve static files from this directory at /MOUNT/...
--install TEXT Additional packages (e.g. plugins) to install
--spatialite Enable SpatialLite extension
--version-note TEXT Additional note to show on /-/versions
--secret TEXT Secret used for signing secure values, such as signed
cookies
-p, --port INTEGER Port to run the server on, defaults to 8001
--title TEXT Title for metadata
--license TEXT License label for metadata
--license_url TEXT License URL for metadata
--source TEXT Source label for metadata
--source_url TEXT Source URL for metadata
--about TEXT About label for metadata
--about_url TEXT About URL for metadata
--help Show this message and exit.
JSON API
Datasette provides a JSON API for your SQLite databases. Anything you can do through the Datasette user interface can also be accessed as JSON via the API.
To access the API for a page, either click on the .json link on that page or
edit the URL and add a .json extension to it.
If you started Datasette with the --cors option, each JSON endpoint will be
served with the following additional HTTP header:
Access-Control-Allow-Origin: *
This means JavaScript running on any domain will be able to make cross-origin requests to fetch the data.
If you start Datasette without the --cors option only JavaScript running on
the same domain as Datasette will be able to access the API.
Different shapes
The default JSON representation of data from a SQLite table or custom query looks like this:
{
"database": "sf-trees",
"table": "qSpecies",
"columns": [
"id",
"value"
],
"rows": [
[
1,
"Myoporum laetum :: Myoporum"
],
[
2,
"Metrosideros excelsa :: New Zealand Xmas Tree"
],
[
3,
"Pinus radiata :: Monterey Pine"
]
],
"truncated": false,
"next": "100",
"next_url": "http://127.0.0.1:8001/sf-trees-02c8ef1/qSpecies.json?_next=100",
"query_ms": 1.9571781158447266
}
The columns key lists the columns that are being returned, and the rows
key then returns a list of lists, each one representing a row. The order of the
values in each row corresponds to the columns.
The _shape parameter can be used to access alternative formats for the
rows key which may be more convenient for your application. There are three
options:
?_shape=arrays-"rows"is the default option, shown above?_shape=objects-"rows"is a list of JSON key/value objects?_shape=array- an JSON array of objects?_shape=array&_nl=on- a newline-separated list of JSON objects?_shape=arrayfirst- a flat JSON array containing just the first value from each row?_shape=object- a JSON object keyed using the primary keys of the rows
_shape=objects looks like this:
{
"database": "sf-trees",
...
"rows": [
{
"id": 1,
"value": "Myoporum laetum :: Myoporum"
},
{
"id": 2,
"value": "Metrosideros excelsa :: New Zealand Xmas Tree"
},
{
"id": 3,
"value": "Pinus radiata :: Monterey Pine"
}
]
}
_shape=array looks like this:
[
{
"id": 1,
"value": "Myoporum laetum :: Myoporum"
},
{
"id": 2,
"value": "Metrosideros excelsa :: New Zealand Xmas Tree"
},
{
"id": 3,
"value": "Pinus radiata :: Monterey Pine"
}
]
_shape=array&_nl=on looks like this:
{"id": 1, "value": "Myoporum laetum :: Myoporum"}
{"id": 2, "value": "Metrosideros excelsa :: New Zealand Xmas Tree"}
{"id": 3, "value": "Pinus radiata :: Monterey Pine"}
_shape=arrayfirst looks like this:
[1, 2, 3]
_shape=object looks like this:
{
"1": {
"id": 1,
"value": "Myoporum laetum :: Myoporum"
},
"2": {
"id": 2,
"value": "Metrosideros excelsa :: New Zealand Xmas Tree"
},
"3": {
"id": 3,
"value": "Pinus radiata :: Monterey Pine"
}
]
The object shape is only available for queries against tables - custom SQL
queries and views do not have an obvious primary key so cannot be returned using
this format.
The object keys are always strings. If your table has a compound primary
key, the object keys will be a comma-separated string.
Special JSON arguments
Every Datasette endpoint that can return JSON also accepts the following querystring arguments:
?_shape=SHAPE- The shape of the JSON to return, documented above.
?_nl=on- When used with
?_shape=arrayproduces newline-delimited JSON objects. ?_json=COLUMN1&_json=COLUMN2If any of your SQLite columns contain JSON values, you can use one or more
_json=parameters to request that those columns be returned as regular JSON. Without this argument those columns will be returned as JSON objects that have been double-encoded into a JSON string value.Compare this query without the argument to this query using the argument
?_json_infinity=on- If your data contains infinity or -infinity values, Datasette will replace
them with None when returning them as JSON. If you pass
_json_infinity=1Datasette will instead return them asInfinityor-Infinitywhich is invalid JSON but can be processed by some custom JSON parsers. ?_timelimit=MS- Sets a custom time limit for the query in ms. You can use this for optimistic queries where you would like Datasette to give up if the query takes too long, for example if you want to implement autocomplete search but only if it can be executed in less than 10ms.
?_ttl=SECONDS- For how many seconds should this response be cached by HTTP proxies? Use
?_ttl=0to disable HTTP caching entirely for this request.
Table arguments
The Datasette table view takes a number of special querystring arguments.
Column filter arguments
You can filter the data returned by the table based on column values using a querystring argument.
?column__exact=valueor?_column=value- Returns rows where the specified column exactly matches the value.
?column__not=value- Returns rows where the column does not match the value.
?column__contains=value- Rows where the string column contains the specified value (
column like "%value%"in SQL). ?column__endswith=value- Rows where the string column ends with the specified value (
column like "%value"in SQL). ?column__startswith=value- Rows where the string column starts with the specified value (
column like "value%"in SQL). ?column__gt=value- Rows which are greater than the specified value.
?column__gte=value- Rows which are greater than or equal to the specified value.
?column__lt=value- Rows which are less than the specified value.
?column__lte=value- Rows which are less than or equal to the specified value.
?column__like=value- Match rows with a LIKE clause, case insensitive and with
%as the wildcard character. ?column__notlike=value- Match rows that do not match the provided LIKE clause.
?column__glob=value- Similar to LIKE but uses Unix wildcard syntax and is case sensitive.
?column__in=value1,value2,value3Rows where column matches any of the provided values.
You can use a comma separated string, or you can use a JSON array.
The JSON array option is useful if one of your matching values itself contains a comma:
?column__in=["value","value,with,commas"]?column__notin=value1,value2,value3- Rows where column does not match any of the provided values. The inverse of
__in=. Also supports JSON arrays. ?column__arraycontains=valueWorks against columns that contain JSON arrays - matches if any of the values in that array match.
This is only available if the
json1SQLite extension is enabled.?column__date=value- Column is a datestamp occurring on the specified YYYY-MM-DD date, e.g.
2018-01-02. ?column__isnull=1- Matches rows where the column is null.
?column__notnull=1- Matches rows where the column is not null.
?column__isblank=1- Matches rows where the column is blank, meaning null or the empty string.
?column__notblank=1- Matches rows where the column is not blank.
Special table arguments
?_labels=on/off- Expand foreign key references for every possible column. See below.
?_label=COLUMN1&_label=COLUMN2- Expand foreign key references for one or more specified columns.
?_size=1000or?_size=max- Sets a custom page size. This cannot exceed the
max_returned_rowslimit passed todatasette serve. Usemaxto getmax_returned_rows. ?_sort=COLUMN- Sorts the results by the specified column.
?_sort_desc=COLUMN- Sorts the results by the specified column in descending order.
?_search=keywords- For SQLite tables that have been configured for full-text search executes a search with the provided keywords.
?_search_COLUMN=keywords- Like
_search=but allows you to specify the column to be searched, as opposed to searching all columns that have been indexed by FTS. ?_searchmode=raw- With this option, queries passed to
?_search=or?_search_COLUMN=will not have special characters escaped. This means you can make use of the full set of advanced SQLite FTS syntax, though this could potentially result in errors if the wrong syntax is used. ?_where=SQL-fragmentIf the execute-sql permission is enabled, this parameter can be used to pass one or more additional SQL fragments to be used in the WHERE clause of the SQL used to query the table.
This is particularly useful if you are building a JavaScript application that needs to do something creative but still wants the other conveniences provided by the table view (such as faceting) and hence would like not to have to construct a completely custom SQL query.
Some examples:
?_through={json}This can be used to filter rows via a join against another table.
The JSON parameter must include three keys:
table,columnandvalue.tablemust be a table that the current table is related to via a foreign key relationship.columnmust be a column in that other table.valueis the value that you want to match against.For example, to filter
roadside_attractionsto just show the attractions that have a characteristic of "museum", you would construct this JSON:{ "table": "roadside_attraction_characteristics", "column": "characteristic_id", "value": "1" }
As a URL, that looks like this:
?_through={%22table%22:%22roadside_attraction_characteristics%22,%22column%22:%22characteristic_id%22,%22value%22:%221%22}Here's an example.
?_next=TOKEN- Pagination by continuation token - pass the token that was returned in the
"next"property by the previous page. ?_trace=1Turns on tracing for this page: SQL queries executed during the request will be gathered and included in the response, either in a new
"_traces"key for JSON responses or at the bottom of the page if the response is in HTML.The structure of the data returned here should be considered highly unstable and very likely to change.
Expanding foreign key references
Datasette can detect foreign key relationships and resolve those references into
labels. The HTML interface does this by default for every detected foreign key
column - you can turn that off using ?_labels=off.
You can request foreign keys be expanded in JSON using the _labels=on or
_label=COLUMN special querystring parameters. Here's what an expanded row
looks like:
[
{
"rowid": 1,
"TreeID": 141565,
"qLegalStatus": {
"value": 1,
"label": "Permitted Site"
},
"qSpecies": {
"value": 1,
"label": "Myoporum laetum :: Myoporum"
},
"qAddress": "501X Baker St",
"SiteOrder": 1
}
]
The column in the foreign key table that is used for the label can be specified
in metadata.json - see Specifying the label column for a table.
Running SQL queries
Datasette treats SQLite database files as read-only and immutable. This means it is not possible to execute INSERT or UPDATE statements using Datasette, which allows us to expose SELECT statements to the outside world without needing to worry about SQL injection attacks.
The easiest way to execute custom SQL against Datasette is through the web UI. The database index page includes a SQL editor that lets you run any SELECT query you like. You can also construct queries using the filter interface on the tables page, then click "View and edit SQL" to open that query in the custom SQL editor.
Note that this interface is only available if the execute-sql permission is allowed.
Any Datasette SQL query is reflected in the URL of the page, allowing you to bookmark them, share them with others and navigate through previous queries using your browser back button.
You can also retrieve the results of any query as JSON by adding .json to
the base URL.
Named parameters
Datasette has special support for SQLite named parameters. Consider a SQL query like this:
select * from Street_Tree_List
where "PermitNotes" like :notes
and "qSpecies" = :species
If you execute this query using the custom query editor, Datasette will extract the two named parameters and use them to construct form fields for you to provide values.
You can also provide values for these fields by constructing a URL:
/mydatabase?sql=select...&species=44
SQLite string escaping rules will be applied to values passed using named parameters - they will be wrapped in quotes and their content will be correctly escaped.
Datasette disallows custom SQL containing the string PRAGMA, as SQLite pragma statements can be used to change database settings at runtime. If you need to include the string "pragma" in a query you can do so safely using a named parameter.
Views
If you want to bundle some pre-written SQL queries with your Datasette-hosted database you can do so in two ways. The first is to include SQL views in your database - Datasette will then list those views on your database index page.
The easiest way to create views is with the SQLite command-line interface:
$ sqlite3 sf-trees.db
SQLite version 3.19.3 2017-06-27 16:48:08
Enter ".help" for usage hints.
sqlite> CREATE VIEW demo_view AS select qSpecies from Street_Tree_List;
<CTRL+D>
Canned queries
As an alternative to adding views to your database, you can define canned
queries inside your metadata.json file. Here's an example:
{
"databases": {
"sf-trees": {
"queries": {
"just_species": {
"sql": "select qSpecies from Street_Tree_List"
}
}
}
}
}
Then run Datasette like this:
datasette sf-trees.db -m metadata.json
Each canned query will be listed on the database index page, and will also get its own URL at:
/database-name/canned-query-name
For the above example, that URL would be:
/sf-trees/just_species
You can optionally include "title" and "description" keys to show a
title and description on the canned query page. As with regular table metadata
you can alternatively specify "description_html" to have your description
rendered as HTML (rather than having HTML special characters escaped).
Canned query parameters
Canned queries support named parameters, so if you include those in the SQL you will then be able to enter them using the form fields on the canned query page or by adding them to the URL. This means canned queries can be used to create custom JSON APIs based on a carefully designed SQL statement.
Here's an example of a canned query with a named parameter:
select neighborhood, facet_cities.name, state
from facetable
join facet_cities on facetable.city_id = facet_cities.id
where neighborhood like '%' || :text || '%'
order by neighborhood;
In the canned query metadata (here Using YAML for metadata as metadata.yaml) it looks like this:
databases:
fixtures:
queries:
neighborhood_search:
sql: |-
select neighborhood, facet_cities.name, state
from facetable
join facet_cities on facetable.city_id = facet_cities.id
where neighborhood like '%' || :text || '%'
order by neighborhood
title: Search neighborhoods
Here's the equivalent using JSON (as metadata.json):
{
"databases": {
"fixtures": {
"queries": {
"neighborhood_search": {
"sql": "select neighborhood, facet_cities.name, state\nfrom facetable\n join facet_cities on facetable.city_id = facet_cities.id\nwhere neighborhood like '%' || :text || '%'\norder by neighborhood",
"title": "Search neighborhoods"
}
}
}
}
}
Note that we are using SQLite string concatenation here - the || operator - to add wildcard % characters to the string provided by the user.
You can try this canned query out here: https://latest.datasette.io/fixtures/neighborhood_search?text=town
In this example the :text named parameter is automatically extracted from the query using a regular expression.
You can alternatively provide an explicit list of named parameters using the "params" key, like this:
databases:
fixtures:
queries:
neighborhood_search:
params:
- text
sql: |-
select neighborhood, facet_cities.name, state
from facetable
join facet_cities on facetable.city_id = facet_cities.id
where neighborhood like '%' || :text || '%'
order by neighborhood
title: Search neighborhoods
Setting a default fragment
Some plugins, such as datasette-vega, can be configured by including additional data in the fragment hash of the URL - the bit that comes after a # symbol.
You can set a default fragment hash that will be included in the link to the canned query from the database index page using the "fragment" key:
{
"databases": {
"fixtures": {
"queries": {
"neighborhood_search": {
"sql": "select neighborhood, facet_cities.name, state\nfrom facetable join facet_cities on facetable.city_id = facet_cities.id\nwhere neighborhood like '%' || :text || '%' order by neighborhood;",
"fragment": "fragment-goes-here"
}
}
}
}
}
See here for a demo of this in action.
Writable canned queries
Canned queries by default are read-only. You can use the "write": true key to indicate that a canned query can write to the database.
See Controlling access to specific canned queries for details on how to add permission checks to canned queries, using the "allow" key.
{
"databases": {
"mydatabase": {
"queries": {
"add_name": {
"sql": "INSERT INTO names (name) VALUES (:name)",
"write": true
}
}
}
}
}
This configuration will create a page at /mydatabase/add_name displaying a form with a name field. Submitting that form will execute the configured INSERT query.
You can customize how Datasette represents success and errors using the following optional properties:
on_success_message- the message shown when a query is successfulon_success_redirect- the path or URL the user is redirected to on successon_error_message- the message shown when a query throws an erroron_error_redirect- the path or URL the user is redirected to on error
For example:
{
"databases": {
"mydatabase": {
"queries": {
"add_name": {
"sql": "INSERT INTO names (name) VALUES (:name)",
"write": true,
"on_success_message": "Name inserted",
"on_success_redirect": "/mydatabase/names",
"on_error_message": "Name insert failed",
"on_error_redirect": "/mydatabase"
}
}
}
}
}
You can use "params" to explicitly list the named parameters that should be displayed as form fields - otherwise they will be automatically detected.
You can pre-populate form fields when the page first loads using a querystring, e.g. /mydatabase/add_name?name=Prepopulated. The user will have to submit the form to execute the query.
Magic parameters
Named parameters that start with an underscore are special: they can be used to automatically add values created by Datasette that are not contained in the incoming form fields or querystring.
Available magic parameters are:
_actor_*- e.g._actor_id,_actor_name- Fields from the currently authenticated Actors.
_header_*- e.g._header_user_agent- Header from the incoming HTTP request. The key should be in lower case and with hyphens converted to underscores e.g.
_header_user_agentor_header_accept_language. _cookie_*- e.g._cookie_lang- The value of the incoming cookie of that name.
_now_epoch- The number of seconds since the Unix epoch.
_now_date_utc- The date in UTC, e.g.
2020-06-01 _now_datetime_utc- The ISO 8601 datetime in UTC, e.g.
2020-06-24T18:01:07Z _random_chars_*- e.g._random_chars_128- A random string of characters of the specified length.
Here's an example configuration (this time using metadata.yaml since that provides better support for multi-line SQL queries) that adds a message from the authenticated user, storing various pieces of additional metadata using magic parameters:
databases:
mydatabase:
queries:
add_message:
allow:
id: "*"
sql: |-
INSERT INTO messages (
user_id, ip, message, datetime
) VALUES (
:_actor_id, :_request_ip, :message, :_now_datetime_utc
)
write: true
The form presented at /mydatabase/add_message will have just a field for message - the other parameters will be populated by the magic parameter mechanism.
Additional custom magic parameters can be added by plugins using the register_magic_parameters(datasette) hook.
Pagination
Datasette's default table pagination is designed to be extremely efficient. SQL OFFSET/LIMIT pagination can have a significant performance penalty once you get into multiple thousands of rows, as each page still requires the database to scan through every preceding row to find the correct offset.
When paginating through tables, Datasette instead orders the rows in the table by their primary key and performs a WHERE clause against the last seen primary key for the previous page. For example:
select rowid, * from Tree_List where rowid > 200 order by rowid limit 101
This represents page three for this particular table, with a page size of 100.
Note that we request 101 items in the limit clause rather than 100. This allows us to detect if we are on the last page of the results: if the query returns less than 101 rows we know we have reached the end of the pagination set. Datasette will only return the first 100 rows - the 101st is used purely to detect if there should be another page.
Since the where clause acts against the index on the primary key, the query is extremely fast even for records that are a long way into the overall pagination set.
Authentication and permissions
Datasette does not require authentication by default. Any visitor to a Datasette instance can explore the full data and execute read-only SQL queries.
Datasette's plugin system can be used to add many different styles of authentication, such as user accounts, single sign-on or API keys.
Actors
Through plugins, Datasette can support both authenticated users (with cookies) and authenticated API agents (via authentication tokens). The word "actor" is used to cover both of these cases.
Every request to Datasette has an associated actor value, available in the code as request.actor. This can be None for unauthenticated requests, or a JSON compatible Python dictionary for authenticated users or API agents.
The actor dictionary can be any shape - the design of that data structure is left up to the plugins. A useful convention is to include an "id" string, as demonstrated by the "root" actor below.
Plugins can use the actor_from_request(datasette, request) hook to implement custom logic for authenticating an actor based on the incoming HTTP request.
Using the "root" actor
Datasette currently leaves almost all forms of authentication to plugins - datasette-auth-github for example.
The one exception is the "root" account, which you can sign into while using Datasette on your local machine. This provides access to a small number of debugging features.
To sign in as root, start Datasette using the --root command-line option, like this:
$ datasette --root
http://127.0.0.1:8001/-/auth-token?token=786fc524e0199d70dc9a581d851f466244e114ca92f33aa3b42a139e9388daa7
INFO: Started server process [25801]
INFO: Waiting for application startup.
INFO: Application startup complete.
INFO: Uvicorn running on http://127.0.0.1:8001 (Press CTRL+C to quit)
The URL on the first line includes a one-use token which can be used to sign in as the "root" actor in your browser. Click on that link and then visit http://127.0.0.1:8001/-/actor to confirm that you are authenticated as an actor that looks like this:
{
"id": "root"
}
Permissions
Datasette has an extensive permissions system built-in, which can be further extended and customized by plugins.
The key question the permissions system answers is this:
Is this actor allowed to perform this action, optionally against this particular resource?
Actors are described above.
An action is a string describing the action the actor would like to perfom. A full list is provided below - examples include view-table and execute-sql.
A resource is the item the actor wishes to interact with - for example a specific database or table. Some actions, such as permissions-debug, are not associated with a particular resource.
Datasette's built-in view permissions (view-database, view-table etc) default to allow - unless you configure additional permission rules unauthenticated users will be allowed to access content.
Permissions with potentially harmful effects should default to deny. Plugin authors should account for this when designing new plugins - for example, the datasette-upload-csvs plugin defaults to deny so that installations don't accidentally allow unauthenticated users to create new tables by uploading a CSV file.
Defining permissions with "allow" blocks
The standard way to define permissions in Datasette is to use an "allow" block. This is a JSON document describing which actors are allowed to perfom a permission.
The most basic form of allow block is this (allow demo, deny demo):
{
"allow": {
"id": "root"
}
}
This will match any actors with an "id" property of "root" - for example, an actor that looks like this:
{
"id": "root",
"name": "Root User"
}
An allow block can specify "deny all" using false (demo):
{
"allow": false
}
An "allow" of true allows all access (demo):
{
"allow": true
}
Allow keys can provide a list of values. These will match any actor that has any of those values (allow demo, deny demo):
{
"allow": {
"id": ["simon", "cleopaws"]
}
}
This will match any actor with an "id" of either "simon" or "cleopaws".
Actors can have properties that feature a list of values. These will be matched against the list of values in an allow block. Consider the following actor:
{
"id": "simon",
"roles": ["staff", "developer"]
}
This allow block will provide access to any actor that has "developer" as one of their roles (allow demo, deny demo):
{
"allow": {
"roles": ["developer"]
}
}
Note that "roles" is not a concept that is baked into Datasette - it's a convention that plugins can choose to implement and act on.
If you want to provide access to any actor with a value for a specific key, use "*". For example, to match any logged-in user specify the following (allow demo, deny demo):
{
"allow": {
"id": "*"
}
}
You can specify that only unauthenticated actors (from anynomous HTTP requests) should be allowed access using the special "unauthenticated": true key in an allow block (allow demo, deny demo):
{
"allow": {
"unauthenticated": true
}
}
Allow keys act as an "or" mechanism. An actor will be able to execute the query if any of their JSON properties match any of the values in the corresponding lists in the allow block. The following block will allow users with either a role of "ops" OR users who have an id of "simon" or "cleopaws":
{
"allow": {
"id": ["simon", "cleopaws"],
"role": "ops"
}
}
Demo for cleopaws, demo for ops role, demo for an actor matching neither rule.
The /-/allow-debug tool
The /-/allow-debug tool lets you try out different "action" blocks against different "actor" JSON objects. You can try that out here: https://latest.datasette.io/-/allow-debug
Configuring permissions in metadata.json
You can limit who is allowed to view different parts of your Datasette instance using "allow" keys in your Metadata configuration.
You can control the following:
- Access to the entire Datasette instance
- Access to specific databases
- Access to specific tables and views
- Access to specific Canned queries
If a user cannot access a specific database, they will not be able to access tables, views or queries within that database. If a user cannot access the instance they will not be able to access any of the databases, tables, views or queries.
Controlling access to an instance
Here's how to restrict access to your entire Datasette instance to just the "id": "root" user:
{
"title": "My private Datasette instance",
"allow": {
"id": "root"
}
}
To deny access to all users, you can use "allow": false:
{
"title": "My entirely inaccessible instance",
"allow": false
}
One reason to do this is if you are using a Datasette plugin - such as datasette-permissions-sql - to control permissions instead.
Controlling access to specific databases
To limit access to a specific private.db database to just authenticated users, use the "allow" block like this:
{
"databases": {
"private": {
"allow": {
"id": "*"
}
}
}
}
Controlling access to specific tables and views
To limit access to the users table in your bakery.db database:
{
"databases": {
"bakery": {
"tables": {
"users": {
"allow": {
"id": "*"
}
}
}
}
}
}
This works for SQL views as well - you can list their names in the "tables" block above in the same way as regular tables.
Warning
Restricting access to tables and views in this way will NOT prevent users from querying them using arbitrary SQL queries, like this for example.
If you are restricting access to specific tables you should also use the "allow_sql" block to prevent users from bypassing the limit with their own SQL queries - see Controlling the ability to execute arbitrary SQL.
Controlling access to specific canned queries
Canned queries allow you to configure named SQL queries in your metadata.json that can be executed by users. These queries can be set up to both read and write to the database, so controlling who can execute them can be important.
To limit access to the add_name canned query in your dogs.db database to just the root user:
{
"databases": {
"dogs": {
"queries": {
"add_name": {
"sql": "INSERT INTO names (name) VALUES (:name)",
"write": true,
"allow": {
"id": ["root"]
}
}
}
}
}
}
Controlling the ability to execute arbitrary SQL
The "allow_sql" block can be used to control who is allowed to execute arbitrary SQL queries, both using the form on the database page e.g. https://latest.datasette.io/fixtures or by appending a ?_where= parameter to the table page as seen on https://latest.datasette.io/fixtures/facetable?_where=city_id=1.
To enable just the root user to execute SQL for all databases in your instance, use the following:
{
"allow_sql": {
"id": "root"
}
}
To limit this ability for just one specific database, use this:
{
"databases": {
"mydatabase": {
"allow_sql": {
"id": "root"
}
}
}
}
Checking permissions in plugins
Datasette plugins can check if an actor has permission to perform an action using the datasette.permission_allowed(...) method.
Datasette core performs a number of permission checks, documented below. Plugins can implement the permission_allowed(datasette, actor, action, resource) plugin hook to participate in decisions about whether an actor should be able to perform a specified action.
actor_matches_allow()
Plugins that wish to implement this same "allow" block permissions scheme can take advantage of the datasette.utils.actor_matches_allow(actor, allow) function:
from datasette.utils import actor_matches_allow
actor_matches_allow({"id": "root"}, {"id": "*"})
# returns True
The currently authenticated actor is made available to plugins as request.actor.
The permissions debug tool
The debug tool at /-/permissions is only available to the authenticated root user (or any actor granted the permissions-debug action according to a plugin).
It shows the thirty most recent permission checks that have been carried out by the Datasette instance.
This is designed to help administrators and plugin authors understand exactly how permission checks are being carried out, in order to effectively configure Datasette's permission system.
The ds_actor cookie
Datasette includes a default authentication plugin which looks for a signed ds_actor cookie containing a JSON actor dictionary. This is how the root actor mechanism works.
Authentication plugins can set signed ds_actor cookies themselves like so:
response = Response.redirect("/")
response.set_cookie("ds_actor", datasette.sign({
"a": {
"id": "cleopaws"
}
}, "actor"))
Note that you need to pass "actor" as the namespace to .sign(value, namespace="default").
The shape of data encoded in the cookie is as follows:
{
"a": {... actor ...}
}
Including an expiry time
ds_actor cookies can optionally include a signed expiry timestamp, after which the cookies will no longer be valid. Authentication plugins may chose to use this mechanism to limit the lifetime of the cookie. For example, if a plugin implements single-sign-on against another source it may decide to set short-lived cookies so that if the user is removed from the SSO system their existing Datasette cookies will stop working shortly afterwards.
To include an expiry, add a "e" key to the cookie value containing a base62-encoded integer representing the timestamp when the cookie should expire. For example, here's how to set a cookie that expires after 24 hours:
import time
import baseconv
expires_at = int(time.time()) + (24 * 60 * 60)
response = Response.redirect("/")
response.set_cookie("ds_actor", datasette.sign({
"a": {
"id": "cleopaws"
},
"e": baseconv.base62.encode(expires_at),
}, "actor"))
The resulting cookie will encode data that looks something like this:
{
"a": {
"id": "cleopaws"
},
"e": "1jjSji"
}
The /-/logout page
The page at /-/logout provides the ability to log out of a ds_actor cookie authentication session.
Built-in permissions
This section lists all of the permission checks that are carried out by Datasette core, along with the resource if it was passed.
view-instance
Top level permission - Actor is allowed to view any pages within this instance, starting at https://latest.datasette.io/
Default allow.
view-database
Actor is allowed to view a database page, e.g. https://latest.datasette.io/fixtures
resource- string- The name of the database
Default allow.
view-database-download
Actor is allowed to download a database, e.g. https://latest.datasette.io/fixtures.db
resource- string- The name of the database
Default allow.
view-table
Actor is allowed to view a table (or view) page, e.g. https://latest.datasette.io/fixtures/complex_foreign_keys
resource- tuple: (string, string)- The name of the database, then the name of the table
Default allow.
view-query
Actor is allowed to view (and execute) a canned query page, e.g. https://latest.datasette.io/fixtures/pragma_cache_size - this includes executing Writable canned queries.
resource- tuple: (string, string)- The name of the database, then the name of the canned query
Default allow.
execute-sql
Actor is allowed to run arbitrary SQL queries against a specific database, e.g. https://latest.datasette.io/fixtures?sql=select+100
resource- string- The name of the database
Default allow.
Performance and caching
Datasette runs on top of SQLite, and SQLite has excellent performance. For small databases almost any query should return in just a few milliseconds, and larger databases (100s of MBs or even GBs of data) should perform extremely well provided your queries make sensible use of database indexes.
That said, there are a number of tricks you can use to improve Datasette's performance.
Immutable mode
If you can be certain that a SQLite database file will not be changed by another process you can tell Datasette to open that file in immutable mode.
Doing so will disable all locking and change detection, which can result in improved query performance.
This also enables further optimizations relating to HTTP caching, described below.
To open a file in immutable mode pass it to the datasette command using the -i option:
datasette -i data.db
When you open a file in immutable mode like this Datasette will also calculate and cache the row counts for each table in that database when it first starts up, further improving performance.
Using "datasette inspect"
Counting the rows in a table can be a very expensive operation on larger databases. In immutable mode Datasette performs this count only once and caches the results, but this can still cause server startup time to increase by several seconds or more.
If you know that a database is never going to change you can precalculate the table row counts once and store then in a JSON file, then use that file when you later start the server.
To create a JSON file containing the calculated row counts for a database, use the following:
datasette inspect data.db --inspect-file=counts.json
Then later you can start Datasette against the counts.json file and use it to skip the row counting step and speed up server startup:
datasette -i data.db --inspect-file=counts.json
You need to use the -i immutable mode against the databse file here or the counts from the JSON file will be ignored.
You will rarely need to use this optimization in every-day use, but several of the datasette publish commands described in Publishing data use this optimization for better performance when deploying a database file to a hosting provider.
HTTP caching
If your database is immutable and guaranteed not to change, you can gain major performance improvements from Datasette by enabling HTTP caching.
This can work at two different levels. First, it can tell browsers to cache the results of queries and serve future requests from the browser cache.
More significantly, it allows you to run Datasette behind a caching proxy such as Varnish or use a cache provided by a hosted service such as Fastly or Cloudflare. This can provide incredible speed-ups since a query only needs to be executed by Datasette the first time it is accessed - all subsequent hits can then be served by the cache.
Using a caching proxy in this way could enable a Datasette-backed visualization to serve thousands of hits a second while running Datasette itself on extremely inexpensive hosting.
Datasette's integration with HTTP caches can be enabled using a combination of configuration options and querystring arguments.
The default_cache_ttl setting sets the default HTTP cache TTL for all Datasette pages. This is 5 seconds unless you change it - you can set it to 0 if you wish to disable HTTP caching entirely.
You can also change the cache timeout on a per-request basis using the ?_ttl=10 querystring parameter. This can be useful when you are working with the Datasette JSON API - you may decide that a specific query can be cached for a longer time, or maybe you need to set ?_ttl=0 for some requests for example if you are running a SQL order by random() query.
Hashed URL mode
When you open a database file in immutable mode using the -i option, Datasette calculates a SHA-256 hash of the contents of that file on startup. This content hash can then optionally be used to create URLs that are guaranteed to change if the contents of the file changes in the future. This results in URLs that can then be cached indefinitely by both browsers and caching proxies - an enormous potential performance optimization.
You can enable these hashed URLs in two ways: using the hash_urls configuration setting (which affects all requests to Datasette) or via the ?_hash=1 querystring parameter (which only applies to the current request).
With hashed URLs enabled, any request to e.g. /mydatabase/mytable will 302 redirect to mydatabase-455fe3a/mytable. The URL containing the hash will be served with a very long cache expire header - configured using default_cache_ttl_hashed which defaults to 365 days.
Since these responses are cached for a long time, you may wish to build API clients against the non-hashed version of these URLs. These 302 redirects are served extremely quickly, so this should still be a performant way to work against the Datasette API.
If you run Datasette behind an HTTP/2 server push aware proxy such as Cloudflare Datasette will serve the 302 redirects in such a way that the redirected page will be efficiently "pushed" to the browser as part of the response, without the browser needing to make a second HTTP request to fetch the redirected resource.
Note
Prior to Datasette 0.28 hashed URL mode was the default behaviour for Datasette, since all database files were assumed to be immutable and unchanging. From 0.28 onwards the default has been to treat database files as mutable unless explicitly configured otherwise.
CSV Export
Any Datasette table, view or custom SQL query can be exported as CSV.
To obtain the CSV representation of the table you are looking, click the "this data as CSV" link.
You can also use the advanced export form for more control over the resulting file, which looks like this and has the following options:

- download file - instead of displaying CSV in your browser, this forces your browser to download the CSV to your downloads directory.
- expand labels - if your table has any foreign key references this option
will cause the CSV to gain additional
COLUMN_NAME_labelcolumns with a label for each foreign key derived from the linked table. In this example thecity_idcolumn is accompanied by acity_id_labelcolumn. - stream all rows - by default CSV files only contain the first max_returned_rows records. This option will cause Datasette to loop through every matching record and return them as a single CSV file.
You can try that out on https://latest.datasette.io/fixtures/facetable?_size=4
Streaming all records
The stream all rows option is designed to be as efficient as possible - under the hood it takes advantage of Python 3 asyncio capabilities and Datasette's efficient pagination to stream back the full CSV file.
Since databases can get pretty large, by default this option is capped at 100MB - if a table returns more than 100MB of data the last line of the CSV will be a truncation error message.
You can increase or remove this limit using the max_csv_mb config setting. You can also disable the CSV export feature entirely using allow_csv_stream.
A note on URLs
The default URL for the CSV representation of a table is that table with
.csv appended to it:
- https://latest.datasette.io/fixtures/facetable - HTML interface
- https://latest.datasette.io/fixtures/facetable.csv - CSV export
- https://latest.datasette.io/fixtures/facetable.json - JSON API
This pattern doesn't work for tables with names that already end in .csv or
.json. For those tables, you can instead use the _format= querystring
parameter:
Facets
Datasette facets can be used to add a faceted browse interface to any database table. With facets, tables are displayed along with a summary showing the most common values in specified columns. These values can be selected to further filter the table.

Facets can be specified in two ways: using querystring parameters, or in metadata.json configuration for the table.
Facets in querystrings
To turn on faceting for specific columns on a Datasette table view, add one or more _facet=COLUMN parameters to the URL. For example, if you want to turn on facets for the city_id and state columns, construct a URL that looks like this:
/dbname/tablename?_facet=state&_facet=city_id
This works for both the HTML interface and the .json view. When enabled, facets will cause a facet_results block to be added to the JSON output, looking something like this:
{
"state": {
"name": "state",
"results": [
{
"value": "CA",
"label": "CA",
"count": 10,
"toggle_url": "http://...?_facet=city_id&_facet=state&state=CA",
"selected": false
},
{
"value": "MI",
"label": "MI",
"count": 4,
"toggle_url": "http://...?_facet=city_id&_facet=state&state=MI",
"selected": false
},
{
"value": "MC",
"label": "MC",
"count": 1,
"toggle_url": "http://...?_facet=city_id&_facet=state&state=MC",
"selected": false
}
],
"truncated": false
}
"city_id": {
"name": "city_id",
"results": [
{
"value": 1,
"label": "San Francisco",
"count": 6,
"toggle_url": "http://...?_facet=city_id&_facet=state&city_id=1",
"selected": false
},
{
"value": 2,
"label": "Los Angeles",
"count": 4,
"toggle_url": "http://...?_facet=city_id&_facet=state&city_id=2",
"selected": false
},
{
"value": 3,
"label": "Detroit",
"count": 4,
"toggle_url": "http://...?_facet=city_id&_facet=state&city_id=3",
"selected": false
},
{
"value": 4,
"label": "Memnonia",
"count": 1,
"toggle_url": "http://...?_facet=city_id&_facet=state&city_id=4",
"selected": false
}
],
"truncated": false
}
}
If Datasette detects that a column is a foreign key, the "label" property will be automatically derived from the detected label column on the referenced table.
Facets in metadata.json
You can turn facets on by default for specific tables by adding them to a "facets" key in a Datasette Metadata file.
Here's an example that turns on faceting by default for the qLegalStatus column in the Street_Tree_List table in the sf-trees database:
{
"databases": {
"sf-trees": {
"tables": {
"Street_Tree_List": {
"facets": ["qLegalStatus"]
}
}
}
}
}
Facets defined in this way will always be shown in the interface and returned in the API, regardless of the _facet arguments passed to the view.
Suggested facets
Datasette's table UI will suggest facets for the user to apply, based on the following criteria:
For the currently filtered data are there any columns which, if applied as a facet...
- Will return 30 or less unique options
- Will return more than one unique option
- Will return less unique options than the total number of filtered rows
- And the query used to evaluate this criteria can be completed in under 50ms
That last point is particularly important: Datasette runs a query for every column that is displayed on a page, which could get expensive - so to avoid slow load times it sets a time limit of just 50ms for each of those queries. This means suggested facets are unlikely to appear for tables with millions of records in them.
Speeding up facets with indexes
The performance of facets can be greatly improved by adding indexes on the columns you wish to facet by. Adding indexes can be performed using the sqlite3 command-line utility. Here's how to add an index on the state column in a table called Food_Trucks:
$ sqlite3 mydatabase.db
SQLite version 3.19.3 2017-06-27 16:48:08
Enter ".help" for usage hints.
sqlite> CREATE INDEX Food_Trucks_state ON Food_Trucks("state");
Facet by JSON array
If your SQLite installation provides the json1 extension (you can check using /-/versions) Datasette will automatically detect columns that contain JSON arrays of values and offer a faceting interface against those columns.
This is useful for modelling things like tags without needing to break them out into a new table.
Example here: latest.datasette.io/fixtures/facetable?_facet_array=tags
Facet by date
If Datasette finds any columns that contain dates in the first 100 values, it will offer a faceting interface against the dates of those values. This works especially well against timestamp values such as 2019-03-01 12:44:00.
Example here: latest.datasette.io/fixtures/facetable?_facet_date=created
Full-text search
SQLite includes a powerful mechanism for enabling full-text search against SQLite records. Datasette can detect if a table has had full-text search configured for it in the underlying database and display a search interface for filtering that table.

Datasette automatically detects which tables have been configured for full-text search.
The table page and table view API
Table views that support full-text search can be queried using the ?_search=TERMS querystring parameter. This will run the search against content from all of the columns that have been included in the index.
Try this example: fara.datasettes.com/fara/FARA_All_ShortForms?_search=manafort
SQLite full-text search supports wildcards. This means you can easily implement prefix auto-complete by including an asterisk at the end of the search term - for example:
/dbname/tablename/?_search=rob*
This will return all records containing at least one word that starts with the letters rob.
You can also run searches against just the content of a specific named column by using _search_COLNAME=TERMS - for example, this would search for just rows where the name column in the FTS index mentions Sarah:
/dbname/tablename/?_search_name=Sarah
Advanced SQLite search queries
SQLite full-text search includes support for a variety of advanced queries, including AND, OR, NOT and NEAR.
By default Datasette disables these features to ensure they do not cause any confusion for users who are not aware of them. You can disable this escaping and use the advanced queries by adding ?_searchmode=raw to the table page query string.
Configuring full-text search for a table or view
If a table has a corresponding FTS table set up using the content= argument to CREATE VIRTUAL TABLE shown above, Datasette will detect it automatically and add a search interface to the table page for that table.
You can also manually configure which table should be used for full-text search using querystring parameters or Metadata. You can set the associated FTS table for a specific table and you can also set one for a view - if you do that, the page for that SQL view will offer a search option.
Use ?_fts_table=x to over-ride the FTS table for a specific page. If the primary key was something other than rowid you can use ?_fts_pk=col to set that as well. This is particularly useful for views, for example:
https://latest.datasette.io/fixtures/searchable_view?_fts_table=searchable_fts&_fts_pk=pk
The fts_table metadata property can be used to specify an associated FTS table. If the primary key column in your table which was used to populate the FTS table is something other than rowid, you can specify the column to use with the fts_pk property.
Here is an example which enables full-text search for a display_ads view which is defined against the ads table and hence needs to run FTS against the ads_fts table, using the id as the primary key:
{
"databases": {
"russian-ads": {
"tables": {
"display_ads": {
"fts_table": "ads_fts",
"fts_pk": "id"
}
}
}
}
}
Searches using custom SQL
You can include full-text search results in custom SQL queries. The general pattern with SQLite search is to run the search as a sub-select that returns rowid values, then include those rowids in another part of the query.
You can see the syntax for a basic search by running that search on a table page and then clicking "View and edit SQL" to see the underlying SQL. For example, consider this search for manafort is the US FARA database:
/fara/FARA_All_ShortForms?_search=manafort
If you click View and edit SQL you'll see that the underlying SQL looks like this:
select
rowid,
Short_Form_Termination_Date,
Short_Form_Date,
Short_Form_Last_Name,
Short_Form_First_Name,
Registration_Number,
Registration_Date,
Registrant_Name,
Address_1,
Address_2,
City,
State,
Zip
from
FARA_All_ShortForms
where
rowid in (
select
rowid
from
FARA_All_ShortForms_fts
where
FARA_All_ShortForms_fts match escape_fts(:search)
)
order by
rowid
limit
101
Enabling full-text search for a SQLite table
Datasette takes advantage of the external content mechanism in SQLite, which allows a full-text search virtual table to be associated with the contents of another SQLite table.
To set up full-text search for a table, you need to do two things:
- Create a new FTS virtual table associated with your table
- Populate that FTS table with the data that you would like to be able to run searches against
Configuring FTS using sqlite-utils
sqlite-utils is a CLI utility and Python library for manipulating SQLite databases. You can use it from Python code to configure FTS search, or you can achieve the same goal using the accompanying command-line tool.
Here's how to use sqlite-utils to enable full-text search for an items table across the name and description columns:
$ sqlite-utils enable-fts mydatabase.db items name description
Configuring FTS using csvs-to-sqlite
If your data starts out in CSV files, you can use Datasette's companion tool csvs-to-sqlite to convert that file into a SQLite database and enable full-text search on specific columns. For a file called items.csv where you want full-text search to operate against the name and description columns you would run the following:
$ csvs-to-sqlite items.csv items.db -f name -f description
Configuring FTS by hand
We recommend using sqlite-utils, but if you want to hand-roll a SQLite full-text search table you can do so using the following SQL.
To enable full-text search for a table called items that works against the name and description columns, you would run this SQL to create a new items_fts FTS virtual table:
CREATE VIRTUAL TABLE "items_fts" USING FTS4 (
name,
description,
content="items"
);
This creates a set of tables to power full-text search against items. The new items_fts table will be detected by Datasette as the fts_table for the items table.
Creating the table is not enough: you also need to populate it with a copy of the data that you wish to make searchable. You can do that using the following SQL:
INSERT INTO "items_fts" (rowid, name, description)
SELECT rowid, name, description FROM items;
If your table has columns that are foreign key references to other tables you can include that data in your full-text search index using a join. Imagine the items table has a foreign key column called category_id which refers to a categories table - you could create a full-text search table like this:
CREATE VIRTUAL TABLE "items_fts" USING FTS4 (
name,
description,
category_name,
content="items"
);
And then populate it like this:
INSERT INTO "items_fts" (rowid, name, description, category_name)
SELECT items.rowid,
items.name,
items.description,
categories.name
FROM items JOIN categories ON items.category_id=categories.id;
You can use this technique to populate the full-text search index from any combination of tables and joins that makes sense for your project.
FTS versions
There are three different versions of the SQLite FTS module: FTS3, FTS4 and FTS5. You can tell which versions are supported by your instance of Datasette by checking the /-/versions page.
FTS5 is the most advanced module but may not be available in the SQLite version that is bundled with your Python installation. Most importantly, FTS5 is the only version that has the ability to order by search relevance without needing extra code.
If you can't be sure that FTS5 will be available, you should use FTS4.
SpatiaLite
The SpatiaLite module for SQLite adds features for handling geographic and spatial data. For an example of what you can do with it, see the tutorial Building a location to time zone API with SpatiaLite, OpenStreetMap and Datasette.
To use it with Datasette, you need to install the mod_spatialite dynamic library. This can then be loaded into Datasette using the --load-extension command-line option.
Installation
Installing SpatiaLite on OS X
The easiest way to install SpatiaLite on OS X is to use Homebrew.
brew update
brew install spatialite-tools
This will install the spatialite command-line tool and the mod_spatialite dynamic library.
You can now run Datasette like so:
datasette --load-extension=/usr/local/lib/mod_spatialite.dylib
Installing SpatiaLite on Linux
SpatiaLite is packaged for most Linux distributions.
apt install spatialite-bin libsqlite3-mod-spatialite
Depending on your distribution, you should be able to run Datasette something like this:
datasette --load-extension=/usr/lib/x86_64-linux-gnu/mod_spatialite.so
If you are unsure of the location of the module, try running locate mod_spatialite and see what comes back.
Building SpatiaLite from source
The packaged versions of SpatiaLite usually provide SpatiaLite 4.3.0a. For an example of how to build the most recent unstable version, 4.4.0-RC0 (which includes the powerful VirtualKNN module), take a look at the Datasette Dockerfile.
Spatial indexing latitude/longitude columns
Here's a recipe for taking a table with existing latitude and longitude columns, adding a SpatiaLite POINT geometry column to that table, populating the new column and then populating a spatial index:
import sqlite3
conn = sqlite3.connect('museums.db')
# Lead the spatialite extension:
conn.enable_load_extension(True)
conn.load_extension('/usr/local/lib/mod_spatialite.dylib')
# Initialize spatial metadata for this database:
conn.execute('select InitSpatialMetadata(1)')
# Add a geometry column called point_geom to our museums table:
conn.execute("SELECT AddGeometryColumn('museums', 'point_geom', 4326, 'POINT', 2);")
# Now update that geometry column with the lat/lon points
conn.execute('''
UPDATE events SET
point_geom = GeomFromText('POINT('||"longitude"||' '||"latitude"||')',4326);
''')
# Now add a spatial index to that column
conn.execute('select CreateSpatialIndex("museums", "point_geom");')
# If you don't commit your changes will not be persisted:
conn.commit()
conn.close()
Making use of a spatial index
SpatiaLite spatial indexes are R*Trees. They allow you to run efficient bounding box queries using a sub-select, with a similar pattern to that used for Searches using custom SQL.
In the above example, the resulting index will be called idx_museums_point_geom. This takes the form of a SQLite virtual table. You can inspect its contents using the following query:
select * from idx_museums_point_geom limit 10;
Here's a live example: timezones-api.now.sh/timezones/idx_timezones_Geometry
| pkid | xmin | xmax | ymin | ymax |
|---|---|---|---|---|
| 1 | -8.601725578308105 | -2.4930307865142822 | 4.162120819091797 | 10.74019718170166 |
| 2 | -3.2607860565185547 | 1.27329421043396 | 4.539252281188965 | 11.174856185913086 |
| 3 | 32.997581481933594 | 47.98238754272461 | 3.3974475860595703 | 14.894054412841797 |
| 4 | -8.66890811920166 | 11.997337341308594 | 18.9681453704834 | 37.296207427978516 |
| 5 | 36.43336486816406 | 43.300174713134766 | 12.354820251464844 | 18.070993423461914 |
You can now construct efficient bounding box queries that will make use of the index like this:
select * from museums where museums.rowid in (
SELECT pkid FROM idx_museums_point_geom
-- left-hand-edge of point > left-hand-edge of bbox (minx)
where xmin > :bbox_minx
-- right-hand-edge of point < right-hand-edge of bbox (maxx)
and xmax < :bbox_maxx
-- bottom-edge of point > bottom-edge of bbox (miny)
and ymin > :bbox_miny
-- top-edge of point < top-edge of bbox (maxy)
and ymax < :bbox_maxy
);
Spatial indexes can be created against polygon columns as well as point columns, in which case they will represent the minimum bounding rectangle of that polygon. This is useful for accelerating within queries, as seen in the Timezones API example.
Importing shapefiles into SpatiaLite
The shapefile format is a common format for distributing geospatial data. You can use the spatialite command-line tool to create a new database table from a shapefile.
Try it now with the North America shapefile available from the University of North Carolina Global River Database project. Download the file and unzip it (this will create files called narivs.dbf, narivs.prj, narivs.shp and narivs.shx in the current directory), then run the following:
$ spatialite rivers-database.db
SpatiaLite version ..: 4.3.0a Supported Extensions:
...
spatialite> .loadshp narivs rivers CP1252 23032
========
Loading shapefile at 'narivs' into SQLite table 'rivers'
...
Inserted 467973 rows into 'rivers' from SHAPEFILE
This will load the data from the narivs shapefile into a new database table called rivers.
Exit out of spatialite (using Ctrl+D) and run Datasette against your new database like this:
datasette rivers-database.db \
--load-extension=/usr/local/lib/mod_spatialite.dylib
If you browse to http://localhost:8001/rivers-database/rivers you will see the new table... but the Geometry column will contain unreadable binary data (SpatiaLite uses a custom format based on WKB).
The easiest way to turn this into semi-readable data is to use the SpatiaLite AsGeoJSON function. Try the following using the SQL query interface at http://localhost:8001/rivers-database:
select *, AsGeoJSON(Geometry) from rivers limit 10;
This will give you back an additional column of GeoJSON. You can copy and paste GeoJSON from this column into the debugging tool at geojson.io to visualize it on a map.
To see a more interesting example, try ordering the records with the longest geometry first. Since there are 467,000 rows in the table you will first need to increase the SQL time limit imposed by Datasette:
datasette rivers-database.db \
--load-extension=/usr/local/lib/mod_spatialite.dylib \
--config sql_time_limit_ms:10000
Now try the following query:
select *, AsGeoJSON(Geometry) from rivers
order by length(Geometry) desc limit 10;
Importing GeoJSON polygons using Shapely
Another common form of polygon data is the GeoJSON format. This can be imported into SpatiaLite directly, or by using the Shapely Python library.
Who's On First is an excellent source of openly licensed GeoJSON polygons. Let's import the geographical polygon for Wales. First, we can use the Who's On First Spelunker tool to find the record for Wales:
spelunker.whosonfirst.org/id/404227475
That page includes a link to the GeoJSON record, which can be accessed here:
data.whosonfirst.org/404/227/475/404227475.geojson
Here's Python code to create a SQLite database, enable SpatiaLite, create a places table and then add a record for Wales:
import sqlite3
conn = sqlite3.connect('places.db')
# Enable SpatialLite extension
conn.enable_load_extension(True)
conn.load_extension('/usr/local/lib/mod_spatialite.dylib')
# Create the masic countries table
conn.execute('select InitSpatialMetadata(1)')
conn.execute('create table places (id integer primary key, name text);')
# Add a MULTIPOLYGON Geometry column
conn.execute("SELECT AddGeometryColumn('places', 'geom', 4326, 'MULTIPOLYGON', 2);")
# Add a spatial index against the new column
conn.execute("SELECT CreateSpatialIndex('places', 'geom');")
# Now populate the table
from shapely.geometry.multipolygon import MultiPolygon
from shapely.geometry import shape
import requests
geojson = requests.get('https://data.whosonfirst.org/404/227/475/404227475.geojson').json()
# Convert to "Well Known Text" format
wkt = shape(geojson['geometry']).wkt
# Insert and commit the record
conn.execute("INSERT INTO places (id, name, geom) VALUES(null, ?, GeomFromText(?, 4326))", (
"Wales", wkt
))
conn.commit()
Querying polygons using within()
The within() SQL function can be used to check if a point is within a geometry:
select
name
from
places
where
within(GeomFromText('POINT(-3.1724366 51.4704448)'), places.geom);
The GeomFromText() function takes a string of well-known text. Note that the order used here is longitude then latitude.
To run that same within() query in a way that benefits from the spatial index, use the following:
select
name
from
places
where
within(GeomFromText('POINT(-3.1724366 51.4704448)'), places.geom)
and rowid in (
SELECT pkid FROM idx_places_geom
where xmin < -3.1724366
and xmax > -3.1724366
and ymin < 51.4704448
and ymax > 51.4704448
);
Metadata
Data loves metadata. Any time you run Datasette you can optionally include a JSON file with metadata about your databases and tables. Datasette will then display that information in the web UI.
Run Datasette like this:
datasette database1.db database2.db --metadata metadata.json
Your metadata.json file can look something like this:
{
"title": "Custom title for your index page",
"description": "Some description text can go here",
"license": "ODbL",
"license_url": "https://opendatacommons.org/licenses/odbl/",
"source": "Original Data Source",
"source_url": "http://example.com/"
}
You can optionally use YAML instead of JSON, see Using YAML for metadata.
The above metadata will be displayed on the index page of your Datasette-powered site. The source and license information will also be included in the footer of every page served by Datasette.
Any special HTML characters in description will be escaped. If you want to
include HTML in your description, you can use a description_html property
instead.
Per-database and per-table metadata
Metadata at the top level of the JSON will be shown on the index page and in the footer on every page of the site. The license and source is expected to apply to all of your data.
You can also provide metadata at the per-database or per-table level, like this:
{
"databases": {
"database1": {
"source": "Alternative source",
"source_url": "http://example.com/",
"tables": {
"example_table": {
"description_html": "Custom <em>table</em> description",
"license": "CC BY 3.0 US",
"license_url": "https://creativecommons.org/licenses/by/3.0/us/"
}
}
}
}
}
Each of the top-level metadata fields can be used at the database and table level.
Source, license and about
The three visible metadata fields you can apply to everything, specific databases or specific tables are source, license and about. All three are optional.
source and source_url should be used to indicate where the underlying data came from.
license and license_url should be used to indicate the license under which the data can be used.
about and about_url can be used to link to further information about the project - an accompanying blog entry for example.
For each of these you can provide just the *_url field and Datasette will treat that as the default link label text and display the URL directly on the page.
Specifying units for a column
Datasette supports attaching units to a column, which will be used when displaying values from that column. SI prefixes will be used where appropriate.
Column units are configured in the metadata like so:
{
"databases": {
"database1": {
"tables": {
"example_table": {
"units": {
"column1": "metres",
"column2": "Hz"
}
}
}
}
}
}
Units are interpreted using Pint, and you can see the full list of available units in Pint's unit registry. You can also add custom units to the metadata, which will be registered with Pint:
{
"custom_units": [
"decibel = [] = dB"
]
}
Setting a default sort order
By default Datasette tables are sorted by primary key. You can over-ride this default for a specific table using the "sort" or "sort_desc" metadata properties:
{
"databases": {
"mydatabase": {
"tables": {
"example_table": {
"sort": "created"
}
}
}
}
}
Or use "sort_desc" to sort in descending order:
{
"databases": {
"mydatabase": {
"tables": {
"example_table": {
"sort_desc": "created"
}
}
}
}
}
Setting a custom page size
Datasette defaults to displaing 100 rows per page, for both tables and views. You can change this default page size on a per-table or per-view basis using the "size" key in metadata.json:
{
"databases": {
"mydatabase": {
"tables": {
"example_table": {
"size": 10
}
}
}
}
}
This size can still be over-ridden by passing e.g. ?_size=50 in the querystring.
Setting which columns can be used for sorting
Datasette allows any column to be used for sorting by default. If you need to
control which columns are available for sorting you can do so using the optional
sortable_columns key:
{
"databases": {
"database1": {
"tables": {
"example_table": {
"sortable_columns": [
"height",
"weight"
]
}
}
}
}
}
This will restrict sorting of example_table to just the height and
weight columns.
You can also disable sorting entirely by setting "sortable_columns": []
You can use sortable_columns to enable specific sort orders for a view called name_of_view in the database my_database like so:
{
"databases": {
"my_database": {
"tables": {
"name_of_view": {
"sortable_columns": [
"clicks",
"impressions"
]
}
}
}
}
}
Specifying the label column for a table
Datasette's HTML interface attempts to display foreign key references as labelled hyperlinks. By default, it looks for referenced tables that only have two columns: a primary key column and one other. It assumes that the second column should be used as the link label.
If your table has more than two columns you can specify which column should be
used for the link label with the label_column property:
{
"databases": {
"database1": {
"tables": {
"example_table": {
"label_column": "title"
}
}
}
}
}
Hiding tables
You can hide tables from the database listing view (in the same way that FTS and
SpatiaLite tables are automatically hidden) using "hidden": true:
{
"databases": {
"database1": {
"tables": {
"example_table": {
"hidden": true
}
}
}
}
}
Using YAML for metadata
Datasette accepts YAML as an alternative to JSON for your metadata configuration file. YAML is particularly useful for including multiline HTML and SQL strings.
Here's an example of a metadata.yml file, re-using an example from Canned queries.
title: Demonstrating Metadata from YAML
description_html: |-
<p>This description includes a long HTML string</p>
<ul>
<li>YAML is better for embedding HTML strings than JSON!</li>
</ul>
license: ODbL
license_url: https://opendatacommons.org/licenses/odbl/
databases:
fixtures:
tables:
no_primary_key:
hidden: true
queries:
neighborhood_search:
sql: |-
select neighborhood, facet_cities.name, state
from facetable join facet_cities on facetable.city_id = facet_cities.id
where neighborhood like '%' || :text || '%' order by neighborhood;
title: Search neighborhoods
description_html: |-
<p>This demonstrates <em>simple</em> LIKE search
The metadata.yml file is passed to Datasette using the same --metadata option:
datasette fixtures.db --metadata metadata.yml
Configuration
Using --config
Datasette provides a number of configuration options. These can be set using the --config name:value option to datasette serve.
You can set multiple configuration options at once like this:
datasette mydatabase.db \
--config default_page_size:50 \
--config sql_time_limit_ms:3500 \
--config max_returned_rows:2000
Configuration directory mode
Normally you configure Datasette using command-line options. For a Datasette instance with custom templates, custom plugins, a static directory and several databases this can get quite verbose:
$ datasette one.db two.db \
--metadata.json \
--template-dir=templates/ \
--plugins-dir=plugins \
--static css:css
As an alternative to this, you can run Datasette in configuration directory mode. Create a directory with the following structure:
# In a directory called my-app:
my-app/one.db
my-app/two.db
my-app/metadata.json
my-app/templates/index.html
my-app/plugins/my_plugin.py
my-app/static/my.css
Now start Datasette by providing the path to that directory:
$ datasette my-app/
Datasette will detect the files in that directory and automatically configure itself using them. It will serve all *.db files that it finds, will load metadata.json if it exists, and will load the templates, plugins and static folders if they are present.
The files that can be included in this directory are as follows. All are optional.
*.db- SQLite database files that will be served by Datasettemetadata.json- Metadata for those databases -metadata.yamlormetadata.ymlcan be used as wellinspect-data.json- the result of runningdatasette inspect- any database files listed here will be treated as immutable, so they should not be changed while Datasette is runningconfig.json- settings that would normally be passed using--config- here they should be stored as a JSON object of key/value pairstemplates/- a directory containing Custom templatesplugins/- a directory containing plugins, see Writing one-off pluginsstatic/- a directory containing static files - these will be served from/static/filename.txt, see Serving static files
Configuration options
The followig options can be set using --config name:value, or by storing them in the config.json file for use with Configuration directory mode.
default_page_size
The default number of rows returned by the table page. You can over-ride this on a per-page basis using the ?_size=80 querystring parameter, provided you do not specify a value higher than the max_returned_rows setting. You can set this default using --config like so:
datasette mydatabase.db --config default_page_size:50
sql_time_limit_ms
By default, queries have a time limit of one second. If a query takes longer than this to run Datasette will terminate the query and return an error.
If this time limit is too short for you, you can customize it using the sql_time_limit_ms limit - for example, to increase it to 3.5 seconds:
datasette mydatabase.db --config sql_time_limit_ms:3500
You can optionally set a lower time limit for an individual query using the ?_timelimit=100 querystring argument:
/my-database/my-table?qSpecies=44&_timelimit=100
This would set the time limit to 100ms for that specific query. This feature is useful if you are working with databases of unknown size and complexity - a query that might make perfect sense for a smaller table could take too long to execute on a table with millions of rows. By setting custom time limits you can execute queries "optimistically" - e.g. give me an exact count of rows matching this query but only if it takes less than 100ms to calculate.
max_returned_rows
Datasette returns a maximum of 1,000 rows of data at a time. If you execute a query that returns more than 1,000 rows, Datasette will return the first 1,000 and include a warning that the result set has been truncated. You can use OFFSET/LIMIT or other methods in your SQL to implement pagination if you need to return more than 1,000 rows.
You can increase or decrease this limit like so:
datasette mydatabase.db --config max_returned_rows:2000
num_sql_threads
Maximum number of threads in the thread pool Datasette uses to execute SQLite queries. Defaults to 3.
datasette mydatabase.db --config num_sql_threads:10
allow_facet
Allow users to specify columns they would like to facet on using the ?_facet=COLNAME URL parameter to the table view.
This is enabled by default. If disabled, facets will still be displayed if they have been specifically enabled in metadata.json configuration for the table.
Here's how to disable this feature:
datasette mydatabase.db --config allow_facet:off
default_facet_size
The default number of unique rows returned by Facets is 30. You can customize it like this:
datasette mydatabase.db --config default_facet_size:50
facet_time_limit_ms
This is the time limit Datasette allows for calculating a facet, which defaults to 200ms:
datasette mydatabase.db --config facet_time_limit_ms:1000
facet_suggest_time_limit_ms
When Datasette calculates suggested facets it needs to run a SQL query for every column in your table. The default for this time limit is 50ms to account for the fact that it needs to run once for every column. If the time limit is exceeded the column will not be suggested as a facet.
You can increase this time limit like so:
datasette mydatabase.db --config facet_suggest_time_limit_ms:500
suggest_facets
Should Datasette calculate suggested facets? On by default, turn this off like so:
datasette mydatabase.db --config suggest_facets:off
allow_download
Should users be able to download the original SQLite database using a link on the database index page? This is turned on by default - to disable database downloads, use the following:
datasette mydatabase.db --config allow_download:off
default_cache_ttl
Default HTTP caching max-age header in seconds, used for Cache-Control: max-age=X. Can be over-ridden on a per-request basis using the ?_ttl= querystring parameter. Set this to 0 to disable HTTP caching entirely. Defaults to 5 seconds.
datasette mydatabase.db --config default_cache_ttl:60
default_cache_ttl_hashed
Default HTTP caching max-age for responses served using using the hashed-urls mechanism. Defaults to 365 days (31536000 seconds).
datasette mydatabase.db --config default_cache_ttl_hashed:10000
cache_size_kb
Sets the amount of memory SQLite uses for its per-connection cache, in KB.
datasette mydatabase.db --config cache_size_kb:5000
allow_csv_stream
Enables the CSV export feature where an entire table (potentially hundreds of thousands of rows) can be exported as a single CSV file. This is turned on by default - you can turn it off like this:
datasette mydatabase.db --config allow_csv_stream:off
max_csv_mb
The maximum size of CSV that can be exported, in megabytes. Defaults to 100MB. You can disable the limit entirely by settings this to 0:
datasette mydatabase.db --config max_csv_mb:0
truncate_cells_html
In the HTML table view, truncate any strings that are longer than this value. The full value will still be available in CSV, JSON and on the individual row HTML page. Set this to 0 to disable truncation.
datasette mydatabase.db --config truncate_cells_html:0
force_https_urls
Forces self-referential URLs in the JSON output to always use the https://
protocol. This is useful for cases where the application itself is hosted using
HTTP but is served to the outside world via a proxy that enables HTTPS.
datasette mydatabase.db --config force_https_urls:1
hash_urls
When enabled, this setting causes Datasette to append a content hash of the database file to the URL path for every table and query within that database.
When combined with far-future expire headers this ensures that queries can be cached forever, safe in the knowledge that any modifications to the database itself will result in new, uncachcacheed URL paths.
datasette mydatabase.db --config hash_urls:1
template_debug
This setting enables template context debug mode, which is useful to help understand what variables are available to custom templates when you are writing them.
Enable it like this:
datasette mydatabase.db --config template_debug:1
Now you can add ?_context=1 or &_context=1 to any Datasette page to see the context that was passed to that template.
Some examples:
base_url
If you are running Datasette behind a proxy, it may be useful to change the root URL used for the Datasette instance.
For example, if you are sending traffic from https://www.example.com/tools/datasette/ through to a proxied Datasette instance you may wish Datasette to use /tools/datasette/ as its root URL.
You can do that like so:
datasette mydatabase.db --config base_url:/tools/datasette/
Configuring the secret
Datasette uses a secret string to sign secure values such as cookies.
If you do not provide a secret, Datasette will create one when it starts up. This secret will reset every time the Datasette server restarts though, so things like authentication cookies will not stay valid between restarts.
You can pass a secret to Datasette in two ways: with the --secret command-line option or by setting a DATASETTE_SECRET environment variable.
$ datasette mydb.db --secret=SECRET_VALUE_HERE
Or:
$ export DATASETTE_SECRET=SECRET_VALUE_HERE
$ datasette mydb.db
One way to generate a secure random secret is to use Python like this:
$ python3 -c 'import secrets; print(secrets.token_hex(32))'
cdb19e94283a20f9d42cca50c5a4871c0aa07392db308755d60a1a5b9bb0fa52
Plugin authors make use of this signing mechanism in their plugins using .sign(value, namespace="default") and .unsign(value, namespace="default").
Using secrets with datasette publish
The datasette publish and datasette package commands both generate a secret for you automatically when Datasette is deployed.
This means that every time you deploy a new version of a Datasette project, a new secret will be generated. This will cause signed cookies to become inalid on every fresh deploy.
You can fix this by creating a secret that will be used for multiple deploys and passing it using the --secret option:
datasette publish cloudrun mydb.db --service=my-service --secret=cdb19e94283a20f9d42cca5
Introspection
Datasette includes some pages and JSON API endpoints for introspecting the current instance. These can be used to understand some of the internals of Datasette and to see how a particular instance has been configured.
Each of these pages can be viewed in your browser. Add .json to the URL to get back the contents as JSON.
/-/metadata
Shows the contents of the metadata.json file that was passed to datasette serve, if any. Metadata example:
{
"license": "CC Attribution 4.0 License",
"license_url": "http://creativecommons.org/licenses/by/4.0/",
"source": "fivethirtyeight/data on GitHub",
"source_url": "https://github.com/fivethirtyeight/data",
"title": "Five Thirty Eight",
"databases": {
}
}
/-/versions
Shows the version of Datasette, Python and SQLite. Versions example:
{
"datasette": {
"version": "0.21"
},
"python": {
"full": "3.6.5 (default, May 5 2018, 03:07:21) \n[GCC 6.3.0 20170516]",
"version": "3.6.5"
},
"sqlite": {
"extensions": {
"json1": null
},
"fts_versions": [
"FTS5",
"FTS4",
"FTS3"
],
"compile_options": [
"COMPILER=gcc-6.3.0 20170516",
"ENABLE_FTS3",
"ENABLE_FTS4",
"ENABLE_FTS5",
"ENABLE_JSON1",
"ENABLE_RTREE",
"THREADSAFE=1"
],
"version": "3.16.2"
}
}
/-/plugins
Shows a list of currently installed plugins and their versions. Plugins example:
[
{
"name": "datasette_cluster_map",
"static": true,
"templates": false,
"version": "0.10",
"hooks": ["extra_css_urls", "extra_js_urls", "extra_body_script"]
}
]
Add ?all=1 to include details of the default plugins baked into Datasette.
/-/config
Shows the Configuration options for this instance of Datasette. Config example:
{
"default_facet_size": 30,
"default_page_size": 100,
"facet_suggest_time_limit_ms": 50,
"facet_time_limit_ms": 1000,
"max_returned_rows": 1000,
"sql_time_limit_ms": 1000
}
/-/databases
Shows currently attached databases. Databases example:
[
{
"hash": null,
"is_memory": false,
"is_mutable": true,
"name": "fixtures",
"path": "fixtures.db",
"size": 225280
}
]
/-/threads
Shows details of threads and asyncio tasks. Threads example:
{
"num_threads": 2,
"threads": [
{
"daemon": false,
"ident": 4759197120,
"name": "MainThread"
},
{
"daemon": true,
"ident": 123145319682048,
"name": "Thread-1"
},
],
"num_tasks": 3,
"tasks": [
"<Task pending coro=<RequestResponseCycle.run_asgi() running at uvicorn/protocols/http/httptools_impl.py:385> cb=[set.discard()]>",
"<Task pending coro=<Server.serve() running at uvicorn/main.py:361> wait_for=<Future pending cb=[<TaskWakeupMethWrapper object at 0x10365c3d0>()]> cb=[run_until_complete.<locals>.<lambda>()]>",
"<Task pending coro=<LifespanOn.main() running at uvicorn/lifespan/on.py:48> wait_for=<Future pending cb=[<TaskWakeupMethWrapper object at 0x10364f050>()]>>"
]
}
/-/actor
Shows the currently authenticated actor. Useful for debugging Datasette authentication plugins.
{
"actor": {
"id": 1,
"username": "some-user"
}
}
/-/messages
The debug tool at /-/messages can be used to set flash messages to try out that feature. See .add_message(request, message, message_type=datasette.INFO) for details of this feature.
Customization
Datasette provides a number of ways of customizing the way data is displayed.
Custom CSS and JavaScript
When you launch Datasette, you can specify a custom metadata file like this:
datasette mydb.db --metadata metadata.json
Your metadata.json file can include links that look like this:
{
"extra_css_urls": [
"https://simonwillison.net/static/css/all.bf8cd891642c.css"
],
"extra_js_urls": [
"https://code.jquery.com/jquery-3.2.1.slim.min.js"
]
}
The extra CSS and JavaScript files will be linked in the <head> of every page.
You can also specify a SRI (subresource integrity hash) for these assets:
{
"extra_css_urls": [
{
"url": "https://simonwillison.net/static/css/all.bf8cd891642c.css",
"sri": "sha384-9qIZekWUyjCyDIf2YK1FRoKiPJq4PHt6tp/ulnuuyRBvazd0hG7pWbE99zvwSznI"
}
],
"extra_js_urls": [
{
"url": "https://code.jquery.com/jquery-3.2.1.slim.min.js",
"sri": "sha256-k2WSCIexGzOj3Euiig+TlR8gA0EmPjuc79OEeY5L45g="
}
]
}
Modern browsers will only execute the stylesheet or JavaScript if the SRI hash matches the content served. You can generate hashes using www.srihash.org
CSS classes on the <body>
Every default template includes CSS classes in the body designed to support custom styling.
The index template (the top level page at /) gets this:
<body class="index">
The database template (/dbname) gets this:
<body class="db db-dbname">
The custom SQL template (/dbname?sql=...) gets this:
<body class="query db-dbname">
A canned query template (/dbname/queryname) gets this:
<body class="query db-dbname query-queryname">
The table template (/dbname/tablename) gets:
<body class="table db-dbname table-tablename">
The row template (/dbname/tablename/rowid) gets:
<body class="row db-dbname table-tablename">
The db-x and table-x classes use the database or table names themselves if
they are valid CSS identifiers. If they aren't, we strip any invalid
characters out and append a 6 character md5 digest of the original name, in
order to ensure that multiple tables which resolve to the same stripped
character version still have different CSS classes.
Some examples:
"simple" => "simple"
"MixedCase" => "MixedCase"
"-no-leading-hyphens" => "no-leading-hyphens-65bea6"
"_no-leading-underscores" => "no-leading-underscores-b921bc"
"no spaces" => "no-spaces-7088d7"
"-" => "336d5e"
"no $ characters" => "no--characters-59e024"
<td> and <th> elements also get custom CSS classes reflecting the
database column they are representing, for example:
<table>
<thead>
<tr>
<th class="col-id" scope="col">id</th>
<th class="col-name" scope="col">name</th>
</tr>
</thead>
<tbody>
<tr>
<td class="col-id"><a href="...">1</a></td>
<td class="col-name">SMITH</td>
</tr>
</tbody>
</table>
Serving static files
Datasette can serve static files for you, using the --static option.
Consider the following directory structure:
metadata.json
static/styles.css
static/app.js
You can start Datasette using --static static:static/ to serve those
files from the /static/ mount point:
$ datasette -m metadata.json --static static:static/ --memory
The following URLs will now serve the content from those CSS and JS files:
http://localhost:8001/static/styles.css
http://localhost:8001/static/app.js
You can reference those files from metadata.json like so:
{
"extra_css_urls": [
"/static/styles.css"
],
"extra_js_urls": [
"/static/app.js"
]
}
Publishing static assets
The datasette publish command can be used to publish your static assets, using the same syntax as above:
$ datasette publish cloudrun mydb.db --static static:static/
This will upload the contents of the static/ directory as part of the
deployment, and configure Datasette to correctly serve the assets.
Custom templates
By default, Datasette uses default templates that ship with the package.
You can over-ride these templates by specifying a custom --template-dir like
this:
datasette mydb.db --template-dir=mytemplates/
Datasette will now first look for templates in that directory, and fall back on the defaults if no matches are found.
It is also possible to over-ride templates on a per-database, per-row or per- table basis.
The lookup rules Datasette uses are as follows:
Index page (/):
index.html
Database page (/mydatabase):
database-mydatabase.html
database.html
Custom query page (/mydatabase?sql=...):
query-mydatabase.html
query.html
Canned query page (/mydatabase/canned-query):
query-mydatabase-canned-query.html
query-mydatabase.html
query.html
Table page (/mydatabase/mytable):
table-mydatabase-mytable.html
table.html
Row page (/mydatabase/mytable/id):
row-mydatabase-mytable.html
row.html
Table of rows and columns include on table page:
_table-table-mydatabase-mytable.html
_table-mydatabase-mytable.html
_table.html
Table of rows and columns include on row page:
_table-row-mydatabase-mytable.html
_table-mydatabase-mytable.html
_table.html
If a table name has spaces or other unexpected characters in it, the template
filename will follow the same rules as our custom <body> CSS classes - for
example, a table called "Food Trucks" will attempt to load the following
templates:
table-mydatabase-Food-Trucks-399138.html
table.html
You can find out which templates were considered for a specific page by viewing source on that page and looking for an HTML comment at the bottom. The comment will look something like this:
<!-- Templates considered: *query-mydb-tz.html, query-mydb.html, query.html -->
This example is from the canned query page for a query called "tz" in the
database called "mydb". The asterisk shows which template was selected - so in
this case, Datasette found a template file called query-mydb-tz.html and
used that - but if that template had not been found, it would have tried for
query-mydb.html or the default query.html.
It is possible to extend the default templates using Jinja template
inheritance. If you want to customize EVERY row template with some additional
content you can do so by creating a row.html template like this:
{% extends "default:row.html" %}
{% block content %}
<h1>EXTRA HTML AT THE TOP OF THE CONTENT BLOCK</h1>
<p>This line renders the original block:</p>
{{ super() }}
{% endblock %}
Note the default:row.html template name, which ensures Jinja will inherit
from the default template.
The _table.html template is included by both the row and the table pages,
and a list of rows. The default _table.html template renders them as an
HTML template and can be seen here.
You can provide a custom template that applies to all of your databases and tables, or you can provide custom templates for specific tables using the template naming scheme described above.
If you want to present your data in a format other than an HTML table, you
can do so by looping through display_rows in your own _table.html
template. You can use {{ row["column_name"] }} to output the raw value
of a specific column.
If you want to output the rendered HTML version of a column, including any
links to foreign keys, you can use {{ row.display("column_name") }}.
Here is an example of a custom _table.html template:
{% for row in display_rows %}
<div>
<h2>{{ row["title"] }}</h2>
<p>{{ row["description"] }}<lp>
<p>Category: {{ row.display("category_id") }}</p>
</div>
{% endfor %}
Custom pages
You can add templated pages to your Datasette instance by creating HTML files in a pages directory within your templates directory.
For example, to add a custom page that is served at http://localhost/about you would create a file in templates/pages/about.html, then start Datasette like this:
$ datasette mydb.db --template-dir=templates/
You can nest directories within pages to create a nested structure. To create a http://localhost:8001/about/map page you would create templates/pages/about/map.html.
Custom headers and status codes
Custom pages default to being served with a content-type of text/html; charset=utf-8 and a 200 status code. You can change these by calling a custom function from within your template.
For example, to serve a custom page with a 418 I'm a teapot HTTP status code, create a file in pages/teapot.html containing the following:
{{ custom_status(418) }}
<html>
<head><title>Teapot</title></head>
<body>
I'm a teapot
</body>
</html>
To serve a custom HTTP header, add a custom_header(name, value) function call. For example:
{{ custom_status(418) }}
{{ custom_header("x-teapot", "I am") }}
<html>
<head><title>Teapot</title></head>
<body>
I'm a teapot
</body>
</html>
You can verify this is working using curl like this:
$ curl -I 'http://127.0.0.1:8001/teapot'
HTTP/1.1 418
date: Sun, 26 Apr 2020 18:38:30 GMT
server: uvicorn
x-teapot: I am
content-type: text/html; charset=utf-8
Custom redirects
You can use the custom_redirect(location) function to redirect users to another page, for example in a file called pages/datasette.html:
{{ custom_redirect("https://github.com/simonw/datasette") }}
Now requests to http://localhost:8001/datasette will result in a redirect.
These redirects are served with a 301 Found status code by default. You can send a 301 Moved Permanently code by passing 301 as the second argument to the function:
{{ custom_redirect("https://github.com/simonw/datasette", 301) }}
Plugins
Datasette's plugin system allows additional features to be implemented as Python code (or front-end JavaScript) which can be wrapped up in a separate Python package. The underlying mechanism uses pluggy.
See Datasette Plugins for a list of existing plugins, or take a look at the datasette-plugin topic on GitHub.
Things you can do with plugins include:
- Add visualizations to Datasette, for example datasette-cluster-map and datasette-vega.
- Make new custom SQL functions available for use within Datasette, for example datasette-haversine and datasette-jellyfish.
- Define custom output formats with custom extensions, for example datasette-atom and datasette-ics.
- Add template functions that can be called within your Jinja custom templates, for example datasette-render-markdown.
- Customize how database values are rendered in the Datasette interface, for example datasette-render-binary and datasette-pretty-json.
- Customize how Datasette's authentication and permissions systems work, for example datasette-auth-tokens and datasette-permissions-sql.
Installing plugins
If a plugin has been packaged for distribution using setuptools you can use the plugin by installing it alongside Datasette in the same virtual environment or Docker container.
You can install plugins using the datasette install command:
datasette install datasette-vega
You can uninstall plugins with datasette uninstall:
datasette uninstall datasette-vega
These ommands are thin wrappers around pip install and pip uninstall, which ensure they run pip in the same virtual environment as Datasette itself.
One-off plugins using --plugins-dir
You can also define one-off per-project plugins by saving them as plugin_name.py functions in a plugins/ folder and then passing that folder to datasette using the --plugins-dir option:
datasette mydb.db --plugins-dir=plugins/
Deploying plugins using datasette publish
The datasette publish and datasette package commands both take an optional --install argument. You can use this one or more times to tell Datasette to pip install specific plugins as part of the process:
datasette publish cloudrun mydb.db --install=datasette-vega
You can use the name of a package on PyPI or any of the other valid arguments to pip install such as a URL to a .zip file:
datasette publish cloudrun mydb.db \
--install=https://url-to-my-package.zip
Seeing what plugins are installed
You can see a list of installed plugins by navigating to the /-/plugins page of your Datasette instance - for example: https://fivethirtyeight.datasettes.com/-/plugins
You can also use the datasette plugins command:
$ datasette plugins
[
{
"name": "datasette_json_html",
"static": false,
"templates": false,
"version": "0.4.0"
}
]
If you run datasette plugins --all it will include default plugins that ship as part of Datasette:
$ datasette plugins --all
[
{
"name": "datasette.sql_functions",
"static": false,
"templates": false,
"version": null
},
{
"name": "datasette.publish.cloudrun",
"static": false,
"templates": false,
"version": null
},
{
"name": "datasette.facets",
"static": false,
"templates": false,
"version": null
},
{
"name": "datasette.publish.heroku",
"static": false,
"templates": false,
"version": null
}
]
You can add the --plugins-dir= option to include any plugins found in that directory.
Plugin configuration
Plugins can have their own configuration, embedded in a Metadata file. Configuration options for plugins live within a "plugins" key in that file, which can be included at the root, database or table level.
Here is an example of some plugin configuration for a specific table:
{
"databases: {
"sf-trees": {
"tables": {
"Street_Tree_List": {
"plugins": {
"datasette-cluster-map": {
"latitude_column": "lat",
"longitude_column": "lng"
}
}
}
}
}
}
}
This tells the datasette-cluster-map column which latitude and longitude columns should be used for a table called Street_Tree_List inside a database file called sf-trees.db.
Secret configuration values
Any values embedded in metadata.json will be visible to anyone who views the /-/metadata page of your Datasette instance. Some plugins may need configuration that should stay secret - API keys for example. There are two ways in which you can store secret configuration values.
As environment variables. If your secret lives in an environment variable that is available to the Datasette process, you can indicate that the configuration value should be read from that environment variable like so:
{
"plugins": {
"datasette-auth-github": {
"client_secret": {
"$env": "GITHUB_CLIENT_SECRET"
}
}
}
}
As values in separate files. Your secrets can also live in files on disk. To specify a secret should be read from a file, provide the full file path like this:
{
"plugins": {
"datasette-auth-github": {
"client_secret": {
"$file": "/secrets/client-secret"
}
}
}
}
If you are publishing your data using the datasette publish family of commands, you can use the --plugin-secret option to set these secrets at publish time. For example, using Heroku you might run the following command:
$ datasette publish heroku my_database.db \
--name my-heroku-app-demo \
--install=datasette-auth-github \
--plugin-secret datasette-auth-github client_id your_client_id \
--plugin-secret datasette-auth-github client_secret your_client_secret
Writing plugins
You can write one-off plugins that apply to just one Datasette instance, or you can write plugins which can be installed using pip and can be shipped to the Python Package Index (PyPI) for other people to install.
Writing one-off plugins
The easiest way to write a plugin is to create a my_plugin.py file and drop it into your plugins/ directory. Here is an example plugin, which adds a new custom SQL function called hello_world() which takes no arguments and returns the string Hello world!.
from datasette import hookimpl
@hookimpl
def prepare_connection(conn):
conn.create_function('hello_world', 0, lambda: 'Hello world!')
If you save this in plugins/my_plugin.py you can then start Datasette like this:
datasette serve mydb.db --plugins-dir=plugins/
Now you can navigate to http://localhost:8001/mydb and run this SQL:
select hello_world();
To see the output of your plugin.
Starting an installable plugin using cookiecutter
Plugins that can be installed should be written as Python packages using a setup.py file.
The easiest way to start writing one an installable plugin is to use the datasette-plugin cookiecutter template. This creates a new plugin structure for you complete with an example test and GitHub Actions workflows for testing and publishing your plugin.
Install cookiecutter and then run this command to start building a plugin using the template:
cookiecutter gh:simonw/datasette-plugin
Read a cookiecutter template for writing Datasette plugins for more information about this template.
Packaging a plugin
Plugins can be packaged using Python setuptools. You can see an example of a packaged plugin at https://github.com/simonw/datasette-plugin-demos
The example consists of two files: a setup.py file that defines the plugin:
from setuptools import setup
VERSION = '0.1'
setup(
name='datasette-plugin-demos',
description='Examples of plugins for Datasette',
author='Simon Willison',
url='https://github.com/simonw/datasette-plugin-demos',
license='Apache License, Version 2.0',
version=VERSION,
py_modules=['datasette_plugin_demos'],
entry_points={
'datasette': [
'plugin_demos = datasette_plugin_demos'
]
},
install_requires=['datasette']
)
And a Python module file, datasette_plugin_demos.py, that implements the plugin:
from datasette import hookimpl
import random
@hookimpl
def prepare_jinja2_environment(env):
env.filters['uppercase'] = lambda u: u.upper()
@hookimpl
def prepare_connection(conn):
conn.create_function('random_integer', 2, random.randint)
Having built a plugin in this way you can turn it into an installable package using the following command:
python3 setup.py sdist
This will create a .tar.gz file in the dist/ directory.
You can then install your new plugin into a Datasette virtual environment or Docker container using pip:
pip install datasette-plugin-demos-0.1.tar.gz
To learn how to upload your plugin to PyPI for use by other people, read the PyPA guide to Packaging and distributing projects.
Static assets
If your plugin has a static/ directory, Datasette will automatically configure itself to serve those static assets from the following path:
/-/static-plugins/NAME_OF_PLUGIN_PACKAGE/yourfile.js
See the datasette-plugin-demos repository for an example of how to create a package that includes a static folder.
Custom templates
If your plugin has a templates/ directory, Datasette will attempt to load templates from that directory before it uses its own default templates.
The priority order for template loading is:
- templates from the
--template-dirargument, if specified - templates from the
templates/directory in any installed plugins - default templates that ship with Datasette
See Customization for more details on how to write custom templates, including which filenames to use to customize which parts of the Datasette UI.
Writing plugins that accept configuration
When you are writing plugins, you can access plugin configuration like this using the datasette plugin_config() method. If you know you need plugin configuration for a specific table, you can access it like this:
plugin_config = datasette.plugin_config(
"datasette-cluster-map", database="sf-trees", table="Street_Tree_List"
)
This will return the {"latitude_column": "lat", "longitude_column": "lng"} in the above example.
If it cannot find the requested configuration at the table layer, it will fall back to the database layer and then the root layer. For example, a user may have set the plugin configuration option like so:
{
"databases: {
"sf-trees": {
"plugins": {
"datasette-cluster-map": {
"latitude_column": "xlat",
"longitude_column": "xlng"
}
}
}
}
}
In this case, the above code would return that configuration for ANY table within the sf-trees database.
The plugin configuration could also be set at the top level of metadata.json:
{
"title": "This is the top-level title in metadata.json",
"plugins": {
"datasette-cluster-map": {
"latitude_column": "xlat",
"longitude_column": "xlng"
}
}
}
Now that datasette-cluster-map plugin configuration will apply to every table in every database.
Plugin hooks
Datasette plugins use plugin hooks to customize Datasette's behavior. These hooks are powered by the pluggy plugin system.
Each plugin can implement one or more hooks using the @hookimpl decorator against a function named that matches one of the hooks documented on this page.
When you implement a plugin hook you can accept any or all of the parameters that are documented as being passed to that hook.
For example, you can implement the render_cell plugin hook like this even though the full documented hook signature is render_cell(value, column, table, database, datasette):
@hookimpl
def render_cell(value, column):
if column == "stars":
return "*" * int(value)
List of plugin hooks
- prepare_connection(conn, database, datasette)
- prepare_jinja2_environment(env)
- extra_template_vars(template, database, table, columns, view_name, request, datasette)
- extra_css_urls(template, database, table, columns, view_name, request, datasette)
- extra_js_urls(template, database, table, columns, view_name, request, datasette)
- extra_body_script(template, database, table, columns, view_name, request, datasette)
- publish_subcommand(publish)
- render_cell(value, column, table, database, datasette)
- register_output_renderer(datasette)
- register_routes()
- register_facet_classes()
- asgi_wrapper(datasette)
- startup(datasette)
- canned_queries(datasette, database, actor)
- actor_from_request(datasette, request)
- permission_allowed(datasette, actor, action, resource)
- register_magic_parameters(datasette)
- forbidden(datasette, request, message)
prepare_connection(conn, database, datasette)
conn- sqlite3 connection object- The connection that is being opened
database- string- The name of the database
datasette- Datasette class- You can use this to access plugin configuration options via
datasette.plugin_config(your_plugin_name)
This hook is called when a new SQLite database connection is created. You can use it to register custom SQL functions, aggregates and collations. For example:
from datasette import hookimpl
import random
@hookimpl
def prepare_connection(conn):
conn.create_function('random_integer', 2, random.randint)
This registers a SQL function called random_integer which takes two
arguments and can be called like this:
select random_integer(1, 10);
Examples: datasette-jellyfish, datasette-jq, datasette-haversine, datasette-rure
prepare_jinja2_environment(env)
env- jinja2 Environment- The template environment that is being prepared
This hook is called with the Jinja2 environment that is used to evaluate Datasette HTML templates. You can use it to do things like register custom template filters, for example:
from datasette import hookimpl
@hookimpl
def prepare_jinja2_environment(env):
env.filters['uppercase'] = lambda u: u.upper()
You can now use this filter in your custom templates like so:
Table name: {{ table|uppercase }}
extra_template_vars(template, database, table, columns, view_name, request, datasette)
Extra template variables that should be made available in the rendered template context.
template- string- The template that is being rendered, e.g.
database.html database- string or None- The name of the database, or
Noneif the page does not correspond to a database (e.g. the root page) table- string or None- The name of the table, or
Noneif the page does not correct to a table columns- list of strings or None- The names of the database columns that will be displayed on this page.
Noneif the page does not contain a table. view_name- string- The name of the view being displayed. (
index,database,table, androware the most important ones.) request- object or None- The current HTTP Request object. This can be
Noneif the request object is not available. datasette- Datasette class- You can use this to access plugin configuration options via
datasette.plugin_config(your_plugin_name)
This hook can return one of three different types:
- Dictionary
- If you return a dictionary its keys and values will be merged into the template context.
- Function that returns a dictionary
- If you return a function it will be executed. If it returns a dictionary those values will will be merged into the template context.
- Function that returns an awaitable function that returns a dictionary
- You can also return a function which returns an awaitable function which returns a dictionary.
Datasette runs Jinja2 in async mode, which means you can add awaitable functions to the template scope and they will be automatically awaited when they are rendered by the template.
Here's an example plugin that adds a "user_agent" variable to the template context containing the current request's User-Agent header:
@hookimpl
def extra_template_vars(request):
return {
"user_agent": request.headers.get("user-agent")
}
This example returns an awaitable function which adds a list of hidden_table_names to the context:
@hookimpl
def extra_template_vars(datasette, database):
async def hidden_table_names():
if database:
db = datasette.databases[database]
return {"hidden_table_names": await db.hidden_table_names()}
else:
return {}
return hidden_table_names
And here's an example which adds a sql_first(sql_query) function which executes a SQL statement and returns the first column of the first row of results:
@hookimpl
def extra_template_vars(datasette, database):
async def sql_first(sql, dbname=None):
dbname = dbname or database or next(iter(datasette.databases.keys()))
return (await datasette.execute(dbname, sql)).rows[0][0]
return {"sql_first": sql_first}
You can then use the new function in a template like so:
SQLite version: {{ sql_first("select sqlite_version()") }}
Examples: datasette-search-all, datasette-template-sql
extra_css_urls(template, database, table, columns, view_name, request, datasette)
Same arguments as extra_template_vars(...)
Return a list of extra CSS URLs that should be included on the page. These can take advantage of the CSS class hooks described in Customization.
This can be a list of URLs:
from datasette import hookimpl
@hookimpl
def extra_css_urls():
return [
'https://stackpath.bootstrapcdn.com/bootstrap/4.1.0/css/bootstrap.min.css'
]
Or a list of dictionaries defining both a URL and an SRI hash:
from datasette import hookimpl
@hookimpl
def extra_css_urls():
return [{
'url': 'https://stackpath.bootstrapcdn.com/bootstrap/4.1.0/css/bootstrap.min.css',
'sri': 'sha384-9gVQ4dYFwwWSjIDZnLEWnxCjeSWFphJiwGPXr1jddIhOegiu1FwO5qRGvFXOdJZ4',
}]
This function can also return an awaitable function, useful if it needs to run any async code:
from datasette import hookimpl
@hookimpl
def extra_css_urls(datasette):
async def inner():
db = datasette.get_database()
results = await db.execute("select url from css_files")
return [r[0] for r in results]
return inner
Examples: datasette-cluster-map, datasette-vega
extra_js_urls(template, database, table, columns, view_name, request, datasette)
Same arguments as extra_template_vars(...)
This works in the same way as extra_css_urls() but for JavaScript. You can
return a list of URLs, a list of dictionaries or an awaitable function that returns those things:
from datasette import hookimpl
@hookimpl
def extra_js_urls():
return [{
'url': 'https://code.jquery.com/jquery-3.3.1.slim.min.js',
'sri': 'sha384-q8i/X+965DzO0rT7abK41JStQIAqVgRVzpbzo5smXKp4YfRvH+8abtTE1Pi6jizo',
}]
You can also return URLs to files from your plugin's static/ directory, if
you have one:
from datasette import hookimpl
@hookimpl
def extra_js_urls():
return [
'/-/static-plugins/your-plugin/app.js'
]
Examples: datasette-cluster-map, datasette-vega
extra_body_script(template, database, table, columns, view_name, request, datasette)
Extra JavaScript to be added to a <script> block at the end of the <body> element on the page.
Same arguments as extra_template_vars(...)
The template, database, table and view_name options can be used to return different code depending on which template is being rendered and which database or table are being processed.
The datasette instance is provided primarily so that you can consult any plugin configuration options that may have been set, using the datasette.plugin_config(plugin_name) method documented above.
The string that you return from this function will be treated as "safe" for inclusion in a <script> block directly in the page, so it is up to you to apply any necessary escaping.
You can also return an awaitable function that returns a string.
Example: datasette-cluster-map
publish_subcommand(publish)
publish- Click publish command group- The Click command group for the
datasette publishsubcommand
This hook allows you to create new providers for the datasette publish
command. Datasette uses this hook internally to implement the default now
and heroku subcommands, so you can read
their source
to see examples of this hook in action.
Let's say you want to build a plugin that adds a datasette publish my_hosting_provider --api_key=xxx mydatabase.db publish command. Your implementation would start like this:
from datasette import hookimpl
from datasette.publish.common import add_common_publish_arguments_and_options
import click
@hookimpl
def publish_subcommand(publish):
@publish.command()
@add_common_publish_arguments_and_options
@click.option(
"-k",
"--api_key",
help="API key for talking to my hosting provider",
)
def my_hosting_provider(
files,
metadata,
extra_options,
branch,
template_dir,
plugins_dir,
static,
install,
plugin_secret,
version_note,
secret,
title,
license,
license_url,
source,
source_url,
about,
about_url,
api_key,
):
# Your implementation goes here
Examples: datasette-publish-fly, datasette-publish-now
render_cell(value, column, table, database, datasette)
Lets you customize the display of values within table cells in the HTML table view.
value- string, integer or None- The value that was loaded from the database
column- string- The name of the column being rendered
table- string or None- The name of the table - or
Noneif this is a custom SQL query database- string- The name of the database
datasette- Datasette class- You can use this to access plugin configuration options via
datasette.plugin_config(your_plugin_name)
If your hook returns None, it will be ignored. Use this to indicate that your hook is not able to custom render this particular value.
If the hook returns a string, that string will be rendered in the table cell.
If you want to return HTML markup you can do so by returning a jinja2.Markup object.
Datasette will loop through all available render_cell hooks and display the value returned by the first one that does not return None.
Here is an example of a custom render_cell() plugin which looks for values that are a JSON string matching the following format:
{"href": "https://www.example.com/", "label": "Name"}
If the value matches that pattern, the plugin returns an HTML link element:
from datasette import hookimpl
import jinja2
import json
@hookimpl
def render_cell(value):
# Render {"href": "...", "label": "..."} as link
if not isinstance(value, str):
return None
stripped = value.strip()
if not stripped.startswith("{") and stripped.endswith("}"):
return None
try:
data = json.loads(value)
except ValueError:
return None
if not isinstance(data, dict):
return None
if set(data.keys()) != {"href", "label"}:
return None
href = data["href"]
if not (
href.startswith("/") or href.startswith("http://")
or href.startswith("https://")
):
return None
return jinja2.Markup('<a href="{href}">{label}</a>'.format(
href=jinja2.escape(data["href"]),
label=jinja2.escape(data["label"] or "") or " "
))
Examples: datasette-render-binary, datasette-render-markdown
register_output_renderer(datasette)
datasette- Datasette class- You can use this to access plugin configuration options via
datasette.plugin_config(your_plugin_name)
Registers a new output renderer, to output data in a custom format. The hook function should return a dictionary, or a list of dictionaries, of the following shape:
@hookimpl
def register_output_renderer(datasette):
return {
"extension": "test",
"render": render_demo,
"can_render": can_render_demo, # Optional
}
This will register render_demo to be called when paths with the extension .test (for example /database.test, /database/table.test, or /database/table/row.test) are requested.
render_demo is a Python function. It can be a regular function or an async def render_demo() awaitable function, depending on if it needs to make any asynchronous calls.
can_render_demo is a Python function (or async def function) which acepts the same arguments as render_demo but just returns True or False. It lets Datasette know if the current SQL query can be represented by the plugin - and hence influnce if a link to this output format is displayed in the user interface. If you omit the "can_render" key from the dictionary every query will be treated as being supported by the plugin.
When a request is received, the "render" callback function is called with zero or more of the following arguments. Datasette will inspect your callback function and pass arguments that match its function signature.
datasette- Datasette class- For accessing plugin configuration and executing queries.
columns- list of strings- The names of the columns returned by this query.
rows- list ofsqlite3.Rowobjects- The rows returned by the query.
sql- string- The SQL query that was executed.
query_name- string or None- If this was the execution of a canned query, the name of that query.
database- string- The name of the database.
table- string or None- The table or view, if one is being rendered.
request- Request object- The incoming HTTP request.
view_name- string- The name of the current view being called.
index,database,table, androware the most important ones.
The callback function can return None, if it is unable to render the data, or a dictionary with the following keys:
body- string or bytes, optional- The response body, default empty
content_type- string, optional- The Content-Type header, default
text/plain status_code- integer, optional- The HTTP status code, default 200
headers- dictionary, optional- Extra HTTP headers to be returned in the response.
A simple example of an output renderer callback function:
def render_demo():
return {
"body": "Hello World"
}
Here is a more complex example:
async def render_demo(datasette, columns, rows):
db = datasette.get_database()
result = await db.execute("select sqlite_version()")
first_row = " | ".join(columns)
lines = [first_row]
lines.append("=" * len(first_row))
for row in rows:
lines.append(" | ".join(row))
return {
"body": "\n".join(lines),
"content_type": "text/plain; charset=utf-8",
"headers": {"x-sqlite-version": result.first()[0]},
}
And here is an example can_render function which returns True only if the query results contain the columns atom_id, atom_title and atom_updated:
def can_render_demo(columns):
return {"atom_id", "atom_title", "atom_updated"}.issubset(columns)
Examples: datasette-atom, datasette-ics
register_routes()
Register additional view functions to execute for specified URL routes.
Return a list of (regex, view_function) pairs, something like this:
from datasette.utils.asgi import Response
import html
async def hello_from(request):
name = request.url_vars["name"]
return Response.html("Hello from {}".format(
html.escape(name)
))
@hookimpl
def register_routes():
return [
(r"^/hello-from/(?P<name>.*)$"), hello_from)
]
The view functions can take a number of different optional arguments. The corresponding argument will be passed to your function depending on its named parameters - a form of dependency injection.
The optional view function arguments are as follows:
datasette- Datasette class- You can use this to access plugin configuration options via
datasette.plugin_config(your_plugin_name), or to execute SQL queries. request- Request object- The current HTTP Request object.
scope- dictionary- The incoming ASGI scope dictionary.
send- function- The ASGI send function.
receive- function- The ASGI receive function.
The view function can be a regular function or an async def function, depending on if it needs to use any await APIs.
The function can either return a Response class or it can return nothing and instead respond directly to the request using the ASGI send function (for advanced uses only).
Examples: datasette-auth-github, datasette-psutil
register_facet_classes()
Return a list of additional Facet subclasses to be registered.
Warning
The design of this plugin hook is unstable and may change. See issue 830.
Each Facet subclass implements a new type of facet operation. The class should look like this:
class SpecialFacet(Facet):
# This key must be unique across all facet classes:
type = "special"
async def suggest(self):
# Use self.sql and self.params to suggest some facets
suggested_facets = []
suggested_facets.append({
"name": column, # Or other unique name
# Construct the URL that will enable this facet:
"toggle_url": self.ds.absolute_url(
self.request, path_with_added_args(
self.request, {"_facet": column}
)
),
})
return suggested_facets
async def facet_results(self):
# This should execute the facet operation and return results, again
# using self.sql and self.params as the starting point
facet_results = {}
facets_timed_out = []
# Do some calculations here...
for column in columns_selected_for_facet:
try:
facet_results_values = []
# More calculations...
facet_results_values.append({
"value": value,
"label": label,
"count": count,
"toggle_url": self.ds.absolute_url(self.request, toggle_path),
"selected": selected,
})
facet_results[column] = {
"name": column,
"results": facet_results_values,
"truncated": len(facet_rows_results) > facet_size,
}
except QueryInterrupted:
facets_timed_out.append(column)
return facet_results, facets_timed_out
See datasette/facets.py for examples of how these classes can work.
The plugin hook can then be used to register the new facet class like this:
@hookimpl
def register_facet_classes():
return [SpecialFacet]
asgi_wrapper(datasette)
Return an ASGI middleware wrapper function that will be applied to the Datasette ASGI application.
This is a very powerful hook. You can use it to manipulate the entire Datasette response, or even to configure new URL routes that will be handled by your own custom code.
You can write your ASGI code directly against the low-level specification, or you can use the middleware utilites provided by an ASGI framework such as Starlette.
This example plugin adds a x-databases HTTP header listing the currently attached databases:
from datasette import hookimpl
from functools import wraps
@hookimpl
def asgi_wrapper(datasette):
def wrap_with_databases_header(app):
@wraps(app)
async def add_x_databases_header(scope, recieve, send):
async def wrapped_send(event):
if event["type"] == "http.response.start":
original_headers = event.get("headers") or []
event = {
"type": event["type"],
"status": event["status"],
"headers": original_headers + [
[b"x-databases",
", ".join(datasette.databases.keys()).encode("utf-8")]
],
}
await send(event)
await app(scope, recieve, wrapped_send)
return add_x_databases_header
return wrap_with_databases_header
Example: datasette-cors
startup(datasette)
This hook fires when the Datasette application server first starts up. You can implement a regular function, for example to validate required plugin configuration:
@hookimpl
def startup(datasette):
config = datasette.plugin_config("my-plugin") or {}
assert "required-setting" in config, "my-plugin requires setting required-setting"
Or you can return an async function which will be awaited on startup. Use this option if you need to make any database queries:
@hookimpl
def startup(datasette):
async def inner():
db = datasette.get_database()
if "my_table" not in await db.table_names():
await db.execute_write("""
create table my_table (mycol text)
""", block=True)
return inner
Potential use-cases:
- Run some initialization code for the plugin
- Create database tables that a plugin needs on startup
- Validate the metadata configuration for a plugin on startup, and raise an error if it is invalid
Note
If you are writing unit tests for a plugin that uses this hook you will need to explicitly call await ds.invoke_startup() in your tests. An example:
@pytest.mark.asyncio
async def test_my_plugin():
ds = Datasette([], metadata={})
await ds.invoke_startup()
# Rest of test goes here
Examples: datasette-saved-queries, datasette-init
canned_queries(datasette, database, actor)
datasette- Datasette class- You can use this to access plugin configuration options via
datasette.plugin_config(your_plugin_name), or to execute SQL queries. database- string- The name of the database.
actor- dictionary or None- The currently authenticated actor.
Ues this hook to return a dictionary of additional canned query definitions for the specified database. The return value should be the same shape as the JSON described in the canned query documentation.
from datasette import hookimpl
@hookimpl
def canned_queries(datasette, database):
if database == "mydb":
return {
"my_query": {
"sql": "select * from my_table where id > :min_id"
}
}
The hook can alternatively return an awaitable function that returns a list. Here's an example that returns queries that have been stored in the saved_queries database table, if one exists:
from datasette import hookimpl
@hookimpl
def canned_queries(datasette, database):
async def inner():
db = datasette.get_database(database)
if await db.table_exists("saved_queries"):
results = await db.execute("select name, sql from saved_queries")
return {result["name"]: {
"sql": result["sql"]
} for result in results}
return inner
The actor parameter can be used to include the currently authenticated actor in your decision. Here's an example that returns saved queries that were saved by that actor:
from datasette import hookimpl
@hookimpl
def canned_queries(datasette, database, actor):
async def inner():
db = datasette.get_database(database)
if actor is not None and await db.table_exists("saved_queries"):
results = await db.execute(
"select name, sql from saved_queries where actor_id = :id", {
"id": actor["id"]
}
)
return {result["name"]: {
"sql": result["sql"]
} for result in results}
return inner
Example: datasette-saved-queries
actor_from_request(datasette, request)
datasette- Datasette class- You can use this to access plugin configuration options via
datasette.plugin_config(your_plugin_name), or to execute SQL queries. request- object- The current HTTP Request object.
This is part of Datasette's authentication and permissions system. The function should attempt to authenticate an actor (either a user or an API actor of some sort) based on information in the request.
If it cannot authenticate an actor, it should return None. Otherwise it should return a dictionary representing that actor.
Here's an example that authenticates the actor based on an incoming API key:
from datasette import hookimpl
import secrets
SECRET_KEY = "this-is-a-secret"
@hookimpl
def actor_from_request(datasette, request):
authorization = request.headers.get("authorization") or ""
expected = "Bearer {}".format(SECRET_KEY)
if secrets.compare_digest(authorization, expected):
return {"id": "bot"}
If you install this in your plugins directory you can test it like this:
$ curl -H 'Authorization: Bearer this-is-a-secret' http://localhost:8003/-/actor.json
Instead of returning a dictionary, this function can return an awaitable function which itself returns either None or a dictionary. This is useful for authentication functions that need to make a database query - for example:
from datasette import hookimpl
@hookimpl
def actor_from_request(datasette, request):
async def inner():
token = request.args.get("_token")
if not token:
return None
# Look up ?_token=xxx in sessions table
result = await datasette.get_database().execute(
"select count(*) from sessions where token = ?", [token]
)
if result.first()[0]:
return {"token": token}
else:
return None
return inner
Example: datasette-auth-tokens
permission_allowed(datasette, actor, action, resource)
datasette- Datasette class- You can use this to access plugin configuration options via
datasette.plugin_config(your_plugin_name), or to execute SQL queries. actor- dictionary- The current actor, as decided by actor_from_request(datasette, request).
action- string- The action to be performed, e.g.
"edit-table". resource- string or None- An identifier for the individual resource, e.g. the name of the table.
Called to check that an actor has permission to perform an action on a resource. Can return True if the action is allowed, False if the action is not allowed or None if the plugin does not have an opinion one way or the other.
Here's an example plugin which randomly selects if a permission should be allowed or denied, except for view-instance which always uses the default permission scheme instead.
from datasette import hookimpl
import random
@hookimpl
def permission_allowed(action):
if action != "view-instance":
# Return True or False at random
return random.random() > 0.5
# Returning None falls back to default permissions
This function can alternatively return an awaitable function which itself returns True, False or None. You can use this option if you need to execute additional database queries using await datasette.execute(...).
Here's an example that allows users to view the admin_log table only if their actor id is present in the admin_users table. It aso disallows arbitrary SQL queries for the staff.db database for all users.
@hookimpl
def permission_allowed(datasette, actor, action, resource):
async def inner():
if action == "execute-sql" and resource == "staff":
return False
if action == "view-table" and resource == ("staff", "admin_log"):
if not actor:
return False
user_id = actor["id"]
return await datasette.get_database("staff").execute(
"select count(*) from admin_users where user_id = :user_id",
{"user_id": user_id},
)
return inner
See built-in permissions for a full list of permissions that are included in Datasette core.
Example: datasette-permissions-sql
register_magic_parameters(datasette)
datasette- Datasette class- You can use this to access plugin configuration options via
datasette.plugin_config(your_plugin_name).
Magic parameters can be used to add automatic parameters to canned queries. This plugin hook allows additional magic parameters to be defined by plugins.
Magic parameters all take this format: _prefix_rest_of_parameter. The prefix indicates which magic parameter function should be called - the rest of the parameter is passed as an argument to that function.
To register a new function, return it as a tuple of (string prefix, function) from this hook. The function you register should take two arguments: key and request, where key is the rest_of_parameter portion of the parameter and request is the current Request object.
This example registers two new magic parameters: :_request_http_version returning the HTTP version of the current request, and :_uuid_new which returns a new UUID:
from uuid import uuid4
def uuid(key, request):
if key == "new":
return str(uuid4())
else:
raise KeyError
def request(key, request):
if key == "http_version":
return request.scope["http_version"]
else:
raise KeyError
@hookimpl
def register_magic_parameters(datasette):
return [
("request", request),
("uuid", uuid),
]
forbidden(datasette, request, message)
datasette- Datasette class- You can use this to access plugin configuration options via
datasette.plugin_config(your_plugin_name), or to execute SQL queries. request- object- The current HTTP Request object.
message- string- A message hinting at why the request was forbidden.
Plugins can use this to customize how Datasette responds when a 403 Forbidden error occurs - usually because a page failed a permission check, see Permissions.
If a plugin hook wishes to react to the error, it should return a Response object.
This example returns a redirect to a /-/login page:
from datasette import hookimpl
from urllib.parse import urlencode
@hookimpl
def forbidden(request, message):
return Response.redirect("/-/login?=" + urlencode({"message": message}))
The function can alternatively return an awaitable function if it needs to make any asynchronous method calls. This example renders a template:
from datasette import hookimpl
from datasette.utils.asgi import Response
@hookimpl
def forbidden(datasette):
async def inner():
return Response.html(await datasette.render_template("forbidden.html"))
return inner
Testing plugins
We recommend using pytest to write automated tests for your plugins.
If you use the template described in Starting an installable plugin using cookiecutter your plugin will start with a single test in your tests/ directory that looks like this:
from datasette.app import Datasette
import pytest
import httpx
@pytest.mark.asyncio
async def test_plugin_is_installed():
app = Datasette([], memory=True).app()
async with httpx.AsyncClient(app=app) as client:
response = await client.get("http://localhost/-/plugins.json")
assert 200 == response.status_code
installed_plugins = {p["name"] for p in response.json()}
assert "datasette-plugin-template-demo" in installed_plugins
This test uses the HTTPX Python library to run mock HTTP requests through a fresh instance of Datasette. This is the recommended way to write tests against a Datasette instance.
It also uses the pytest-asyncio package to add support for async def test functions running under pytest.
You can install these packages like so:
pip install pytest pytest-asyncio httpx
If you are building an installable package you can add them as test dependencies to your setup.py module like this:
setup(
name="datasette-my-plugin",
# ...
extras_require={
"test": ["pytest", "pytest-asyncio", "httpx"]
},
tests_require=["datasette-my-plugin[test]"],
)
You can then install the test dependencies like so:
pip install -e '.[test]'
Then run the tests using pytest like so:
pytest
Using pytest fixtures
Pytest fixtures can be used to create initial testable objects which can then be used by multiple tests.
A common pattern for Datasette plugins is to create a fixture which sets up a temporary test database and wraps it in a Datasette instance.
Here's an example that uses the sqlite-utils library to populate a temporary test database. It also sets the title of that table using a simulated metadata.json congiguration:
from datasette.app import Datasette
import httpx
import pytest
import sqlite_utils
@pytest.fixture(scope="session")
def ds(tmp_path_factory):
db_directory = tmp_path_factory.mktemp("dbs")
db_path = db_directory / "test.db"
db = sqlite_utils.Database(db_path)
db["dogs"].insert_all([
{"id": 1, "name": "Cleo", "age": 5},
{"id": 2, "name": "Pancakes", "age": 4}
], pk="id")
ds = Datasette(
[db_path],
metadata={
"databases": {
"test": {
"tables": {
"dogs": {
"title": "Some dogs"
}
}
}
}
}
)
return ds
@pytest.mark.asyncio
async def test_example_table_json(ds):
async with httpx.AsyncClient(app=ds.app()) as client:
response = await client.get("http://localhost/test/dogs.json?_shape=array")
assert 200 == response.status_code
assert [
{"id": 1, "name": "Cleo", "age": 5},
{"id": 2, "name": "Pancakes", "age": 4},
] == response.json()
@pytest.mark.asyncio
async def test_example_table_html(ds):
async with httpx.AsyncClient(app=ds.app()) as client:
response = await client.get("http://localhost/test/dogs")
assert ">Some dogs</h1>" in response.text
Here the ds() function defines the fixture, which is than automatically passed to the two test functions based on pytest automatically matching their ds function parameters.
The @pytest.fixture(scope="session") line here ensures the fixture is reused for the full pytest execution session. This means that the temporary database file will be created once and reused for each test.
If you want to create that test database repeatedly for every individual test function, write the fixture function like this instead. You may want to do this if your plugin modifies the database contents in some way:
@pytest.fixture
def ds(tmp_path_factory):
# ...
Internals for plugins
Many Plugin hooks are passed objects that provide access to internal Datasette functionality. The interface to these objects should not be considered stable with the exception of methods that are documented here.
Request object
The request object is passed to various plugin hooks. It represents an incoming HTTP request. It has the following properties:
.scope- dictionary- The ASGI scope that was used to construct this request, described in the ASGI HTTP connection scope specification.
.method- string- The HTTP method for this request, usually
GETorPOST. .url- string- The full URL for this request, e.g.
https://latest.datasette.io/fixtures. .scheme- string- The request scheme - usually
httpsorhttp. .headers- dictionary (str -> str)- A dictionary of incoming HTTP request headers.
.cookies- dictionary (str -> str)- A dictionary of incoming cookies
.host- string- The host header from the incoming request, e.g.
latest.datasette.ioorlocalhost. .path- string- The path of the request, e.g.
/fixtures. .query_string- string- The querystring component of the request, without the
?- e.g.name__contains=sam&age__gt=10. .args- MultiParams- An object representing the parsed querystring parameters, see below.
.url_vars- dictionary (str -> str)- Variables extracted from the URL path, if that path was defined using a regular expression. See register_routes().
.actor- dictionary (str -> Any) or None- The currently authenticated actor (see actors), or
Noneif the request is unauthenticated.
The object also has two awaitable methods:
await request.post_vars()- dictionary- Returns a dictionary of form variables that were submitted in the request body via
POST. Don't forget to read about CSRF protection! await request.post_body()- bytes- Returns the un-parsed body of a request submitted by
POST- useful for things like incoming JSON data.
The MultiParams class
request.args is a MultiParams object - a dictionary-like object which provides access to querystring parameters that may have multiple values.
Consider the querystring ?foo=1&foo=2&bar=3 - with two values for foo and one value for bar.
request.args[key]- string- Returns the first value for that key, or raises a
KeyErrorif the key is missing. For the above examplerequest.args["foo"]would return"1". request.args.get(key)- string or None- Returns the first value for that key, or
Noneif the key is missing. Pass a second argument to specify a different default, e.g.q = request.args.get("q", ""). request.args.getlist(key)- list of strings- Returns the list of strings for that key.
request.args.getlist("foo")would return["1", "2"]in the above example.request.args.getlist("bar")would return["3"]. If the key is missing an empty list will be returned. request.args.keys()- list of strings- Returns the list of available keys - for the example this would be
["foo", "bar"]. key in request.args- True or False- You can use
if key in request.argsto check if a key is present. for key in request.args- iterator- This lets you loop through every available key.
len(request.args)- integer- Returns the number of keys.
Response class
The Response class can be returned from view functions that have been registered using the register_routes() hook.
The Response() constructor takes the following arguments:
body- string- The body of the response.
status- integer (optional)- The HTTP status - defaults to 200.
headers- dictionary (optional)- A dictionary of extra HTTP headers, e.g.
{"x-hello": "world"}. content_type- string (optional)- The content-type for the response. Defaults to
text/plain.
For example:
from datasette.utils.asgi import Response
response = Response(
"<xml>This is XML</xml>",
content_type="application/xml; charset=utf-8"
)
The easiest way to create responses is using the Response.text(...), Response.html(...), Response.json(...) or Response.redirect(...) helper methods:
from datasette.utils.asgi import Response
html_response = Response.html("This is HTML")
json_response = Response.json({"this_is": "json"})
text_response = Response.text("This will become utf-8 encoded text")
# Redirects are served as 302, unless you pass status=301:
redirect_response = Response.redirect("https://latest.datasette.io/")
Each of these responses will use the correct corresponding content-type - text/html; charset=utf-8, application/json; charset=utf-8 or text/plain; charset=utf-8 respectively.
Each of the helper methods take optional status= and headers= arguments, documented above.
Setting cookies with response.set_cookie()
To set cookies on the response, use the response.set_cookie(...) method. The method signature looks like this:
def set_cookie(
self,
key,
value="",
max_age=None,
expires=None,
path="/",
domain=None,
secure=False,
httponly=False,
samesite="lax",
):
You can use this with datasette.sign() to set signed cookies. Here's how you would set the ds_actor cookie for use with Datasette authentication:
response = Response.redirect("/")
response.set_cookie("ds_actor", datasette.sign({"a": {"id": "cleopaws"}}, "actor"))
return response
Datasette class
This object is an instance of the Datasette class, passed to many plugin hooks as an argument called datasette.
.plugin_config(plugin_name, database=None, table=None)
plugin_name- string- The name of the plugin to look up configuration for. Usually this is something similar to
datasette-cluster-map. database- None or string- The database the user is interacting with.
table- None or string- The table the user is interacting with.
This method lets you read plugin configuration values that were set in metadata.json. See Writing plugins that accept configuration for full details of how this method should be used.
await .render_template(template, context=None, request=None)
template- string- The template file to be rendered, e.g.
my_plugin.html. Datasette will search for this file first in the--template-dir=location, if it was specified - then in the plugin's bundled templates and finally in Datasette's set of default templates. context- None or a Python dictionary- The context variables to pass to the template.
request- request object or None- If you pass a Datasette request object here it will be made available to the template.
Renders a Jinja template using Datasette's preconfigured instance of Jinja and returns the resulting string. The template will have access to Datasette's default template functions and any functions that have been made available by other plugins.
await .permission_allowed(actor, action, resource=None, default=False)
actor- dictionary- The authenticated actor. This is usually
request.actor. action- string- The name of the action that is being permission checked.
resource- string or tuple, optional- The resource, e.g. the name of the database, or a tuple of two strings containing the name of the database and the name of the table. Only some permissions apply to a resource.
default- optional, True or False- Should this permission check be default allow or default deny.
Check if the given actor has permission to perform the given action on the given resource.
Some permission checks are carried out against rules defined in metadata.json, while other custom permissions may be decided by plugins that implement the permission_allowed(datasette, actor, action, resource) plugin hook.
If neither metadata.json nor any of the plugins provide an answer to the permission query the default argument will be returned.
See Built-in permissions for a full list of permission actions included in Datasette core.
.get_database(name)
name- string, optional- The name of the database - optional.
Returns the specified database object. Raises a KeyError if the database does not exist. Call this method without an argument to return the first connected database.
.add_database(name, db)
name- string- The unique name to use for this database. Also used in the URL.
db- datasette.database.Database instance- The database to be attached.
The datasette.add_database(name, db) method lets you add a new database to the current Datasette instance. This database will then be served at URL path that matches the name parameter, e.g. /mynewdb/.
The db parameter should be an instance of the datasette.database.Database class. For example:
from datasette.database import Database
datasette.add_database("my-new-database", Database(
datasette,
path="path/to/my-new-database.db",
is_mutable=True
))
This will add a mutable database from the provided file path.
The Database() constructor takes four arguments: the first is the datasette instance you are attaching to, the second is a path=, then is_mutable and is_memory are both optional arguments.
Use is_mutable if it is possible that updates will be made to that database - otherwise Datasette will open it in immutable mode and any changes could cause undesired behavior.
Use is_memory if the connection is to an in-memory SQLite database.
.remove_database(name)
name- string- The name of the database to be removed.
This removes a database that has been previously added. name= is the unique name of that database, also used in the URL for it.
.sign(value, namespace="default")
value- any serializable type- The value to be signed.
namespace- string, optional- An alternative namespace, see the itsdangerous salt documentation.
Utility method for signing values, such that you can safely pass data to and from an untrusted environment. This is a wrapper around the itsdangerous library.
This method returns a signed string, which can be decoded and verified using .unsign(value, namespace="default").
.unsign(value, namespace="default")
signed- any serializable type- The signed string that was created using .sign(value, namespace="default").
namespace- string, optional- The alternative namespace, if one was used.
Returns the original, decoded object that was passed to .sign(value, namespace="default"). If the signature is not valid this raises a itsdangerous.BadSignature exception.
.add_message(request, message, message_type=datasette.INFO)
request- Request- The current Request object
message- string- The message string
message_type- constant, optional- The message type -
datasette.INFO,datasette.WARNINGordatasette.ERROR
Datasette's flash messaging mechanism allows you to add a message that will be displayed to the user on the next page that they visit. Messages are persisted in a ds_messages cookie. This method adds a message to that cookie.
You can try out these messages (including the different visual styling of the three message types) using the /-/messages debugging tool.
Database class
Instances of the Database class can be used to execute queries against attached SQLite databases, and to run introspection against their schemas.
await db.execute(sql, ...)
Executes a SQL query against the database and returns the resulting rows (see Results).
sql- string (required)- The SQL query to execute. This can include
?or:namedparameters. params- list or dict- A list or dictionary of values to use for the parameters. List for
?, dictionary for:named. truncate- boolean- Should the rows returned by the query be truncated at the maximum page size? Defaults to
True, set this toFalseto disable truncation. custom_time_limit- integer ms- A custom time limit for this query. This can be set to a lower value than the Datasette configured default. If a query takes longer than this it will be terminated early and raise a
dataette.database.QueryInterruptedexception. page_size- integer- Set a custom page size for truncation, over-riding the configured Datasette default.
log_sql_errors- boolean- Should any SQL errors be logged to the console in addition to being raised as an error? Defaults to
True.
Results
The db.execute() method returns a single Results object. This can be used to access the rows returned by the query.
Iterating over a Results object will yield SQLite Row objects. Each of these can be treated as a tuple or can be accessed using row["column"] syntax:
info = []
results = await db.execute("select name from sqlite_master")
for row in results:
info.append(row["name"])
The Results object also has the following properties and methods:
.truncated- boolean- Indicates if this query was truncated - if it returned more results than the specified
page_size. If this is true then the results object will only provide access to the firstpage_sizerows in the query result. You can disable truncation by passingtruncate=Falseto thedb.query()method. .columns- list of strings- A list of column names returned by the query.
.rows- list of sqlite3.Row- This property provides direct access to the list of rows returned by the database. You can access specific rows by index using
results.rows[0]. .first()- row or None- Returns the first row in the results, or
Noneif no rows were returned. .single_value()- Returns the value of the first column of the first row of results - but only if the query returned a single row with a single column. Raises a
datasette.database.MultipleValuesexception otherwise. .__len__()- Calling
len(results)returns the (truncated) number of returned results.
await db.execute_fn(fn)
Executes a given callback function against a read-only database connection running in a thread. The function will be passed a SQLite connection, and the return value from the function will be returned by the await.
Example usage:
def get_version(conn):
return conn.execute(
"select sqlite_version()"
).fetchall()[0][0]
version = await db.execute_fn(get_version)
await db.execute_write(sql, params=None, block=False)
SQLite only allows one database connection to write at a time. Datasette handles this for you by maintaining a queue of writes to be executed against a given database. Plugins can submit write operations to this queue and they will be executed in the order in which they are received.
This method can be used to queue up a non-SELECT SQL query to be executed against a single write connection to the database.
You can pass additional SQL parameters as a tuple or dictionary.
By default queries are considered to be "fire and forget" - they will be added to the queue and executed in a separate thread while your code can continue to do other things. The method will return a UUID representing the queued task.
If you pass block=True this behaviour changes: the method will block until the write operation has completed, and the return value will be the return from calling conn.execute(...) using the underlying sqlite3 Python library.
await db.execute_write_fn(fn, block=False)
This method works like .execute_write(), but instead of a SQL statement you give it a callable Python function. This function will be queued up and then called when the write connection is available, passing that connection as the argument to the function.
The function can then perform multiple actions, safe in the knowledge that it has exclusive access to the single writable connection as long as it is executing.
For example:
def my_action(conn):
conn.execute("delete from some_table")
conn.execute("delete from other_table")
await database.execute_write_fn(my_action)
This method is fire-and-forget, queueing your function to be executed and then allowing your code after the call to .execute_write_fn() to continue running while the underlying thread waits for an opportunity to run your function. A UUID representing the queued task will be returned.
If you pass block=True your calling code will block until the function has been executed. The return value to the await will be the return value of your function.
If your function raises an exception and you specified block=True, that exception will be propagated up to the await line. With block=False any exceptions will be silently ignored.
Here's an example of block=True in action:
def my_action(conn):
conn.execute("delete from some_table where id > 5")
return conn.execute("select count(*) from some_table").fetchone()[0]
try:
num_rows_left = await database.execute_write_fn(my_action, block=True)
except Exception as e:
print("An error occurred:", e)
Database introspection
The Database class also provides properties and methods for introspecting the database.
db.name- string- The name of the database - usually the filename without the
.dbprefix. db.size- integer- The size of the database file in bytes. 0 for
:memory:databases. db.mtime_ns- integer or None- The last modification time of the database file in nanoseconds since the epoch.
Nonefor:memory:databases. db.is_mutable- boolean- Is this database mutable, and allowed to accept writes?
db.is_memory- boolean- Is this database an in-memory database?
await db.table_exists(table)- boolean- Check if a table called
tableexists. await db.table_names()- list of strings- List of names of tables in the database.
await db.view_names()- list of strings- List of names of views in tha database.
await db.table_columns(table)- list of strings- Names of columns in a specific table.
await db.primary_keys(table)- list of strings- Names of the columns that are part of the primary key for this table.
await db.fts_table(table)- string or None- The name of the FTS table associated with this table, if one exists.
await db.label_column_for_table(table)- string or None- The label column that is associated with this table - either automatically detected or using the
"label_column"key from Metadata, see Specifying the label column for a table. await db.foreign_keys_for_table(table)- list of dictionaries- Details of columns in this table which are foreign keys to other tables. A list of dictionaries where each dictionary is shaped like this:
{"column": string, "other_table": string, "other_column": string}. await db.hidden_table_names()- list of strings- List of tables which Datasette "hides" by default - usually these are tables associated with SQLite's full-text search feature, the SpatiaLite extension or tables hidden using the Hiding tables feature.
await db.get_table_definition(table)- string- Returns the SQL definition for the table - the
CREATE TABLEstatement and any associatedCREATE INDEXstatements. await db.get_view_definition(view)- string- Returns the SQL definition of the named view.
await db.get_all_foreign_keys()- dictionaryDictionary representing both incoming and outgoing foreign keys for this table. It has two keys,
"incoming"and"outgoing", each of which is a list of dictionaries with keys"column","other_table"and"other_column". For example:{ "incoming": [], "outgoing": [ { "other_table": "attraction_characteristic", "column": "characteristic_id", "other_column": "pk", }, { "other_table": "roadside_attractions", "column": "attraction_id", "other_column": "pk", } ] }
CSRF protection
Datasette uses asgi-csrf to guard against CSRF attacks on form POST submissions. Users receive a ds_csrftoken cookie which is compared against the csrftoken form field (or x-csrftoken HTTP header) for every incoming request.
If your plugin implements a <form method="POST"> anywhere you will need to include that token. You can do so with the following template snippet:
<input type="hidden" name="csrftoken" value="{{ csrftoken() }}">
Contributing
Datasette is an open source project. We welcome contributions!
This document describes how to contribute to Datasette core. You can also contribute to the wider Datasette ecosystem by creating new Plugins.
General guidelines
- master should always be releasable. Incomplete features should live in branches. This ensures that any small bug fixes can be quickly released.
- The ideal commit should bundle together the implementation, unit tests and associated documentation updates. The commit message should link to an associated issue.
- New plugin hooks should only be shipped if accompanied by a separate release of a non-demo plugin that uses them.
Setting up a development environment
If you have Python 3.6 or higher installed on your computer (on OS X the easiest way to do this is using homebrew) you can install an editable copy of Datasette using the following steps.
If you want to use GitHub to publish your changes, first create a fork of datasette under your own GitHub account.
Now clone that repository somewhere on your computer:
git clone git@github.com:YOURNAME/datasette
If you just want to get started without creating your own fork, you can do this instead:
git clone git@github.com:simonw/datasette
The next step is to create a virtual environment for your project and use it to install Datasette's dependencies:
cd datasette
# Create a virtual environment in ./venv
python3 -m venv ./venv
# Now activate the virtual environment, so pip can install into it
source venv/bin/activate
# Install Datasette and its testing dependencies
python3 -m pip install -e .[test]
That last line does most of the work: pip install -e means "install this package in a way that allows me to edit the source code in place". The .[test] option means "use the setup.py in this directory and install the optional testing dependencies as well".
Once you have done this, you can run the Datasette unit tests from inside your datasette/ directory using pytest like so:
pytest
To run Datasette itself, just type datasette.
You're going to need at least one SQLite database. An easy way to get started is to use the fixtures database that Datasette uses for its own tests.
You can create a copy of that database by running this command:
python tests/fixtures.py fixtures.db
Now you can run Datasette against the new fixtures database like so:
datasette fixtures.db
This will start a server at http://127.0.0.1:8001/.
Any changes you make in the datasette/templates or datasette/static folder will be picked up immediately (though you may need to do a force-refresh in your browser to see changes to CSS or JavaScript).
If you want to change Datasette's Python code you can use the --reload option to cause Datasette to automatically reload any time the underlying code changes:
datasette --reload fixtures.db
You can also use the fixtures.py script to recreate the testing version of metadata.json used by the unit tests. To do that:
python tests/fixtures.py fixtures.db fixtures-metadata.json
Or to output the plugins used by the tests, run this:
python tests/fixtures.py fixtures.db fixtures-metadata.json fixtures-plugins
Test tables written to fixtures.db
- metadata written to fixtures-metadata.json
Wrote plugin: fixtures-plugins/register_output_renderer.py
Wrote plugin: fixtures-plugins/view_name.py
Wrote plugin: fixtures-plugins/my_plugin.py
Wrote plugin: fixtures-plugins/messages_output_renderer.py
Wrote plugin: fixtures-plugins/my_plugin_2.py
Then run Datasette like this:
datasette fixtures.db -m fixtures-metadata.json --plugins-dir=fixtures-plugins/
Editing and building the documentation
Datasette's documentation lives in the docs/ directory and is deployed automatically using Read The Docs.
The documentation is written using reStructuredText. You may find this article on The subset of reStructuredText worth committing to memory useful.
You can build it locally by installing sphinx and sphinx_rtd_theme in your Datasette development environment and then running make html directly in the docs/ directory:
# You may first need to activate your virtual environment:
source venv/bin/activate
# Install the dependencies needed to build the docs
pip install -e .[docs]
# Now build the docs
cd docs/
make html
This will create the HTML version of the documentation in docs/_build/html. You can open it in your browser like so:
open _build/html/index.html
Any time you make changes to a .rst file you can re-run make html to update the built documents, then refresh them in your browser.
For added productivity, you can use use sphinx-autobuild to run Sphinx in auto-build mode. This will run a local webserver serving the docs that automatically rebuilds them and refreshes the page any time you hit save in your editor.
sphinx-autobuild will have been installed when you ran pip install -e .[docs]. In your docs/ directory you can start the server by running the following:
make livehtml
Now browse to http://localhost:8000/ to view the documentation. Any edits you make should be instantly reflected in your browser.
Release process
Datasette releases are performed using tags. When a new version tag is pushed to GitHub, a Travis CI task will perform the following:
- Run the unit tests against all supported Python versions. If the tests pass...
- Build a Docker image of the release and push a tag to https://hub.docker.com/r/datasetteproject/datasette
- Re-point the "latest" tag on Docker Hub to the new image
- Build a wheel bundle of the underlying Python source code
- Push that new wheel up to PyPI: https://pypi.org/project/datasette/
To deploy new releases you will need to have push access to the main Datasette GitHub repository.
Datasette follows Semantic Versioning:
major.minor.patch
We increment major for backwards-incompatible releases. Datasette is currently pre-1.0 so the major version is always 0.
We increment minor for new features.
We increment patch for bugfix releass.
Alpha and beta releases may have an additional a0 or b0 prefix - the integer component will be incremented with each subsequent alpha or beta.
To release a new version, first create a commit that updates the changelog with highlights of the new version. An example commit can be seen here:
# Update changelog
git commit -m "Release notes for 0.43
Refs #581, #770, #729, #706, #751, #706, #744, #771, #773" -a
git push
Referencing the issues that are part of the release in the commit message ensures the name of the release shows up on those issue pages, e.g. here.
You can generate the list of issue references for a specific release by pasting the following into the browser devtools while looking at the Changelog page (replace v0-44 with the most recent version):
[
...new Set(
Array.from(
document.getElementById("v0-44").querySelectorAll("a[href*=issues]")
).map((a) => "#" + a.href.split("/issues/")[1])
),
].sort().join(", ");
For non-bugfix releases you may want to update the news section of README.md as part of the same commit.
To tag and push the releaes, run the following:
git tag 0.25.2
git push --tags
Final steps once the release has deployed to https://pypi.org/project/datasette/
- Manually post the new release to GitHub releases: https://github.com/simonw/datasette/releases - you can convert the release notes to Markdown by copying and pasting the rendered HTML into this tool: https://euangoddard.github.io/clipboard2markdown/
- Manually kick off a build of the stable branch on Read The Docs: https://readthedocs.org/projects/datasette/builds/
Alpha and beta releases
Alpha and beta releases are published to preview upcoming features that may not yet be stable - in particular to preview new plugin hooks.
You are welcome to try these out, but please be aware that details may change before the final release.
Please join discussions on the issue tracker to share your thoughts and experiences with on alpha and beta features that you try out.
Changelog
0.48 (2020-08-16)
- Datasette documentation now lives at docs.datasette.io.
db.is_mutableproperty is now documented and tested, see Database introspection.- The
extra_template_vars,extra_css_urls,extra_js_urlsandextra_body_scriptplugin hooks now all accept the same arguments. See extra_template_vars(template, database, table, columns, view_name, request, datasette) for details. (#939) - Those hooks now accept a new
columnsargument detailing the table columns that will be rendered on that page. (#938) - Fixed bug where plugins calling
db.execute_write_fn()could hang Datasette if the connection failed. (#935) - Fixed bug with the
?_nl=onoutput option and binary data. (#914)
0.47.3 (2020-08-15)
- The
datasette --getcommand-line mechanism now ensures any plugins using thestartup()hook are correctly executed. (#934)
0.47.2 (2020-08-12)
- Fixed an issue with the Docker image published to Docker Hub. (#931)
0.47.1 (2020-08-11)
- Fixed a bug where the
sdistdistribution of Datasette was not correctly including the template files. (#930)
0.47 (2020-08-11)
- Datasette now has a GitHub discussions forum for conversations about the project that go beyond just bug reports and issues.
- Datasette can now be installed on macOS using Homebrew! Run
brew install simonw/datasette/datasette. See Using Homebrew. (#335) - Two new commands:
datasette install name-of-pluginanddatasette uninstall name-of-plugin. These are equivalent topip installandpip uninstallbut automatically run in the same virtual environment as Datasette, so users don't have to figure out where that virtual environment is - useful for installations created using Homebrew orpipx. See Installing plugins. (#925) - A new command-line option,
datasette --get, accepts a path to a URL within the Datasette instance. It will run that request through Datasette (without starting a web server) and print out the repsonse. See datasette --get for an example. (#926)
0.46 (2020-08-09)
Warning
This release contains a security fix related to authenticated writable canned queries. If you are using this feature you should upgrade as soon as possible.
- Security fix: CSRF tokens were incorrectly included in read-only canned query forms, which could allow them to be leaked to a sophisticated attacker. See issue 918 for details.
- Datasette now supports GraphQL via the new datasette-graphql plugin - see GraphQL in Datasette with the new datasette-graphql plugin.
- Principle git branch has been renamed from
mastertomain. (#849) - New debugging tool:
/-/allow-debug tool(demo here) helps test allow blocks against actors, as described in Defining permissions with "allow" blocks. (#908) - New logo for the documentation, and a new project tagline: "An open source multi-tool for exploring and publishing data".
- Whitespace in column values is now respected on display, using
white-space: pre-wrap. (#896) - New
await request.post_body()method for accessing the raw POST body, see Request object. (#897) - Database file downloads now include a
content-lengthHTTP header, enabling download progress bars. (#905) - File downloads now also correctly set the suggested file name using a
content-dispositionHTTP header. (#909) testsare now excluded from the Datasette package properly - thanks, abeyerpath. (#456)- The Datasette package published to PyPI now includes
sdistas well asbdist_wheel. - Better titles for canned query pages. (#887)
- Now only loads Python files from a directory passed using the
--plugins-diroption - thanks, Amjith Ramanujam. (#890) - New documentation section on Publishing to Vercel.
0.45 (2020-07-01)
Magic parameters for canned queries, a log out feature, improved plugin documentation and four new plugin hooks.
Magic parameters for canned queries
Canned queries now support Magic parameters, which can be used to insert or select automatically generated values. For example:
insert into logs
(user_id, timestamp)
values
(:_actor_id, :_now_datetime_utc)
This inserts the currently authenticated actor ID and the current datetime. (#842)
Log out
The ds_actor cookie can be used by plugins (or by Datasette's --root mechanism) to authenticate users. The new /-/logout page provides a way to clear that cookie.
A "Log out" button now shows in the global navigation provided the user is authenticated using the ds_actor cookie. (#840)
Better plugin documentation
The plugin documentation has been re-arranged into four sections, including a brand new section on testing plugins. (#687)
- Plugins introduces Datasette's plugin system and describes how to install and configure plugins.
- Writing plugins describes how to author plugins, from simple one-off plugins to packaged plugins that can be published to PyPI. It also describes how to start a plugin using the new datasette-plugin cookiecutter template.
- Plugin hooks is a full list of detailed documentation for every Datasette plugin hook.
- Testing plugins describes how to write tests for Datasette plugins, using pytest and HTTPX.
New plugin hooks
- register_magic_parameters(datasette) can be used to define new types of magic canned query parameters.
- startup(datasette) can run custom code when Datasette first starts up. datasette-init is a new plugin that uses this hook to create database tables and views on startup if they have not yet been created. (#834)
- canned_queries(datasette, database, actor) lets plugins provide additional canned queries beyond those defined in Datasette's metadata. See datasette-saved-queries for an example of this hook in action. (#852)
- forbidden(datasette, request, message) is a hook for customizing how Datasette responds to 403 forbidden errors. (#812)
Smaller changes
- Cascading view permissons - so if a user has
view-tablethey can view the table page even if they do not haveview-databaseorview-instance. (#832) - CSRF protection no longer applies to
Authentication: Bearer tokenrequests or requests without cookies. (#835) datasette.add_message()now works inside plugins. (#864)- Workaround for "Too many open files" error in test runs. (#846)
- Respect existing
scope["actor"]if already set by ASGI middleware. (#854) - New process for shipping Alpha and beta releases. (#807)
{{ csrftoken() }}now works when plugins render a template usingdatasette.render_template(..., request=request). (#863)- Datasette now creates a single Request object and uses it throughout the lifetime of the current HTTP request. (#870)
0.44 (2020-06-11)
Authentication and permissions, writable canned queries, flash messages, new plugin hooks and more.
Authentication
Prior to this release the Datasette ecosystem has treated authentication as exclusively the realm of plugins, most notably through datasette-auth-github.
0.44 introduces Authentication and permissions as core Datasette concepts (#699). This makes it easier for different plugins can share responsibility for authenticating requests - you might have one plugin that handles user accounts and another one that allows automated access via API keys, for example.
You'll need to install plugins if you want full user accounts, but default Datasette can now authenticate a single root user with the new --root command-line option, which outputs a one-time use URL to authenticate as a root actor (#784):
$ datasette fixtures.db --root
http://127.0.0.1:8001/-/auth-token?token=5b632f8cd44b868df625f5a6e2185d88eea5b22237fd3cc8773f107cc4fd6477
INFO: Started server process [14973]
INFO: Waiting for application startup.
INFO: Application startup complete.
INFO: Uvicorn running on http://127.0.0.1:8001 (Press CTRL+C to quit)
Plugins can implement new ways of authenticating users using the new actor_from_request(datasette, request) hook.
Permissions
Datasette also now has a built-in concept of Permissions. The permissions system answers the following question:
Is this actor allowed to perform this action, optionally against this particular resource?
You can use the new "allow" block syntax in metadata.json (or metadata.yaml) to set required permissions at the instance, database, table or canned query level. For example, to restrict access to the fixtures.db database to the "root" user:
{
"databases": {
"fixtures": {
"allow": {
"id" "root"
}
}
}
}
See Defining permissions with "allow" blocks for more details.
Plugins can implement their own custom permission checks using the new permission_allowed(datasette, actor, action, resource) hook.
A new debug page at /-/permissions shows recent permission checks, to help administrators and plugin authors understand exactly what checks are being performed. This tool defaults to only being available to the root user, but can be exposed to other users by plugins that respond to the permissions-debug permission. (#788)
Writable canned queries
Datasette's Canned queries feature lets you define SQL queries in metadata.json which can then be executed by users visiting a specific URL. https://latest.datasette.io/fixtures/neighborhood_search for example.
Canned queries were previously restricted to SELECT, but Datasette 0.44 introduces the ability for canned queries to execute INSERT or UPDATE queries as well, using the new "write": true property (#800):
{
"databases": {
"dogs": {
"queries": {
"add_name": {
"sql": "INSERT INTO names (name) VALUES (:name)",
"write": true
}
}
}
}
}
See Writable canned queries for more details.
Flash messages
Writable canned queries needed a mechanism to let the user know that the query has been successfully executed. The new flash messaging system (#790) allows messages to persist in signed cookies which are then displayed to the user on the next page that they visit. Plugins can use this mechanism to display their own messages, see .add_message(request, message, message_type=datasette.INFO) for details.
You can try out the new messages using the /-/messages debug tool, for example at https://latest.datasette.io/-/messages
Signed values and secrets
Both flash messages and user authentication needed a way to sign values and set signed cookies. Two new methods are now available for plugins to take advantage of this mechanism: .sign(value, namespace="default") and .unsign(value, namespace="default").
Datasette will generate a secret automatically when it starts up, but to avoid resetting the secret (and hence invalidating any cookies) every time the server restarts you should set your own secret. You can pass a secret to Datasette using the new --secret option or with a DATASETTE_SECRET environment variable. See Configuring the secret for more details.
You can also set a secret when you deploy Datasette using datasette publish or datasette package - see Using secrets with datasette publish.
Plugins can now sign value and verify their signatures using the datasette.sign() and datasette.unsign() methods.
CSRF protection
Since writable canned queries are built using POST forms, Datasette now ships with CSRF protection (#798). This applies automatically to any POST request, which means plugins need to include a csrftoken in any POST forms that they render. They can do that like so:
<input type="hidden" name="csrftoken" value="{{ csrftoken() }}">
Cookie methods
Plugins can now use the new response.set_cookie() method to set cookies.
A new request.cookies method on the :ref:internals_request` can be used to read incoming cookies.
register_routes() plugin hooks
Plugins can now register new views and routes via the register_routes() plugin hook (#819). View functions can be defined that accept any of the current datasette object, the current request, or the ASGI scope, send and receive objects.
Smaller changes
- New internals documentation for Request object and Response class. (#706)
request.urlnow respects theforce_https_urlsconfig setting. closes (#781)request.args.getlist()returns[]if missing. Removedrequest.raw_argsentirely. (#774)- New datasette.get_database() method.
- Added
_prefix to many private, undocumented methods of the Datasette class. (#576) - Removed the
db.get_outbound_foreign_keys()method which duplicated the behaviour ofdb.foreign_keys_for_table(). - New await datasette.permission_allowed() method.
/-/actordebugging endpoint for viewing the currently authenticated actor.- New
request.cookiesproperty. /-/pluginsendpoint now shows a list of hooks implemented by each plugin, e.g. https://latest.datasette.io/-/plugins?all=1request.post_vars()method no longer discards empty values.- New "params" canned query key for explicitly setting named parameters, see Canned query parameters. (#797)
request.argsis now a MultiParams object.- Fixed a bug with the
datasette pluginscommand. (#802) - Nicer pattern for using
make_app_client()in tests. (#395) - New
request.actorproperty. - Fixed broken CSS on nested 404 pages. (#777)
- New
request.url_varsproperty. (#822) - Fixed a bug with the
python tests/fixtures.pycommand for outputting Datasette's testing fixtures database and plugins. (#804) datasette publish herokunow deploys using Python 3.8.3.- Added a warning that the register_facet_classes() hook is unstable and may change in the future. (#830)
- The
{"$env": "ENVIRONMENT_VARIBALE"}mechanism (see Secret configuration values) now works with variables inside nested lists. (#837)
The road to Datasette 1.0
I've assembled a milestone for Datasette 1.0. The focus of the 1.0 release will be the following:
- Signify confidence in the quality/stability of Datasette
- Give plugin authors confidence that their plugins will work for the whole 1.x release cycle
- Provide the same confidence to developers building against Datasette JSON APIs
If you have thoughts about what you would like to see for Datasette 1.0 you can join the conversation on issue #519.
0.43 (2020-05-28)
The main focus of this release is a major upgrade to the register_output_renderer(datasette) plugin hook, which allows plugins to provide new output formats for Datasette such as datasette-atom and datasette-ics.
- Redesign of register_output_renderer(datasette) to provide more context to the render callback and support an optional
"can_render"callback that controls if a suggested link to the output format is provided. (#581, #770) - Visually distinguish float and integer columns - useful for figuring out why order-by-column might be returning unexpected results. (#729)
- The Request object, which is passed to several plugin hooks, is now documented. (#706)
- New
metadata.jsonoption for setting a custom default page size for specific tables and views, see Setting a custom page size. (#751) - Canned queries can now be configured with a default URL fragment hash, useful when working with plugins such as datasette-vega, see Setting a default fragment. (#706)
- Fixed a bug in
datasette publishwhen running on operating systems where the/tmpdirectory lives in a different volume, using a backport of the Python 3.8shutil.copytree()function. (#744) - Every plugin hook is now covered by the unit tests, and a new unit test checks that each plugin hook has at least one corresponding test. (#771, #773)
0.42 (2020-05-08)
A small release which provides improved internal methods for use in plugins, along with documentation. See #685.
- Added documentation for
db.execute(), see await db.execute(sql, ...). - Renamed
db.execute_against_connection_in_thread()todb.execute_fn()and made it a documented method, see await db.execute_fn(fn). - New
results.first()andresults.single_value()methods, plus documentation for theResultsclass - see Results.
0.41 (2020-05-06)
You can now create custom pages within your Datasette instance using a custom template file. For example, adding a template file called templates/pages/about.html will result in a new page being served at /about on your instance. See the custom pages documentation for full details, including how to return custom HTTP headers, redirects and status codes. (#648)
Configuration directory mode (#731) allows you to define a custom Datasette instance as a directory. So instead of running the following:
$ datasette one.db two.db \
--metadata.json \
--template-dir=templates/ \
--plugins-dir=plugins \
--static css:css
You can instead arrange your files in a single directory called my-project and run this:
$ datasette my-project/
Also in this release:
- New
NOT LIKEtable filter:?colname__notlike=expression. (#750) - Datasette now has a pattern portfolio at
/-/patterns- e.g. https://latest.datasette.io/-/patterns. This is a page that shows every Datasette user interface component in one place, to aid core development and people building custom CSS themes. (#151) - SQLite PRAGMA functions such as
pragma_table_info(tablename)are now allowed in Datasette SQL queries. (#761) - Datasette pages now consistently return a
content-typeoftext/html; charset=utf-8". (#752) - Datasette now handles an ASGI
raw_pathvalue ofNone, which should allow compatibilty with the Mangum adapter for running ASGI apps on AWS Lambda. Thanks, Colin Dellow. (#719) - Installation documentation now covers how to Using pipx. (#756)
- Improved the documentation for Full-text search. (#748)
0.40 (2020-04-21)
- Datasette Metadata can now be provided as a YAML file as an optional alternative to JSON. See Using YAML for metadata. (#713)
- Removed support for
datasette publish now, which used the the now-retired Zeit Now v1 hosting platform. A new plugin, datasette-publish-now, can be installed to publish data to Zeit (now Vercel) Now v2. (#710) - Fixed a bug where the
extra_template_vars(request, view_name)plugin hook was not receiving the correctview_name. (#716) - Variables added to the template context by the
extra_template_vars()plugin hook are now shown in the?_context=1debugging mode (see template_debug). (#693) - Fixed a bug where the "templates considered" HTML comment was no longer being displayed. (#689)
- Fixed a
datasette publishbug where--plugin-secretwould over-ride plugin configuration in the providedmetadata.jsonfile. (#724) - Added a new CSS class for customizing the canned query page. (#727)
0.39 (2020-03-24)
- New base_url configuration setting for serving up the correct links while running Datasette under a different URL prefix. (#394)
- New metadata settings
"sort"and"sort_desc"for setting the default sort order for a table. See Setting a default sort order. (#702) - Sort direction arrow now displays by default on the primary key. This means you only have to click once (not twice) to sort in reverse order. (#677)
- New
await Request(scope, receive).post_vars()method for accessing POST form variables. (#700) - Plugin hooks documentation now links to example uses of each plugin. (#709)
0.38 (2020-03-08)
- The Docker build of Datasette now uses SQLite 3.31.1, upgraded from 3.26. (#695)
datasette publish cloudrunnow accepts an optional--memory=2Giflag for setting the Cloud Run allocated memory to a value other than the default (256Mi). (#694)- Fixed bug where templates that shipped with plugins were sometimes not being correctly loaded. (#697)
0.37.1 (2020-03-02)
- Don't attempt to count table rows to display on the index page for databases > 100MB. (#688)
- Print exceptions if they occur in the write thread rather than silently swallowing them.
- Handle the possibility of
scope["path"]being a string rather than bytes - Better documentation for the extra_template_vars(template, database, table, columns, view_name, request, datasette) plugin hook.
0.37 (2020-02-25)
- Plugins now have a supported mechanism for writing to a database, using the new
.execute_write()and.execute_write_fn()methods. Documentation. (#682) - Immutable databases that have had their rows counted using the
inspectcommand now use the calculated count more effectively - thanks, Kevin Keogh. (#666) --reloadno longer restarts the server if a database file is modified, unless that database was opened immutable mode with-i. (#494)- New
?_searchmode=rawoption turns off escaping for FTS queries in?_search=allowing full use of SQLite's FTS5 query syntax. (#676)
0.36 (2020-02-21)
- The
datasetteobject passed to plugins now has API documentation: Datasette class. (#576) - New methods on
datasette:.add_database()and.remove_database()- documentation. (#671) prepare_connection()plugin hook now takes optionaldatasetteanddatabasearguments - prepare_connection(conn, database, datasette). (#678)- Added three new plugins and one new conversion tool to the The Datasette Ecosystem.
0.35 (2020-02-04)
- Added five new plugins and one new conversion tool to the The Datasette Ecosystem.
- The
Datasetteclass has a newrender_template()method which can be used by plugins to render templates using Datasette's pre-configured Jinja templating library. - You can now execute SQL queries that start with a
-- comment- thanks, Jay Graves (#653)
0.34 (2020-01-29)
_search=queries are now correctly escaped using a newescape_fts()custom SQL function. This means you can now run searches for strings likepark.without seeing errors. (#651)- Google Cloud Run is no longer in beta, so
datasette publish cloudrunhas been updated to work even if the user has not installed thegcloudbeta components package. Thanks, Katie McLaughlin (#660) datasette packagenow accepts a--portoption for specifying which port the resulting Docker container should listen on. (#661)
0.33 (2019-12-22)
rowidis now included in dropdown menus for filtering tables (#636)- Columns are now only suggested for faceting if they have at least one value with more than one record (#638)
- Queries with no results now display "0 results" (#637)
- Improved documentation for the
--staticoption (#641) - asyncio task information is now included on the
/-/threadsdebug page - Bumped Uvicorn dependency 0.11
- You can now use
--port 0to listen on an available port - New template_debug setting for debugging templates, e.g. https://latest.datasette.io/fixtures/roadside_attractions?_context=1 (#654)
0.32 (2019-11-14)
Datasette now renders templates using Jinja async mode. This makes it easy for plugins to provide custom template functions that perform asynchronous actions, for example the new datasette-template-sql plugin which allows custom templates to directly execute SQL queries and render their results. (#628)
0.31.2 (2019-11-13)
0.31.1 (2019-11-12)
- Deployments created using
datasette publishnow usepython:3.8base Docker image (#629)
0.31 (2019-11-11)
This version adds compatibility with Python 3.8 and breaks compatibility with Python 3.5.
If you are still running Python 3.5 you should stick with 0.30.2, which you can install like this:
pip install datasette==0.30.2
- Format SQL button now works with read-only SQL queries - thanks, Tobias Kunze (#602)
- New
?column__notin=x,y,zfilter for table views (#614) - Table view now uses
select col1, col2, col3instead ofselect * - Database filenames can now contain spaces - thanks, Tobias Kunze (#590)
- Removed obsolete
?_group_count=colfeature (#504) - Improved user interface and documentation for
datasette publish cloudrun(#608) - Tables with indexes now show the
CREATE INDEXstatements on the table page (#618) - Current version of uvicorn is now shown on
/-/versions - Python 3.8 is now supported! (#622)
- Python 3.5 is no longer supported.
0.30.2 (2019-11-02)
/-/pluginspage now uses distribution name e.g.datasette-cluster-mapinstead of the name of the underlying Python package (datasette_cluster_map) (#606)- Array faceting is now only suggested for columns that contain arrays of strings (#562)
- Better documentation for the
--hostargument (#574) - Don't show
Nonewith a broken link for the label on a nullable foreign key (#406)
0.30.1 (2019-10-30)
0.30 (2019-10-18)
- Added
/-/threadsdebugging page - Allow
EXPLAIN WITH...(#583) - Button to format SQL - thanks, Tobias Kunze (#136)
- Sort databases on homepage by argument order - thanks, Tobias Kunze (#585)
- Display metadata footer on custom SQL queries - thanks, Tobias Kunze (#589)
- Use
--platform=managedforpublish cloudrun(#587) - Fixed bug returning non-ASCII characters in CSV (#584)
- Fix for
/foov.s./foo-barbug (#601)
0.29.3 (2019-09-02)
- Fixed implementation of CodeMirror on database page (#560)
- Documentation typo fixes - thanks, Min ho Kim (#561)
- Mechanism for detecting if a table has FTS enabled now works if the table name used alternative escaping mechanisms (#570) - for compatibility with a recent change to sqlite-utils.
0.29.2 (2019-07-13)
0.29.1 (2019-07-11)
0.29 (2019-07-07)
ASGI, new plugin hooks, facet by date and much, much more...
ASGI
ASGI is the Asynchronous Server Gateway Interface standard. I've been wanting to convert Datasette into an ASGI application for over a year - Port Datasette to ASGI #272 tracks thirteen months of intermittent development - but with Datasette 0.29 the change is finally released. This also means Datasette now runs on top of Uvicorn and no longer depends on Sanic.
I wrote about the significance of this change in Porting Datasette to ASGI, and Turtles all the way down.
The most exciting consequence of this change is that Datasette plugins can now take advantage of the ASGI standard.
New plugin hook: asgi_wrapper
The asgi_wrapper(datasette) plugin hook allows plugins to entirely wrap the Datasette ASGI application in their own ASGI middleware. (#520)
Two new plugins take advantage of this hook:
- datasette-auth-github adds a authentication layer: users will have to sign in using their GitHub account before they can view data or interact with Datasette. You can also use it to restrict access to specific GitHub users, or to members of specified GitHub organizations or teams.
- datasette-cors allows you to configure CORS headers for your Datasette instance. You can use this to enable JavaScript running on a whitelisted set of domains to make
fetch()calls to the JSON API provided by your Datasette instance.
New plugin hook: extra_template_vars
The extra_template_vars(template, database, table, columns, view_name, request, datasette) plugin hook allows plugins to inject their own additional variables into the Datasette template context. This can be used in conjunction with custom templates to customize the Datasette interface. datasette-auth-github uses this hook to add custom HTML to the new top navigation bar (which is designed to be modified by plugins, see #540).
Secret plugin configuration options
Plugins like datasette-auth-github need a safe way to set secret configuration options. Since the default mechanism for configuring plugins exposes those settings in /-/metadata a new mechanism was needed. Secret configuration values describes how plugins can now specify that their settings should be read from a file or an environment variable:
{
"plugins": {
"datasette-auth-github": {
"client_secret": {
"$env": "GITHUB_CLIENT_SECRET"
}
}
}
}
These plugin secrets can be set directly using datasette publish. See Custom metadata and plugins for details. (#538 and #543)
Facet by date
If a column contains datetime values, Datasette can now facet that column by date. (#481)
Easier custom templates for table rows
If you want to customize the display of individual table rows, you can do so using a _table.html template include that looks something like this:
{% for row in display_rows %}
<div>
<h2>{{ row["title"] }}</h2>
<p>{{ row["description"] }}<lp>
<p>Category: {{ row.display("category_id") }}</p>
</div>
{% endfor %}
This is a backwards incompatible change. If you previously had a custom template called _rows_and_columns.html you need to rename it to _table.html.
See Custom templates for full details.
?_through= for joins through many-to-many tables
The new ?_through={json} argument to the Table view allows records to be filtered based on a many-to-many relationship. See Special table arguments for full documentation - here's an example. (#355)
This feature was added to help support facet by many-to-many, which isn't quite ready yet but will be coming in the next Datasette release.
Small changes
- Databases published using
datasette publishnow open in Immutable mode. (#469) ?col__date=now works for columns containing spaces- Automatic label detection (for deciding which column to show when linking to a foreign key) has been improved. (#485)
- Fixed bug where pagination broke when combined with an expanded foreign key. (#489)
- Contributors can now run
pip install -e .[docs]to get all of the dependencies needed to build the documentation, includingcd docs && make livehtmlsupport. - Datasette's dependencies are now all specified using the
~=match operator. (#532) white-space: pre-wrapnow used for table creation SQL. (#505)
Full list of commits between 0.28 and 0.29.
0.28 (2019-05-19)
A salmagundi of new features!
Supporting databases that change
From the beginning of the project, Datasette has been designed with read-only databases in mind. If a database is guaranteed not to change it opens up all kinds of interesting opportunities - from taking advantage of SQLite immutable mode and HTTP caching to bundling static copies of the database directly in a Docker container. The interesting ideas in Datasette explores this idea in detail.
As my goals for the project have developed, I realized that read-only databases are no longer the right default. SQLite actually supports concurrent access very well provided only one thread attempts to write to a database at a time, and I keep encountering sensible use-cases for running Datasette on top of a database that is processing inserts and updates.
So, as-of version 0.28 Datasette no longer assumes that a database file will not change. It is now safe to point Datasette at a SQLite database which is being updated by another process.
Making this change was a lot of work - see tracking tickets #418, #419 and #420. It required new thinking around how Datasette should calculate table counts (an expensive operation against a large, changing database) and also meant reconsidering the "content hash" URLs Datasette has used in the past to optimize the performance of HTTP caches.
Datasette can still run against immutable files and gains numerous performance benefits from doing so, but this is no longer the default behaviour. Take a look at the new Performance and caching documentation section for details on how to make the most of Datasette against data that you know will be staying read-only and immutable.
Faceting improvements, and faceting plugins
Datasette Facets provide an intuitive way to quickly summarize and interact with data. Previously the only supported faceting technique was column faceting, but 0.28 introduces two powerful new capabilities: facet-by-JSON-array and the ability to define further facet types using plugins.
Facet by array (#359) is only available if your SQLite installation provides the json1 extension. Datasette will automatically detect columns that contain JSON arrays of values and offer a faceting interface against those columns - useful for modelling things like tags without needing to break them out into a new table. See Facet by JSON array for more.
The new register_facet_classes() plugin hook (#445) can be used to register additional custom facet classes. Each facet class should provide two methods: suggest() which suggests facet selections that might be appropriate for a provided SQL query, and facet_results() which executes a facet operation and returns results. Datasette's own faceting implementations have been refactored to use the same API as these plugins.
datasette publish cloudrun
Google Cloud Run is a brand new serverless hosting platform from Google, which allows you to build a Docker container which will run only when HTTP traffic is received and will shut down (and hence cost you nothing) the rest of the time. It's similar to Zeit's Now v1 Docker hosting platform which sadly is no longer accepting signups from new users.
The new datasette publish cloudrun command was contributed by Romain Primet (#434) and publishes selected databases to a new Datasette instance running on Google Cloud Run.
See Publishing to Google Cloud Run for full documentation.
register_output_renderer plugins
Russ Garrett implemented a new Datasette plugin hook called register_output_renderer (#441) which allows plugins to create additional output renderers in addition to Datasette's default .json and .csv.
Russ's in-development datasette-geo plugin includes an example of this hook being used to output .geojson automatically converted from SpatiaLite.
Medium changes
- Datasette now conforms to the Black coding style (#449) - and has a unit test to enforce this in the future
- New Special table arguments:
?columnname__in=value1,value2,value3filter for executing SQL IN queries against a table, see Table arguments (#433)?columnname__date=yyyy-mm-ddfilter which returns rows where the spoecified datetime column falls on the specified date (583b22a)?tags__arraycontains=tagfilter which acts against a JSON array contained in a column (78e45ea)?_where=sql-fragmentfilter for the table view (#429)?_fts_table=mytableand?_fts_pk=mycolumnquerystring options can be used to specify which FTS table to use for a search query - see Configuring full-text search for a table or view (#428)
- You can now pass the same table filter multiple times - for example,
?content__not=world&content__not=hellowill return all rows where the content column is neitherhelloorworld(#288) - You can now specify
aboutandabout_urlmetadata (in addition tosourceandlicense) linking to further information about a project - see Source, license and about - New
?_trace=1parameter now adds debug information showing every SQL query that was executed while constructing the page (#435) datasette inspectnow just calculates table counts, and does not introspect other database metadata (#462)- Removed
/-/inspectpage entirely - this will be replaced by something similar in the future, see #465 - Datasette can now run against an in-memory SQLite database. You can do this by starting it without passing any files or by using the new
--memoryoption todatasette serve. This can be useful for experimenting with SQLite queries that do not access any data, such asSELECT 1+1orSELECT sqlite_version().
Small changes
- We now show the size of the database file next to the download link (#172)
- New
/-/databasesintrospection page shows currently connected databases (#470) - Binary data is no longer displayed on the table and row pages (#442 - thanks, Russ Garrett)
- New show/hide SQL links on custom query pages (#415)
- The extra_body_script plugin hook now accepts an optional
view_nameargument (#443 - thanks, Russ Garrett) - Bumped Jinja2 dependency to 2.10.1 (#426)
- All table filters are now documented, and documentation is enforced via unit tests (2c19a27)
- New project guideline: master should stay shippable at all times! (31f36e1)
- Fixed a bug where
sqlite_timelimit()occasionally failed to clean up after itself (bac4e01) - We no longer load additional plugins when executing pytest (#438)
- Homepage now links to database views if there are less than five tables in a database (#373)
- The
--corsoption is now respected by error pages (#453) datasette publish herokunow uses the--include-vcs-ignoreoption, which means it works under Travis CI (#407)datasette publish herokunow publishes using Python 3.6.8 (666c374)- Renamed
datasette publish nowtodatasette publish nowv1(#472) datasette publish nowv1now accepts multiple--aliasparameters (09ef305)- Removed the
datasette skeletoncommand (#476) - The documentation on how to build the documentation now recommends
sphinx-autobuild
0.27.1 (2019-05-09)
- Tiny bugfix release: don't install
tests/in the wrong place. Thanks, Veit Heller.
0.27 (2019-01-31)
- New command:
datasette plugins(documentation) shows you the currently installed list of plugins. - Datasette can now output newline-delimited JSON using the new
?_shape=array&_nl=onquerystring option. - Added documentation on The Datasette Ecosystem.
- Now using Python 3.7.2 as the base for the official Datasette Docker image.
0.26.1 (2019-01-10)
/-/versionsnow includes SQLitecompile_options(#396)- datasetteproject/datasette Docker image now uses SQLite 3.26.0 (#397)
- Cleaned up some deprecation warnings under Python 3.7
0.26 (2019-01-02)
datasette serve --reloadnow restarts Datasette if a database file changes on disk.datasette publish nownow takes an optional--alias mysite.now.shargument. This will attempt to set an alias after the deploy completes.- Fixed a bug where the advanced CSV export form failed to include the currently selected filters (#393)
0.25.2 (2018-12-16)
datasette publish herokunow uses thepython-3.6.7runtime- Added documentation on how to build the documentation
- Added documentation covering our release process
- Upgraded to pytest 4.0.2
0.25.1 (2018-11-04)
Documentation improvements plus a fix for publishing to Zeit Now.
datasette publish nownow uses Zeit's v1 platform, to work around the new 100MB image limit. Thanks, @slygent - closes #366.
0.25 (2018-09-19)
New plugin hooks, improved database view support and an easier way to use more recent versions of SQLite.
- New
publish_subcommandplugin hook. A plugin can now add additionaldatasette publishpublishers in addition to the defaultnowandheroku, both of which have been refactored into default plugins. publish_subcommand documentation. Closes #349 - New
render_cellplugin hook. Plugins can now customize how values are displayed in the HTML tables produced by Datasette's browseable interface. datasette-json-html and datasette-render-images are two new plugins that use this hook. render_cell documentation. Closes #352 - New
extra_body_scriptplugin hook, enabling plugins to provide additional JavaScript that should be added to the page footer. extra_body_script documentation. extra_css_urlsandextra_js_urlshooks now take additional optional parameters, allowing them to be more selective about which pages they apply to. Documentation.- You can now use the sortable_columns metadata setting to explicitly enable sort-by-column in the interface for database views, as well as for specific tables.
- The new
fts_tableandfts_pkmetadata settings can now be used to explicitly configure full-text search for a table or a view, even if that table is not directly coupled to the SQLite FTS feature in the database schema itself. - Datasette will now use pysqlite3 in place of the standard library
sqlite3module if it has been installed in the current environment. This makes it much easier to run Datasette against a more recent version of SQLite, including the just-released SQLite 3.25.0 which adds window function support. More details on how to use this in #360 - New mechanism that allows plugin configuration options to be set using
metadata.json.
0.24 (2018-07-23)
A number of small new features:
datasette publish herokunow supports--extra-options, fixes #334- Custom error message if SpatiaLite is needed for specified database, closes #331
- New config option:
truncate_cells_htmlfor truncating long cell values in HTML view - closes #330 - Documentation for datasette publish and datasette package, closes #337
- Fixed compatibility with Python 3.7
datasette publish herokunow supports app names via the-noption, which can also be used to overwrite an existing application [Russ Garrett]- Title and description metadata can now be set for canned SQL queries, closes #342
- New
force_https_onconfig option, fixeshttps://API URLs when deploying to Zeit Now - closes #333 ?_json_infinity=1querystring argument for handling Infinity/-Infinity values in JSON, closes #332- URLs displayed in the results of custom SQL queries are now URLified, closes #298
0.23.2 (2018-07-07)
Minor bugfix and documentation release.
- CSV export now respects
--cors, fixes #326 - Installation instructions, including docker image - closes #328
- Fix for row pages for tables with / in, closes #325
0.23.1 (2018-06-21)
Minor bugfix release.
- Correctly display empty strings in HTML table, closes #314
- Allow "." in database filenames, closes #302
- 404s ending in slash redirect to remove that slash, closes #309
- Fixed incorrect display of compound primary keys with foreign key references. Closes #319
- Docs + example of canned SQL query using || concatenation. Closes #321
- Correctly display facets with value of 0 - closes #318
- Default 'expand labels' to checked in CSV advanced export
0.23 (2018-06-18)
This release features CSV export, improved options for foreign key expansions, new configuration settings and improved support for SpatiaLite.
See datasette/compare/0.22.1...0.23 for a full list of commits added since the last release.
CSV export
Any Datasette table, view or custom SQL query can now be exported as CSV.
Check out the CSV export documentation for more details, or try the feature out on https://fivethirtyeight.datasettes.com/fivethirtyeight/bechdel%2Fmovies
If your table has more than max_returned_rows (default 1,000) Datasette provides the option to stream all rows. This option takes advantage of async Python and Datasette's efficient pagination to iterate through the entire matching result set and stream it back as a downloadable CSV file.
Foreign key expansions
When Datasette detects a foreign key reference it attempts to resolve a label for that reference (automatically or using the Specifying the label column for a table metadata option) so it can display a link to the associated row.
This expansion is now also available for JSON and CSV representations of the
table, using the new _labels=on querystring option. See
Expanding foreign key references for more details.
New configuration settings
Datasette's Configuration now also supports boolean settings. A number of new configuration options have been added:
num_sql_threads- the number of threads used to execute SQLite queries. Defaults to 3.allow_facet- enable or disable custom Facets using the _facet= parameter. Defaults to on.suggest_facets- should Datasette suggest facets? Defaults to on.allow_download- should users be allowed to download the entire SQLite database? Defaults to on.allow_sql- should users be allowed to execute custom SQL queries? Defaults to on.default_cache_ttl- Default HTTP caching max-age header in seconds. Defaults to 365 days - caching can be disabled entirely by settings this to 0.cache_size_kb- Set the amount of memory SQLite uses for its per-connection cache, in KB.allow_csv_stream- allow users to stream entire result sets as a single CSV file. Defaults to on.max_csv_mb- maximum size of a returned CSV file in MB. Defaults to 100MB, set to 0 to disable this limit.
Control HTTP caching with ?_ttl=
You can now customize the HTTP max-age header that is sent on a per-URL basis, using the new ?_ttl= querystring parameter.
You can set this to any value in seconds, or you can set it to 0 to disable HTTP caching entirely.
Consider for example this query which returns a randomly selected member of the Avengers:
select * from [avengers/avengers] order by random() limit 1
If you hit the following page repeatedly you will get the same result, due to HTTP caching:
/fivethirtyeight?sql=select+*+from+%5Bavengers%2Favengers%5D+order+by+random%28%29+limit+1
By adding ?_ttl=0 to the zero you can ensure the page will not be cached and get back a different super hero every time:
/fivethirtyeight?sql=select+*+from+%5Bavengers%2Favengers%5D+order+by+random%28%29+limit+1&_ttl=0
Improved support for SpatiaLite
The SpatiaLite module for SQLite adds robust geospatial features to the database.
Getting SpatiaLite working can be tricky, especially if you want to use the most recent alpha version (with support for K-nearest neighbor).
Datasette now includes extensive documentation on SpatiaLite, and thanks to Ravi Kotecha our GitHub repo includes a Dockerfile that can build the latest SpatiaLite and configure it for use with Datasette.
The datasette publish and datasette package commands now accept a new
--spatialite argument which causes them to install and configure SpatiaLite
as part of the container they deploy.
latest.datasette.io
Every commit to Datasette master is now automatically deployed by Travis CI to https://latest.datasette.io/ - ensuring there is always a live demo of the latest version of the software.
The demo uses the fixtures from our unit tests, ensuring it demonstrates the same range of functionality that is covered by the tests.
You can see how the deployment mechanism works in our .travis.yml file.
0.22.1 (2018-05-23)
Bugfix release, plus we now use versioneer for our version numbers.
Faceting no longer breaks pagination, fixes #282
Add
__version_info__derived from __version__ [Robert Gieseke]This might be tuple of more than two values (major and minor version) if commits have been made after a release.
Add version number support with Versioneer. [Robert Gieseke]
Versioneer Licence: Public Domain (CC0-1.0)
Closes #273
Refactor inspect logic [Russ Garrett]
0.22 (2018-05-20)
The big new feature in this release is Facets. Datasette can now apply faceted browse to any column in any table. It will also suggest possible facets. See the Datasette Facets announcement post for more details.
In addition to the work on facets:
New
--configoption, added--help-config, closes #274Removed the
--page_size=argument todatasette servein favour of:datasette serve --config default_page_size:50 mydb.db
Added new help section:
$ datasette --help-config Config options: default_page_size Default page size for the table view (default=100) max_returned_rows Maximum rows that can be returned from a table or custom query (default=1000) sql_time_limit_ms Time limit for a SQL query in milliseconds (default=1000) default_facet_size Number of values to return for requested facets (default=30) facet_time_limit_ms Time limit for calculating a requested facet (default=200) facet_suggest_time_limit_ms Time limit for calculating a suggested facet (default=50)Only apply responsive table styles to
.rows-and-columnOtherwise they interfere with tables in the description, e.g. on https://fivethirtyeight.datasettes.com/fivethirtyeight/nba-elo%2Fnbaallelo
Refactored views into new
views/modules, refs #256Documentation for SQLite full-text search support, closes #253
/-/versionsnow includes SQLitefts_versions, closes #252
0.21 (2018-05-05)
New JSON _shape= options, the ability to set table _size= and a mechanism for searching within specific columns.
Default tests to using a longer timelimit
Every now and then a test will fail in Travis CI on Python 3.5 because it hit the default 20ms SQL time limit.
Test fixtures now default to a 200ms time limit, and we only use the 20ms time limit for the specific test that tests query interruption. This should make our tests on Python 3.5 in Travis much more stable.
Support
_search_COLUMN=textsearches, closes #237Show version on
/-/pluginspage, closes #248?_size=maxoption, closes #249Added
/-/versionsand/-/versions.json, closes #244Sample output:
{ "python": { "version": "3.6.3", "full": "3.6.3 (default, Oct 4 2017, 06:09:38) \n[GCC 4.2.1 Compatible Apple LLVM 9.0.0 (clang-900.0.37)]" }, "datasette": { "version": "0.20" }, "sqlite": { "version": "3.23.1", "extensions": { "json1": null, "spatialite": "4.3.0a" } } }
Renamed
?_sql_time_limit_ms=to?_timelimit, closes #242New
?_shape=arrayoption + tweaks to_shape, closes #245- Default is now
?_shape=arrays(renamed fromlists) - New
?_shape=arrayreturns an array of objects as the root object - Changed
?_shape=objectto return the object as the root - Updated docs
- Default is now
FTS tables now detected by
inspect(), closes #240New
?_size=XXXquerystring parameter for table view, closes #229Also added documentation for all of the
_specialarguments.Plus deleted some duplicate logic implementing
_group_count.If
max_returned_rows==page_size, incrementmax_returned_rows- fixes #230New
hidden: Trueoption for table metadata, closes #239Hide
idx_*tables if spatialite detected, closes #228Added
class=rows-and-columnsto custom query results tableAdded CSS class
rows-and-columnsto main tablelabel_columnoption inmetadata.json- closes #234
0.20 (2018-04-20)
Mostly new work on the Plugins mechanism: plugins can now bundle static assets and custom templates, and datasette publish has a new --install=name-of-plugin option.
Add col-X classes to HTML table on custom query page
Fixed out-dated template in documentation
Plugins can now bundle custom templates, #224
Added /-/metadata /-/plugins /-/inspect, #225
Documentation for --install option, refs #223
Datasette publish/package --install option, #223
Fix for plugins in Python 3.5, #222
New plugin hooks: extra_css_urls() and extra_js_urls(), #214
/-/static-plugins/PLUGIN_NAME/ now serves static/ from plugins
<th> now gets class="col-X" - plus added col-X documentation
Use to_css_class for table cell column classes
This ensures that columns with spaces in the name will still generate usable CSS class names. Refs #209
Add column name classes to <td>s, make PK bold [Russ Garrett]
Don't duplicate simple primary keys in the link column [Russ Garrett]
When there's a simple (single-column) primary key, it looks weird to duplicate it in the link column.
This change removes the second PK column and treats the link column as if it were the PK column from a header/sorting perspective.
Correct escaping for HTML display of row links [Russ Garrett]
Longer time limit for test_paginate_compound_keys
It was failing intermittently in Travis - see #209
Use application/octet-stream for downloadable databases
Updated PyPI classifiers
Updated PyPI link to pypi.org
0.19 (2018-04-16)
This is the first preview of the new Datasette plugins mechanism. Only two plugin hooks are available so far - for custom SQL functions and custom template filters. There's plenty more to come - read the documentation and get involved in the tracking ticket if you have feedback on the direction so far.
Fix for
_sort_desc=sortable_with_nullstest, refs #216Fixed #216 - paginate correctly when sorting by nullable column
Initial documentation for plugins, closes #213
New
--plugins-dir=plugins/option (#212)New option causing Datasette to load and evaluate all of the Python files in the specified directory and register any plugins that are defined in those files.
This new option is available for the following commands:
datasette serve mydb.db --plugins-dir=plugins/ datasette publish now/heroku mydb.db --plugins-dir=plugins/ datasette package mydb.db --plugins-dir=plugins/
Start of the plugin system, based on pluggy (#210)
Uses https://pluggy.readthedocs.io/ originally created for the py.test project
We're starting with two plugin hooks:
prepare_connection(conn)This is called when a new SQLite connection is created. It can be used to register custom SQL functions.
prepare_jinja2_environment(env)This is called with the Jinja2 environment. It can be used to register custom template tags and filters.
An example plugin which uses these two hooks can be found at https://github.com/simonw/datasette-plugin-demos or installed using
pip install datasette-plugin-demosRefs #14
Return HTTP 405 on InvalidUsage rather than 500. [Russ Garrett]
This also stops it filling up the logs. This happens for HEAD requests at the moment - which perhaps should be handled better, but that's a different issue.
0.18 (2018-04-14)
This release introduces support for units,
contributed by Russ Garrett (#203).
You can now optionally specify the units for specific columns using metadata.json.
Once specified, units will be displayed in the HTML view of your table. They also become
available for use in filters - if a column is configured with a unit of distance, you can
request all rows where that column is less than 50 meters or more than 20 feet for example.
Link foreign keys which don't have labels. [Russ Garrett]
This renders unlabeled FKs as simple links.
Also includes bonus fixes for two minor issues:
- In foreign key link hrefs the primary key was escaped using HTML escaping rather than URL escaping. This broke some non-integer PKs.
- Print tracebacks to console when handling 500 errors.
Fix SQLite error when loading rows with no incoming FKs. [Russ Garrett]
This fixes an error caused by an invalid query when loading incoming FKs.
The error was ignored due to async but it still got printed to the console.
Allow custom units to be registered with Pint. [Russ Garrett]
Support units in filters. [Russ Garrett]
Tidy up units support. [Russ Garrett]
- Add units to exported JSON
- Units key in metadata skeleton
- Docs
Initial units support. [Russ Garrett]
Add support for specifying units for a column in
metadata.jsonand rendering them on display using pint
0.17 (2018-04-13)
- Release 0.17 to fix issues with PyPI
0.16 (2018-04-13)
Better mechanism for handling errors; 404s for missing table/database
New error mechanism closes #193
404s for missing tables/databases closes #184
long_description in markdown for the new PyPI
Hide SpatiaLite system tables. [Russ Garrett]
Allow
explain select/explain query plan select#201Datasette inspect now finds primary_keys #195
Ability to sort using form fields (for mobile portrait mode) #199
We now display sort options as a select box plus a descending checkbox, which means you can apply sort orders even in portrait mode on a mobile phone where the column headers are hidden.
0.15 (2018-04-09)
The biggest new feature in this release is the ability to sort by column. On the
table page the column headers can now be clicked to apply sort (or descending
sort), or you can specify ?_sort=column or ?_sort_desc=column directly
in the URL.
table_rows=>table_rows_count,filtered_table_rows=>filtered_table_rows_countRenamed properties. Closes #194
New
sortable_columnsoption inmetadata.jsonto control sort options.You can now explicitly set which columns in a table can be used for sorting using the
_sortand_sort_descarguments usingmetadata.json:{ "databases": { "database1": { "tables": { "example_table": { "sortable_columns": [ "height", "weight" ] } } } } }
Refs #189
Column headers now link to sort/desc sort - refs #189
_sortand_sort_descparameters for table viewsAllows for paginated sorted results based on a specified column.
Refs #189
Total row count now correct even if
_nextappliedUse .custom_sql() for _group_count implementation (refs #150)
Make HTML title more readable in query template (#180) [Ryan Pitts]
New
?_shape=objects/object/listsparam for JSON API (#192)New
_shape=parameter replacing old.jsonoextensionNow instead of this:
/database/table.jsono
We use the
_shapeparameter like this:/database/table.json?_shape=objects
Also introduced a new
_shapecalledobjectwhich looks like this:/database/table.json?_shape=object
Returning an object for the rows key:
... "rows": { "pk1": { ... }, "pk2": { ... } }
Refs #122
Utility for writing test database fixtures to a .db file
python tests/fixtures.py /tmp/hello.dbThis is useful for making a SQLite database of the test fixtures for interactive exploration.
Compound primary key
_next=now plays well with extra filtersCloses #190
Fixed bug with keyset pagination over compound primary keys
Refs #190
Database/Table views inherit
source/license/source_url/license_urlmetadataIf you set the
source_url/license_url/source/licensefields in your root metadata those values will now be inherited all the way down to the database and table templates.The
title/descriptionare NOT inherited.Also added unit tests for the HTML generated by the metadata.
Refs #185
Add metadata, if it exists, to heroku temp dir (#178) [Tony Hirst]
Initial documentation for pagination
Broke up test_app into test_api and test_html
Fixed bug with .json path regular expression
I had a table called
geojsonand it caused an exception because the regex was matching.jsonand not\.jsonDeploy to Heroku with Python 3.6.3
0.14 (2017-12-09)
The theme of this release is customization: Datasette now allows every aspect of its presentation to be customized either using additional CSS or by providing entirely new templates.
Datasette's metadata.json format
has also been expanded, to allow per-database and per-table metadata. A new
datasette skeleton command can be used to generate a skeleton JSON file
ready to be filled in with per-database and per-table details.
The metadata.json file can also be used to define
canned queries,
as a more powerful alternative to SQL views.
extra_css_urls/extra_js_urlsin metadataA mechanism in the
metadata.jsonformat for adding custom CSS and JS urls.Create a
metadata.jsonfile that looks like this:{ "extra_css_urls": [ "https://simonwillison.net/static/css/all.bf8cd891642c.css" ], "extra_js_urls": [ "https://code.jquery.com/jquery-3.2.1.slim.min.js" ] }
Then start datasette like this:
datasette mydb.db --metadata=metadata.json
The CSS and JavaScript files will be linked in the
<head>of every page.You can also specify a SRI (subresource integrity hash) for these assets:
{ "extra_css_urls": [ { "url": "https://simonwillison.net/static/css/all.bf8cd891642c.css", "sri": "sha384-9qIZekWUyjCyDIf2YK1FRoKiPJq4PHt6tp/ulnuuyRBvazd0hG7pWbE99zvwSznI" } ], "extra_js_urls": [ { "url": "https://code.jquery.com/jquery-3.2.1.slim.min.js", "sri": "sha256-k2WSCIexGzOj3Euiig+TlR8gA0EmPjuc79OEeY5L45g=" } ] }
Modern browsers will only execute the stylesheet or JavaScript if the SRI hash matches the content served. You can generate hashes using https://www.srihash.org/
Auto-link column values that look like URLs (#153)
CSS styling hooks as classes on the body (#153)
Every template now gets CSS classes in the body designed to support custom styling.
The index template (the top level page at
/) gets this:<body class="index">
The database template (
/dbname/) gets this:<body class="db db-dbname">
The table template (
/dbname/tablename) gets:<body class="table db-dbname table-tablename">
The row template (
/dbname/tablename/rowid) gets:<body class="row db-dbname table-tablename">
The
db-xandtable-xclasses use the database or table names themselves IF they are valid CSS identifiers. If they aren't, we strip any invalid characters out and append a 6 character md5 digest of the original name, in order to ensure that multiple tables which resolve to the same stripped character version still have different CSS classes.Some examples (extracted from the unit tests):
"simple" => "simple" "MixedCase" => "MixedCase" "-no-leading-hyphens" => "no-leading-hyphens-65bea6" "_no-leading-underscores" => "no-leading-underscores-b921bc" "no spaces" => "no-spaces-7088d7" "-" => "336d5e" "no $ characters" => "no--characters-59e024"
datasette --template-dir=mytemplates/argumentYou can now pass an additional argument specifying a directory to look for custom templates in.
Datasette will fall back on the default templates if a template is not found in that directory.
Ability to over-ride templates for individual tables/databases.
It is now possible to over-ride templates on a per-database / per-row or per- table basis.
When you access e.g.
/mydatabase/mytableDatasette will look for the following:- table-mydatabase-mytable.html - table.html
If you provided a
--template-dirargument to datasette serve it will look in that directory first.The lookup rules are as follows:
Index page (/): index.html Database page (/mydatabase): database-mydatabase.html database.html Table page (/mydatabase/mytable): table-mydatabase-mytable.html table.html Row page (/mydatabase/mytable/id): row-mydatabase-mytable.html row.html
If a table name has spaces or other unexpected characters in it, the template filename will follow the same rules as our custom
<body>CSS classes - for example, a table called "Food Trucks" will attempt to load the following templates:table-mydatabase-Food-Trucks-399138.html table.html
It is possible to extend the default templates using Jinja template inheritance. If you want to customize EVERY row template with some additional content you can do so by creating a row.html template like this:
{% extends "default:row.html" %} {% block content %} <h1>EXTRA HTML AT THE TOP OF THE CONTENT BLOCK</h1> <p>This line renders the original block:</p> {{ super() }} {% endblock %}
--staticoption for datasette serve (#160)You can now tell Datasette to serve static files from a specific location at a specific mountpoint.
For example:
datasette serve mydb.db --static extra-css:/tmp/static/css
Now if you visit this URL:
http://localhost:8001/extra-css/blah.css
The following file will be served:
/tmp/static/css/blah.css
Canned query support.
Named canned queries can now be defined in
metadata.jsonlike this:{ "databases": { "timezones": { "queries": { "timezone_for_point": "select tzid from timezones ..." } } } }
These will be shown in a new "Queries" section beneath "Views" on the database page.
New
datasette skeletoncommand for generatingmetadata.json(#164)metadata.jsonsupport for per-table/per-database metadata (#165)Also added support for descriptions and HTML descriptions.
Here's an example metadata.json file illustrating custom per-database and per- table metadata:
{ "title": "Overall datasette title", "description_html": "This is a <em>description with HTML</em>.", "databases": { "db1": { "title": "First database", "description": "This is a string description & has no HTML", "license_url": "http://example.com/", "license": "The example license", "queries": { "canned_query": "select * from table1 limit 3;" }, "tables": { "table1": { "title": "Custom title for table1", "description": "Tables can have descriptions too", "source": "This has a custom source", "source_url": "http://example.com/" } } } } }
Renamed
datasette buildcommand todatasette inspect(#130)Upgrade to Sanic 0.7.0 (#168)
Package and publish commands now accept
--staticand--template-dirExample usage:
datasette package --static css:extra-css/ --static js:extra-js/ \ sf-trees.db --template-dir templates/ --tag sf-trees --branch master
This creates a local Docker image that includes copies of the templates/, extra-css/ and extra-js/ directories. You can then run it like this:
docker run -p 8001:8001 sf-trees
For publishing to Zeit now:
datasette publish now --static css:extra-css/ --static js:extra-js/ \ sf-trees.db --template-dir templates/ --name sf-trees --branch master
HTML comment showing which templates were considered for a page (#171)
0.13 (2017-11-24)
Search now applies to current filters.
Combined search into the same form as filters.
Closes #133
Much tidier design for table view header.
Closes #147
Added
?column__not=blahfilter.Closes #148
Row page now resolves foreign keys.
Closes #132
Further tweaks to select/input filter styling.
Refs #86 - thanks for the help, @natbat!
Show linked foreign key in table cells.
Added UI for editing table filters.
Refs #86
Hide FTS-created tables on index pages.
Closes #129
Add publish to heroku support [Jacob Kaplan-Moss]
datasette publish heroku mydb.dbPull request #104
Initial implementation of
?_group_count=column.URL shortcut for counting rows grouped by one or more columns.
?_group_count=column1&_group_count=column2works as well.SQL generated looks like this:
select "qSpecies", count(*) as "count" from Street_Tree_List group by "qSpecies" order by "count" desc limit 100
Or for two columns like this:
select "qSpecies", "qSiteInfo", count(*) as "count" from Street_Tree_List group by "qSpecies", "qSiteInfo" order by "count" desc limit 100
Refs #44
Added
--build=masteroption to datasette publish and package.The
datasette publishanddatasette packagecommands both now accept an optional--buildargument. If provided, this can be used to specify a branch published to GitHub that should be built into the container.This makes it easier to test code that has not yet been officially released to PyPI, e.g.:
datasette publish now mydb.db --branch=master
Implemented
?_search=XXX+ UI if a FTS table is detected.Closes #131
Added
datasette --versionsupport.Table views now show expanded foreign key references, if possible.
If a table has foreign key columns, and those foreign key tables have
label_columns, the TableView will now query those other tables for the corresponding values and display those values as links in the corresponding table cells.label_columns are currently detected by the
inspect()function, which looks for any table that has just two columns - an ID column and one other - and sets thelabel_columnto be that second non-ID column.Don't prevent tabbing to "Run SQL" button (#117) [Robert Gieseke]
See comment in #115
Add keyboard shortcut to execute SQL query (#115) [Robert Gieseke]
Allow
--load-extensionto be set via environment variable.Add support for
?field__isnull=1(#107) [Ray N]Add spatialite, switch to debian and local build (#114) [Ariel Núñez]
Added
--load-extensionargument to datasette serve.Allows loading of SQLite extensions. Refs #110.
0.12 (2017-11-16)
Added
__version__, now displayed as tooltip in page footer (#108).Added initial docs, including a changelog (#99).
Turned on auto-escaping in Jinja.
Added a UI for editing named parameters (#96).
You can now construct a custom SQL statement using SQLite named parameters (e.g.
:name) and datasette will display form fields for editing those parameters. Here’s an example which lets you see the most popular names for dogs of different species registered through various dog registration schemes in Australia.
Pin to specific Jinja version. (#100).
Default to 127.0.0.1 not 0.0.0.0. (#98).
Added extra metadata options to publish and package commands. (#92).
You can now run these commands like so:
datasette now publish mydb.db \ --title="My Title" \ --source="Source" \ --source_url="http://www.example.com/" \ --license="CC0" \ --license_url="https://creativecommons.org/publicdomain/zero/1.0/"
This will write those values into the metadata.json that is packaged with the app. If you also pass
--metadata=metadata.jsonthat file will be updated with the extra values before being written into the Docker image.Added simple production-ready Dockerfile (#94) [Andrew Cutler]
New
?_sql_time_limit_ms=10argument to database and table page (#95)SQL syntax highlighting with Codemirror (#89) [Tom Dyson]
0.11 (2017-11-14)
Added
datasette publish now --forceoption.This calls
nowwith--force- useful as it means you get a fresh copy of datasette even if Now has already cached that docker layer.Enable
--corsby default when running in a container.
0.10 (2017-11-14)
Fixed #83 - 500 error on individual row pages.
Stop using sqlite WITH RECURSIVE in our tests.
The version of Python 3 running in Travis CI doesn't support this.
0.9 (2017-11-13)
Added
--sql_time_limit_msand--extra-options.The serve command now accepts
--sql_time_limit_msfor customizing the SQL time limit.The publish and package commands now accept
--extra-optionswhich can be used to specify additional options to be passed to the datasite serve command when it executes inside the resulting Docker containers.
0.8 (2017-11-13)
V0.8 - added PyPI metadata, ready to ship.
Implemented offset/limit pagination for views (#70).
Improved pagination. (#78)
Limit on max rows returned, controlled by
--max_returned_rowsoption. (#69)If someone executes 'select * from table' against a table with a million rows in it, we could run into problems: just serializing that much data as JSON is likely to lock up the server.
Solution: we now have a hard limit on the maximum number of rows that can be returned by a query. If that limit is exceeded, the server will return a
"truncated": truefield in the JSON.This limit can be optionally controlled by the new
--max_returned_rowsoption. Setting that option to 0 disables the limit entirely.